Are you tired of searching for things in cluttered drawers and messy shelves? Imagine turning that chaos into calm with personalized vinyl labels you create yourself.
Making vinyl labels with your Cricut is easier than you think, and it’s a fun way to bring order to your home. In this guide, you’ll discover simple steps to design and cut perfect labels that fit your style and needs.
Ready to transform your space and save time every day? Let’s dive in and make your home beautifully organized!
Choosing Vinyl For Labels
Choosing the right vinyl is key for making labels that last and look great. The vinyl you pick affects how well your labels stick and how they appear. Different types of vinyl suit different needs and projects. Understanding the options helps you create perfect labels for your home organization.
Types Of Vinyl Materials
There are mainly two types of vinyl: adhesive and heat transfer. Adhesive vinyl sticks to surfaces like glass, plastic, and wood. It is perfect for labels. Heat transfer vinyl works on fabric but is not ideal for most home labels. Choose adhesive vinyl for easy application and strong hold.
Matte Vs Glossy Finish
Vinyl comes in matte and glossy finishes. Matte vinyl has a flat look and reduces glare. It works well on shelves and containers. Glossy vinyl shines and catches the eye. It suits decorative labels or jars you want to stand out. Pick the finish based on your style and label placement.
Permanent Or Removable Vinyl
Permanent vinyl sticks firmly and lasts a long time. It is great for labels that stay in one place. Removable vinyl peels off easily without damage. Use removable vinyl for temporary labels or renters. Think about how long you need the label before choosing.
Preparing Your Cricut Machine
Preparing your Cricut machine is the first step to making vinyl labels. It helps ensure clean cuts and smooth crafting. This stage sets the base for your labeling project. Follow simple steps to get your machine ready for use.
Setting Up The Machine
Place your Cricut machine on a flat surface. Connect it to your computer or mobile device via USB or Bluetooth. Power on the machine using the button on the front. Open the Cricut Design Space app to start your project. Make sure the machine firmware is updated for best performance.
Installing The Cutting Mat
Select the correct cutting mat for vinyl. The light grip mat works well for vinyl sheets. Remove the protective film from the mat before use. Place the vinyl sheet shiny side down on the mat. Smooth out any bubbles or wrinkles for accurate cutting. Load the mat into the machine by pressing the load button.
Selecting The Right Blade
Use the fine-point blade for vinyl cutting. This blade gives precise and clean edges. Insert the blade into the machine’s blade housing. Ensure it locks securely in place. Check the blade condition to avoid tearing the vinyl. Replace the blade if it looks dull or damaged.
Designing Labels On Cricut
Designing labels on Cricut is a fun and simple way to organize your home. You can create custom labels that fit your style and needs. The Cricut Design Space makes the process easy, even for beginners.
Using Cricut Design Space
Cricut Design Space is the software you use to create your labels. It has many tools to help you design. Start by opening a new project and choosing the label size. You can add text, shapes, and images to your design. Use the layers panel to organize your elements. Preview your design before cutting to see how it will look.
Choosing Fonts And Icons
Pick clear fonts that are easy to read. Simple fonts work best for small labels. You can use bold or regular styles to make important words stand out. Add icons to show what the label means, like a leaf for plants or a book for shelves. Cricut Design Space offers many free icons to choose from. Keep the design clean and simple.
Sizing And Layout Tips
Measure the space where you will put your label. Make sure your design fits well. Avoid making text too small or too large. Keep enough space between letters and icons for clarity. Align your text and images to create balance. Use grids and guides in Design Space to help with placement. A neat layout makes your labels look professional and easy to read.
Cutting Vinyl Labels
Cutting vinyl labels with your Cricut is a key step to organize your home. This process shapes your designs precisely on vinyl sheets. It ensures clean edges and perfect sizes for your labels. Follow simple steps to get the best results every time.
Loading Vinyl Correctly
Place your vinyl sheet shiny side down on the cutting mat. Align it with the top left corner for accurate cutting. Smooth out any bubbles or wrinkles. Load the mat into the Cricut machine until it grips firmly. This step keeps your vinyl steady during cutting.
Adjusting Cut Settings
Choose the right material setting on your Cricut app. Select “Vinyl” or the closest option. Adjust pressure and blade type if needed. These settings control how deep the blade cuts. Proper settings prevent tearing or incomplete cuts.
Starting The Cut
Press the “Go” button on your Cricut machine. Watch as the blade moves carefully along your design. Avoid moving the mat or machine during cutting. Wait until the machine finishes before unloading. This keeps your labels perfect and ready to use.
Weeding And Transferring Labels
Weeding and transferring labels are key steps in making vinyl labels with Cricut. This process removes unwanted vinyl parts and moves your design to the desired surface. Careful handling ensures clean, sharp labels that stick well.
Removing Excess Vinyl
Start by peeling away the vinyl pieces around your design. Use a weeding tool or a pin to lift small parts. Take your time to avoid tearing the label. Remove tiny pieces inside letters or shapes carefully. Keep your workspace clean to spot all excess vinyl.
Applying Transfer Tape
Cut a piece of transfer tape slightly larger than your design. Peel the backing off and place the sticky side on top of the vinyl. Press down gently with a scraper or credit card. This step helps the label stay in place during transfer. Smooth out any air bubbles for better adhesion.
Positioning Labels Accurately
Lift the transfer tape with the vinyl attached. Align it over the surface you want to label. Use a ruler or guide to keep the label straight. Press down firmly, starting from the center outwards. Slowly peel off the transfer tape, leaving the vinyl stuck to the surface.
Labeling Tips For Home Organization
Labeling helps keep your home neat and easy to navigate. It saves time and reduces stress by making items simple to find. Using vinyl labels with a Cricut machine is a smart way to personalize and organize your space. Clear, readable labels give every item a place and purpose. Below are some practical tips for labeling different areas in your home.
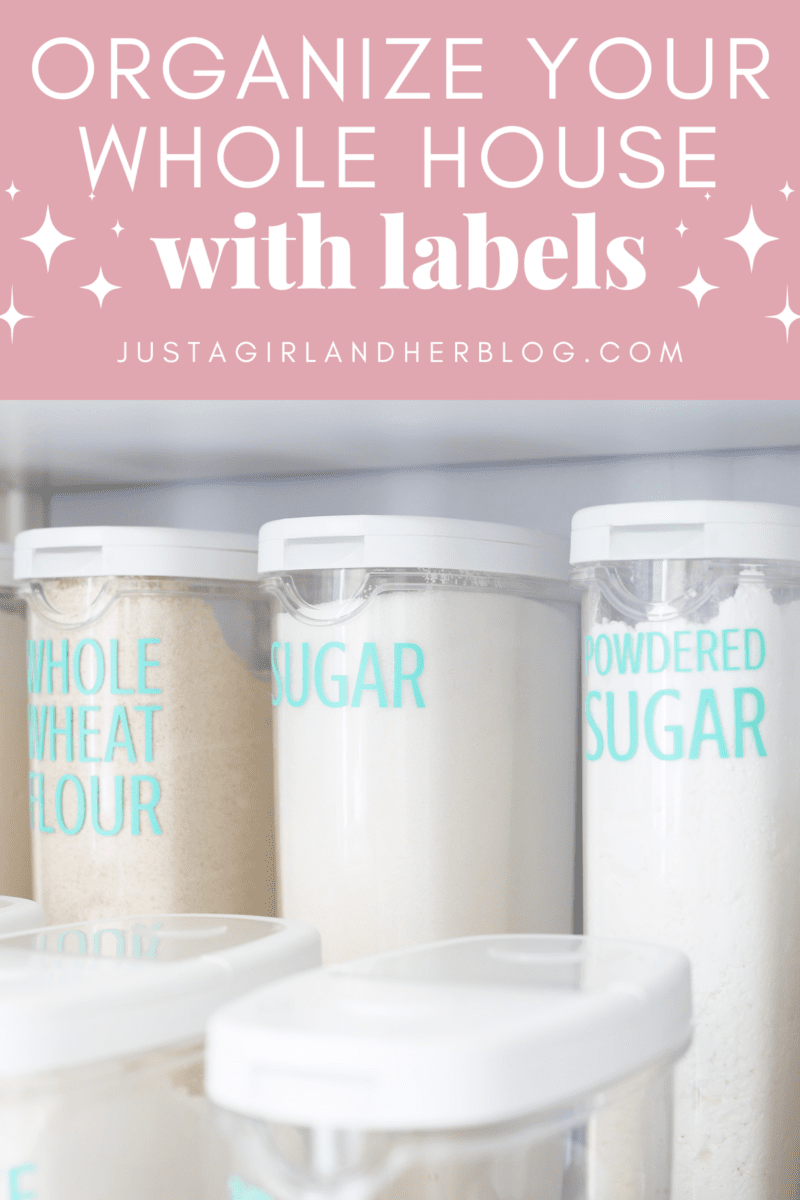
Labeling Kitchen Containers
Use vinyl labels to mark jars, tins, and containers. Choose clear, waterproof vinyl to protect labels from spills and steam. Write or cut labels with simple names like “Sugar,” “Flour,” or “Rice.” Place labels at eye level for easy reading. Match label colors to kitchen decor for a tidy look.
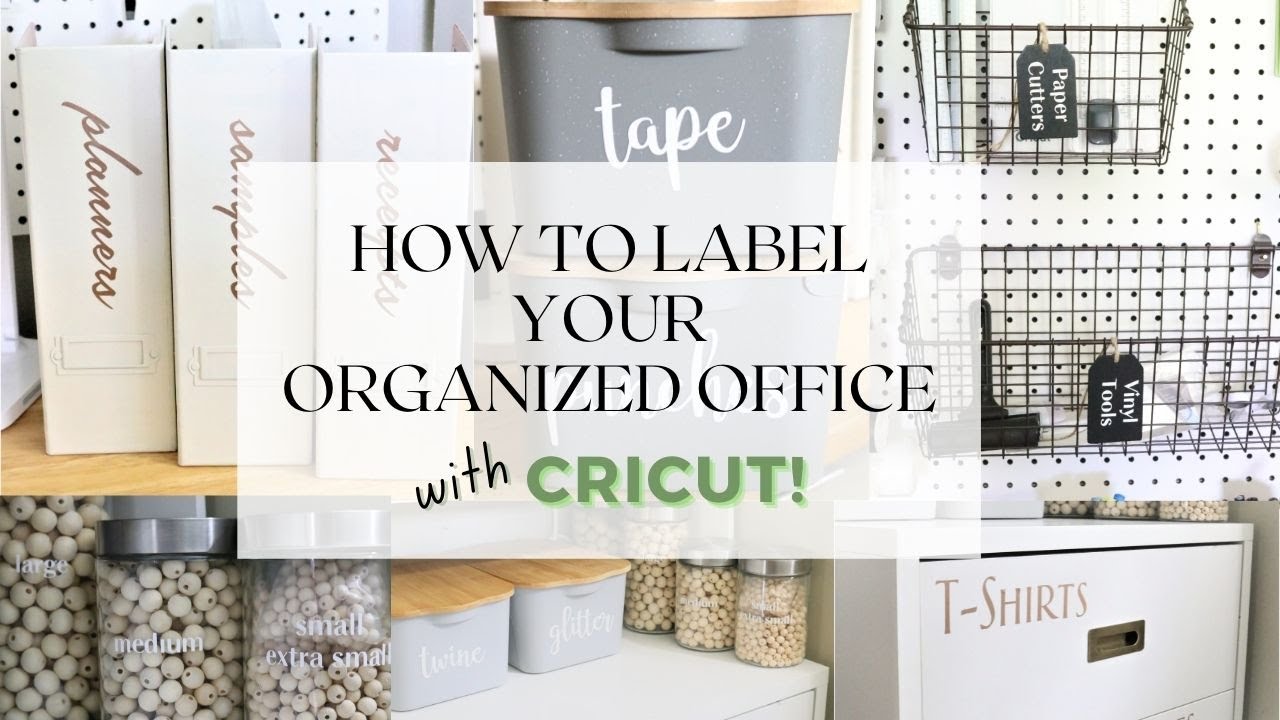
Organizing Office Supplies
Label drawers, boxes, and bins for pens, papers, and tools. Use small vinyl stickers to fit tight spaces. Group similar items with color-coded labels. Keep important files labeled clearly to avoid confusion. Change labels easily by using removable vinyl sheets.
Decluttering Storage Spaces
Label bins, shelves, and boxes in closets and garages. Use large, bold fonts for quick identification. Label by category, like “Holiday Decor,” “Tools,” or “Toys.” Keep labels consistent in style and size for a neat appearance. This helps keep clutter under control and storage efficient.
Maintaining Vinyl Labels
Maintaining vinyl labels keeps your home organized and neat. Proper care helps labels last longer. It also ensures they stay clear and easy to read. Follow simple steps to protect and clean your labels regularly.
Cleaning Labeled Surfaces
Use a soft cloth to clean vinyl labels gently. Avoid harsh chemicals that can damage the label surface. Mild soap and water work best for dirt and dust. Wipe carefully to keep labels from peeling off. Dry the labels fully after cleaning to prevent moisture damage.
Replacing Worn Labels
Check your labels often for signs of wear or fading. Replace labels that are torn or hard to read. Remove old labels slowly to avoid residue on surfaces. Use rubbing alcohol to clean leftover glue before applying new labels. Fresh labels keep your home looking tidy and organized.
Protecting Labels From Damage
Keep vinyl labels away from direct sunlight to prevent fading. Avoid placing labels on rough or dirty surfaces. Use clear laminate or sealant for extra protection on frequently touched labels. Handle labeled items with care to reduce scratches and peeling. These steps help your labels stay in great shape longer.

Frequently Asked Questions
What Materials Are Needed For Cricut Vinyl Labels?
You need vinyl sheets, a Cricut machine, transfer tape, weeding tools, and scissors. These materials help create and apply durable, customized labels for home organization.
How Do I Design Vinyl Labels With Cricut?
Use Cricut Design Space to create your label designs. Customize fonts, sizes, and shapes. Once ready, send the design to cut on vinyl sheets for precise labels.
Can I Use Permanent Vinyl For Home Labels?
Yes, permanent vinyl is ideal for home labels. It sticks well to surfaces and resists water, fading, and peeling, ensuring long-lasting organization.
How To Apply Vinyl Labels Smoothly On Surfaces?
Clean the surface, position the label with transfer tape, then press firmly. Slowly peel the transfer tape to leave the vinyl adhered perfectly without bubbles.
Conclusion
Creating vinyl labels with your Cricut is simple and fun. These labels help keep your home neat and tidy. You can customize each label to fit your style. Using easy steps saves time and effort. Organized spaces feel calm and welcoming.
Start small and add more labels as you go. Enjoy the process and see the difference it makes. Your home will look cleaner and more organized every day. Give it a try and enjoy the neatness you create.