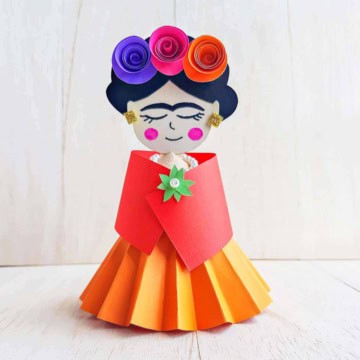
Are you looking for a fun and creative way to spend your time? Making a paper doll can be the perfect art and craft project for you.
It’s simple, enjoyable, and lets you bring your own characters to life step by step. Whether you’re a beginner or someone who loves crafting, this guide will help you create your very own paper doll model with easy instructions. Get ready to discover how satisfying it feels to turn plain paper into a charming doll you can dress and decorate.
Keep reading, and you’ll soon have a beautiful paper doll made by your own hands!

Credit: www.youtube.com
Materials Needed
Types of paperinclude plain white paper, colored paper, and cardstock. Cardstock is thicker and holds shape better for dolls. Use smooth paper for easy drawing and cutting.
Cutting toolsare scissors and craft knives. Scissors work well for big cuts. Craft knives help with small, detailed parts. Always use tools carefully to avoid injuries.
Decorative suppliesare markers, crayons, stickers, and glue. Markers and crayons add colors and details. Stickers can decorate clothes or faces. Glue helps to stick parts together firmly.
Preparing The Template
Start by picking a simple designthat you like. Choose a doll shape with clear lines. This helps when cutting later. You can print a ready-made templatefrom the internet. Make sure your printer uses good ink for clear images.
Drawing your own doll is also fun. Use a pencil and ruler to keep shapes neat. Sketch the outline lightly first. Add details like hair, clothes, or shoes. Keep the drawing simple and boldto make cutting easier.
Use regular paperfor drawing or printing. Thicker paper works better for a strong doll. Avoid very thin sheets that tear easily. Always check your design before cutting.
Cutting The Doll Shape
Use child-safe scissorsfor cutting the paper doll. Hold the paper firmly on a flat surface. Cut slowly and follow the lines carefully. Small, smooth cuts help avoid jagged edges.
For detailed areas like hands or hair, make tiny cuts. Turn the paper, not the scissors, for better control. Keep fingers away from the cutting path to stay safe.
After cutting, check the edges. Use a clean eraser to gently rub any pencil marks left. If edges look rough, trim them lightly with scissors.
Credit: www.theinspirationedit.com
Decorating The Doll
Use bright colorsto make the paper doll stand out. Choose crayons, markers, or colored pencils for smooth coloring. Color inside the lines carefully to keep the doll neat. Light colors work well for skin and face details.
Draw patternslike stripes or dots on clothes to add fun designs. Mix and match colors for a lively look. Use soft strokes for clothes and bold strokes for hair and eyes.
- Cut outclothes and accessories carefully to fit the doll.
- Use glue or tapeto attach clothes securely.
- Make small accessorieslike hats, shoes, or bags from colored paper.
- Layer clothesfor a 3D effect and more fun play.
Assembling Moving Parts
Attach the limbsof the paper doll using bradsor fasteners. These small metal pieces allow the arms and legs to move freely. First, poke a small hole through the limb and the doll’s body at the joint point.
Push the brad through the holes, then spread its ends flat behind the paper. This keeps the limb securebut able to rotate. Check that the limb moves without tearing the paper.
Use fastenersif brads are not available. They work in a similar way but may have a different shape. Make sure the fastener is tight enough to hold the limb but loose enough to allow movement.
Customizing Your Paper Doll
Creating unique outfits for your paper doll is fun and easy. Use colorful paper, scissors, and glue to make different clothes. Try cutting shapes like shirts, pants, and dresses. Mix and match colors to make your doll stand out.
Personalizing features helps make your paper doll special. Draw eyes, hair, and smiles with markers or crayons. Add small details like buttons or hats. These small touches bring your doll to life.
Displaying And Playing
Storage ideashelp keep paper dolls safe and neat. Use small boxes or folders to hold the dolls. Clear plastic sleeves protect them from tears and dirt. Label each folder with the doll’s name or theme. This makes it easy to find your favorite doll. A small container can store tiny accessories like hats or shoes. Keep everything in one place to avoid losing parts.
Interactive play tipsmake paper dolls more fun. Create stories using different doll clothes and backgrounds. Invite friends to join and share their dolls. Move the dolls gently to avoid damage. Use a table or flat surface to play. Change doll outfits often to keep playtime exciting. Let imagination guide the games. Role play helps develop creativity and social skills.

Credit: www.youtube.com
Frequently Asked Questions
What Materials Are Needed For A Paper Doll Model?
You need colored paper, scissors, glue, markers, and decorative items. These basic supplies help create vibrant and durable paper dolls. Using quality paper ensures the doll holds shape well. Markers add personalized details to your model.
How Do I Start Making A Paper Doll Step By Step?
Begin by drawing the doll’s outline on paper. Cut carefully along the lines. Next, add facial features and clothing details. Finally, decorate with colors and accessories to enhance appearance.
Can Kids Easily Make Paper Dolls At Home?
Yes, paper dolls are simple and safe for kids. They encourage creativity and fine motor skills. Adult supervision is helpful for cutting and gluing. This craft is perfect for family activities.
How To Make Paper Dolls More Durable?
Use thicker cardstock instead of regular paper for strength. Laminate the doll after decorating to protect it. Reinforce joints with tape or brads for flexible movement. These steps increase longevity and play value.
Conclusion
Creating a paper doll step by step is fun and simple. Each step helps you build your own unique doll. You can use different colors and shapes to make it special. This craft improves your skills and keeps you busy in a good way.
Paper dolls also make great gifts for friends and family. Try this project to enjoy art and craft at home. It’s a great way to relax and be creative. Give it a try and see how much fun you have!