Are you ready to create stunning, personalized resin crafts but don’t know where to start? This step-by-step resin crafts tutorial is designed just for you.
Whether you want to make beautiful jewelry, eye-catching coasters, or unique home décor, you’ll find clear, simple instructions that make the process easy and fun. By following this guide, you’ll avoid common mistakes and discover tips that turn your ideas into dazzling resin art.
Keep reading, and unlock the secrets to mastering resin crafts—your next creative masterpiece is just a few steps away!
Materials And Tools
Starting resin crafts requires the right materials and tools. These basics help create beautiful, lasting pieces. Understanding what to use makes your crafting easier and more fun. This section explains the key supplies and how to set up your workspace safely.
Choosing The Right Resin
Select resin based on your project type. Epoxy resin is clear and popular for crafts. It cures slowly, giving time to work. Polyester resin dries faster but smells stronger. UV resin hardens quickly under light. Pick resin with low odor for indoor use. Check the resin’s curing time and finish. Some resins add a yellow tint. Choose one that stays clear for art projects.
Essential Tools For Beginners
Basic tools help you measure, mix, and pour resin. Use disposable cups for mixing resin and hardener. Stir sticks should be wooden or plastic. A silicone mold is perfect for shaping resin crafts. Gloves protect your skin from resin. Use a heat gun or torch to remove bubbles. A digital scale helps measure ingredients exactly. Paper towels clean spills quickly. Tape and toothpicks help with small details.
Safety Gear And Workspace Setup
Wear gloves and a mask to avoid resin fumes. Use safety glasses to protect your eyes. Work in a well-ventilated area. Cover your workspace with plastic or paper. Keep tools and resin away from children and pets. Have a trash bin nearby for waste. Avoid eating or drinking near your work area. Clean spills immediately to prevent stains or damage.
Preparing For Your Project
Preparing for your resin craft project sets the stage for success. Careful preparation helps you avoid mistakes and creates a smooth crafting process. Gather all materials and plan your design before starting. Organize your workspace to keep everything within reach and protect surfaces from spills.
Selecting Molds And Accessories
Choose molds that match your project size and shape. Silicone molds work best for easy release and smooth edges. Pick accessories like glitter, beads, or dried flowers to enhance your craft. Make sure your molds are clean and dry before use. Avoid materials that resin won’t stick to, such as silicone if you want a permanent bond.
Mixing Resin And Hardener
Measure resin and hardener carefully using the recommended ratio. Stir slowly to mix without creating bubbles. Mix for at least three minutes, scraping the sides and bottom. Use a disposable cup and stir stick for easy cleanup. Mixing well ensures the resin cures properly and becomes strong.
Adding Colors And Embellishments
Add color using resin dyes, pigments, or alcohol inks. Start with small amounts and build up the shade. Mix colors thoroughly for an even look. Drop in embellishments like glitter or small charms after mixing colors. Place decorations carefully to avoid trapping air bubbles around them.
Step-by-step Crafting Process
The step-by-step crafting process in resin art helps you create beautiful pieces with ease. Each stage is important for a smooth and successful project. Follow these simple steps to achieve the best results. This guide breaks down the process into clear parts.
Pouring Resin Into Molds
Start by mixing your resin and hardener as per the instructions. Pour the mixture slowly into the mold to avoid spills. Fill the mold to the desired level, but do not overfill. A steady hand ensures a clean and even pour every time.
Removing Air Bubbles
Air bubbles can ruin the smooth finish of your resin craft. Use a small torch or heat gun to gently pass over the resin surface. The heat helps bubbles rise and pop quickly. You can also use a toothpick to lift stubborn bubbles from the mold.
Layering And Embedding Objects
Create depth by pouring resin in layers. Pour the first layer and let it partially cure before adding objects. Place items like flowers, glitter, or small charms carefully on the sticky surface. Pour the next resin layer on top to seal everything in place.
Curing And Finishing
The curing and finishing stages are essential in resin crafts. These steps give your project its final strength and shine. Proper curing ensures the resin hardens fully and lasts long. Finishing touches enhance the look and smoothness of your creation. Follow each step carefully to get the best results.
Drying Times And Tips
Resin usually takes 24 to 72 hours to cure completely. Temperature and humidity affect drying times. Keep your work in a dust-free, warm place. Avoid touching the surface during this time. Use a fan or small heater to speed up curing. Check the resin’s instructions for exact drying times. Patience is key for a perfect finish.
Demolding Your Creation
Once cured, gently remove resin from the mold. Flex the mold slowly to release the piece. Use a soft tool if needed, but avoid sharp objects. If stuck, place the mold in warm water for a few minutes. Handle your piece with care to prevent damage. Clean the mold for future use immediately after demolding.
Sanding And Polishing
Sand the edges and surface to remove imperfections. Start with coarse sandpaper and move to finer grits. Keep sanding wet to avoid dust and heat buildup. Use a polishing compound and soft cloth for shine. Buff the resin until it looks smooth and glossy. This step brings out the true beauty of your craft.
Common Mistakes To Avoid
Working with resin can be fun, but mistakes can spoil your project. Knowing common errors helps you avoid them. This section highlights key points to keep your resin crafts clear and smooth. Follow these tips to improve your results and save time.
Preventing Sticky Or Cloudy Resin
Sticky resin often means the mix ratio was wrong. Measure resin and hardener carefully for best results. Cloudy resin appears if you mix too fast or in a cold room. Stir slowly and keep your workspace warm. Avoid moisture, as it makes resin cloudy and sticky.
Handling Resin That Doesn’t Set
Resin that stays soft usually means it was not mixed long enough. Mix resin and hardener for at least three minutes. Use fresh resin, as old resin can fail to cure. Check room temperature; resin cures best between 70°F and 80°F. If resin does not set, you may need to remove and start over.
Avoiding Bubbles And Imperfections
Bubbles ruin smooth resin surfaces. To reduce bubbles, warm resin before mixing. Stir gently to avoid air bubbles. Use a heat gun or torch to pop bubbles after pouring. Pour resin slowly and in thin layers for fewer imperfections. Cover your work to prevent dust and debris.

Creative Project Ideas
Resin crafts offer endless chances to create beautiful and useful items. This section shares simple and fun project ideas. These ideas suit beginners and help build skills fast. Each project uses easy techniques and common materials. Try them to enjoy crafting with resin and make lovely gifts or home items.
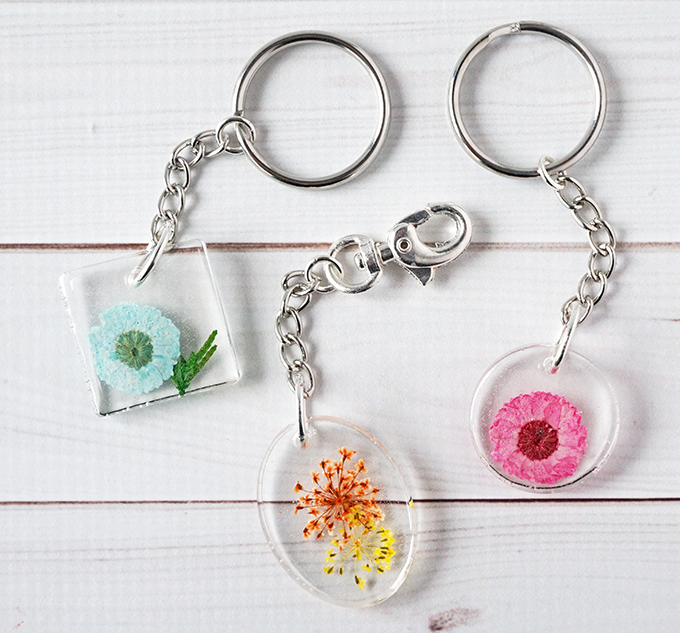
Simple Coasters And Keychains
Start with small, practical projects like coasters and keychains. Use silicone molds to shape resin easily. Add colors, glitter, or small objects inside resin for a personal touch. These projects dry quickly and need little experience. They make great presents or everyday accessories.
Jewelry And Accessories
Create unique jewelry pieces using resin and molds. Make earrings, pendants, or rings by pouring resin into small shapes. Embed dried flowers, beads, or colored powders for extra beauty. These crafts allow creativity with colors and designs. Resin jewelry looks professional and is fun to wear.
Home Decor And Art Pieces
Use resin to make eye-catching art and decor items. Try making wall hangings, trays, or decorative bowls. Layer resin with different colors or textures for striking effects. This craft brightens any room with glossy and smooth finishes. Home decor projects help improve skills and decorate your space.
Maintenance And Care
Resin crafts need care to keep their shine and strength. Proper maintenance extends their beauty and lifespan. Simple steps help avoid damage and maintain gloss.
Cleaning Resin Crafts
Use a soft cloth to clean resin surfaces gently. Avoid harsh chemicals that can dull the finish. Mild soap and water work best for dirt removal. Dry thoroughly with a clean, soft towel. Do not use abrasive scrubbers that scratch the resin.
Storage Tips For Longevity
Store resin items in a cool, dry place away from sunlight. UV light can yellow the resin over time. Keep crafts in dust-free containers or display cases. Avoid stacking heavy objects on resin pieces. Proper storage prevents warping and scratches.
Repairing Minor Damages
Small scratches can be fixed with fine grit sandpaper. Sand gently, then polish with a resin-safe polish. For chips, apply a thin layer of resin to fill gaps. Let the resin cure fully before sanding smooth. This keeps your crafts looking new longer.

Frequently Asked Questions
How To Start Resin Art As A Beginner?
Start resin art by gathering epoxy resin, hardener, and molds. Mix resin carefully, add colors or glitter, then pour into molds. Work in a well-ventilated space, use gloves, and remove air bubbles with a torch or heat source. Practice with simple projects like coasters.
How To Resin Steps For Beginners?
Gather materials and wear protective gear. Mix resin and hardener as instructed. Pour into molds. Remove air bubbles with a torch. Let cure fully before demolding. Sand and finish as desired.
What Should You Not Put In Resin?
Avoid putting food, water, metal objects that rust, silicone, and polyethylene plastics in resin. These can cause curing issues or poor adhesion.
What Is The Best Beginner Resin Project?
The best beginner resin project is making coasters using silicone molds. Add alcohol inks or glitter for personalization.
Conclusion
Resin crafting is a fun and creative hobby anyone can try. Follow each step carefully to avoid mistakes. Use the right tools and materials for best results. Practice helps improve your skills over time. Enjoy making unique items for yourself or as gifts.
Stay patient and have fun with your resin projects. Keep exploring new designs to stay inspired. Your creativity grows with every piece you create.