Have you ever wanted to create your own unique jewelry that truly stands out? DIY resin jewelry lets you turn simple materials into stunning, personalized pieces that reflect your style.
This step-by-step guide will walk you through everything you need to know, from gathering supplies to finishing touches. By the end, you’ll have beautiful, handmade jewelry that’s sure to impress—and the satisfaction of making it yourself. Ready to unleash your creativity?
Let’s dive in.
Key Takeaways
Understanding the fundamental steps and necessary materials is crucial for crafting beautiful resin jewelry. The following points highlight essential practices that will help ensure your resin projects turn out flawless and vibrant.
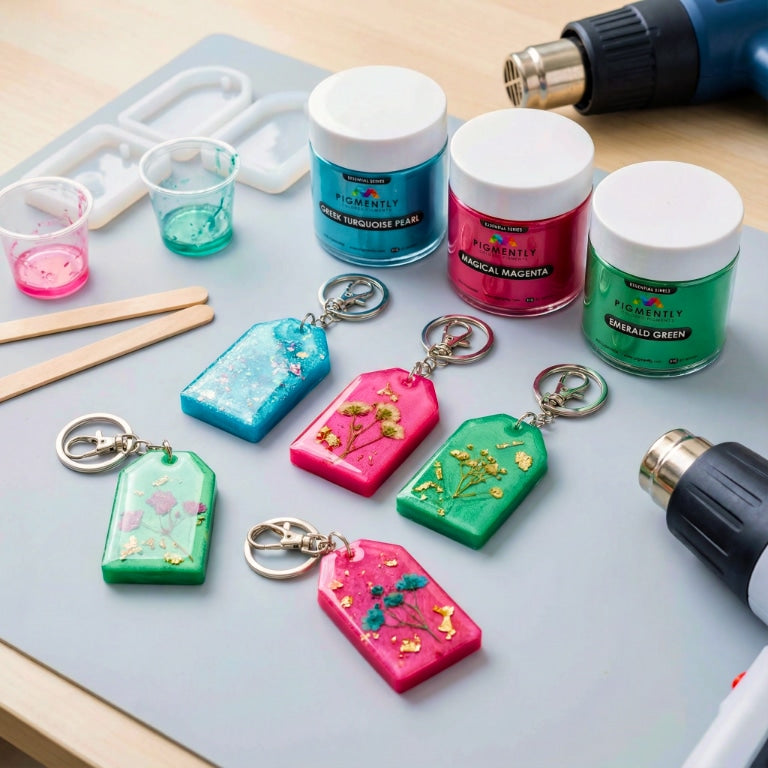
- Collect all vital materials including a two-part epoxy resin kit, silicone molds, mixing tools, and protective equipment like gloves and a respirator mask.
- Set up a tidy, temperature-stable work area, covering your surfaces with protective sheets such as parchment or plastic to prevent damage.
- Carefully measure the resin and hardener according to instructions, blending them gently to avoid trapping air bubbles in the mixture.
- Apply the resin in successive layers, letting each one fully solidify—typically for a minimum of four hours—before embedding any embellishments or adding the next coat.
Supplies And Workspace Setup
Setting up the right supplies and an efficient workspace forms the foundation for crafting beautiful resin jewelry. Proper preparation not only enhances the quality of your pieces but also ensures a smooth and enjoyable creative process.
Begin by assembling all essential materials such as a two-part epoxy resin, mixing cups, stirring sticks, and jewelry molds or bezels. Don’t forget safety essentials like nitrile gloves and protective eyewear to shield your skin and eyes during handling. Keeping these items neatly arranged and easily accessible helps maintain an organized workflow, reducing interruptions while you work.
Choose a well-ventilated, temperature-stable environment, ideally between 75°F and 80°F, to optimize resin curing times and achieve flawless results. Cover your work surface with disposable plastic sheeting or wax paper to guard against spills and prevent damage to furniture.
Some recommended starter kits include the KISREL Epoxy Resin Kit, which offers 18 ounces of resin along with molds and dried flowers, perfect for beginners. For adding vibrant colors and effects, LET’S RESIN Liquid Mirror Chrome Metallic Markers provide a smooth application with reflective finishes. To incorporate natural elements, consider the LUCISKY 136-piece set of pressed leaves and butterflies—ideal for embellishing resin creations.
Maintaining a dust-free and tidy workspace is crucial since tiny particles can settle into the resin, compromising the clarity and finish of your jewelry. Regularly wiping down your area and minimizing airborne debris will help you produce polished, professional-quality pieces every time.
Preparing Your Materials
Getting your supplies ready lays the foundation for a successful resin jewelry project. Careful preparation ensures your crafting experience is enjoyable and your finished pieces look flawless.
Start by inspecting all decorative accents to ensure they are clean, dry, and suitable for the resin molds you plan to use. This helps prevent any unwanted flaws or cloudiness in your final creation.
Gather your key materials: a high-quality two-part epoxy resin, disposable mixing cups, stirring sticks, and your chosen molds. Safety should be a priority—wear nitrile gloves and protective eyewear to shield yourself from resin exposure.
Set up your workstation in a well-ventilated area with a stable temperature around 75°F to 80°F to optimize resin curing. Protect your surfaces with plastic sheets or craft mats to catch any drips or spills, saving you time on cleanup later.
Choose the resin type based on your design requirements. For thin layers and delicate details, a standard clear epoxy works well, while deep pour epoxy is ideal for creating thick, dimensional pieces without excessive heat buildup.
Arrange your embellishments carefully, confirming they will fit well within your molds. For porous items like dried petals or leaves, apply a clear sealant beforehand to preserve their color and prevent resin absorption.
Thoroughly preparing your materials sets the stage for a smooth crafting process and helps you create stunning resin jewelry with ease.
Mixing The Resin
Properly blending resin is a crucial step in crafting stunning and resilient resin jewelry. A well-mixed resin ensures your pieces cure flawlessly, boasting a smooth, polished appearance that lasts.
Begin by carefully measuring the components—typically, the ideal ratio is one part hardener to two parts resin. Combine them thoroughly, stirring continuously for at least two minutes to avoid any tacky spots or uneven curing.
Stirring gently is key, as vigorous mixing can trap air, creating bubbles that mar the glossy finish of your creation.
Understanding The Resin Mixing Ratio
Getting the resin-to-hardener ratio just right is fundamental for producing sturdy and visually appealing resin jewelry. This balance ensures the chemical reaction proceeds correctly, preventing issues like tackiness or incomplete hardening. For products like UltraClear Deep Pour Epoxy, the standard guideline calls for mixing one portion of hardener with two portions of resin. Deviating from this ratio risks compromising the integrity of your piece.
Start the mixing process by pouring the hardener into your container first, then add the resin. This sequence kickstarts the curing process effectively. Use dependable tools to stir the mixture evenly, scraping along the edges and bottom to incorporate all material completely over a minimum of two minutes.
Keep these practical tips in mind for best results:
- Precise measurement: Utilize accurate measuring tools to maintain the correct proportions.
- Quality tools: Choose sturdy mixing sticks and smooth containers to aid thorough blending.
- Adding color: Introduce pigments gradually, mixing well to achieve your preferred shade.
- Batch size: Prepare only the amount required for your current project phase to minimize waste.
Adhering to these steps will help you master the resin mixing process and create jewelry that impresses.
Minimizing Air Bubbles
Reducing bubbles during resin mixing requires attention to technique and appropriate equipment. Opt for containers with smooth walls to prevent air from getting trapped during stirring.
Pour the hardener first, followed by the resin, as this order helps lessen bubble formation right from the start.
Mix slowly and steadily, avoiding aggressive or rapid motions that introduce air. If bubbles do form, gently tapping the container or using a heat source like a small torch or heat gun can help release trapped air, promoting a flawless, glass-like finish on your jewelry.
Pouring The First Layer
Pouring the initial layer of resin marks the exciting beginning of your jewelry-making journey. This foundational step sets the tone for the entire piece, so it’s important to get it right from the start.
Start by thoroughly blending the epoxy resin and hardener, following the exact proportions recommended by the manufacturer. A common ratio is 2 parts resin to 1 part hardener, especially when working with products like UltraClear Deep Pour Epoxy to ensure clarity and durability.
Choosing the color for your first layer opens up endless creative possibilities. Whether you prefer striking, vivid shades or gentle, understated hues, you can even blend pigments to craft a shade unique to your design.
Next, select the mold that fits your vision. Molds come in a variety of forms—from classic geometric shapes like ovals and rectangles to more detailed patterns such as leaves or animals.
Keep these essential tips in mind:
- Immediately pour the mixed resin into your chosen mold, filling it about halfway to establish the base layer.
- Leave enough space for additional layers, so avoid filling the mold to the top at this stage.
- Use a heat source like a heat gun or small torch to gently remove any bubbles trapped in the resin for a smooth finish.
- Keep an eye on the curing process to ensure the resin sets evenly and properly.
By taking your time and paying close attention to detail, you’ll be well on your way to creating breathtaking resin jewelry pieces that shine with professionalism and artistry.
Embedding Decorative Objects
Embedding decorative elements into resin is a rewarding way to personalize your jewelry pieces, bringing texture and character to your creations. This process requires careful preparation and attention to detail to preserve the beauty of your embedded items and ensure a flawless finish.Ensuring that all decorative items are thoroughly dried and well-sealed before embedding is crucial to avoid discoloration or trapped air pockets in your resin piece. Applying a sealing layer, such as Mod Podge, on porous materials helps protect them and creates a smooth barrier. Think of this preparation as the groundwork that supports your artistic vision, allowing your design to stay vibrant and clear.
After pouring the initial resin layer into your mold, gently place your chosen decorations on top. Tools like toothpicks or tweezers can assist in precisely positioning each piece and pressing them down to prevent floating. Give the resin a few moments to stabilize and hold the items in place before moving on.
Keeping an eye on the resin as it cures is important since any movement during this time can cause your decorations to shift. Resin usually requires at least four hours to set firmly. To achieve a polished, bubble-free surface, carefully pass a heat gun or kitchen torch over the resin to eliminate any air bubbles clinging to your embedded objects. Take care not to overheat, as excessive heat can damage the resin or cause unwanted effects.
Pouring The Second Layer
Pouring the second layer of resin is a crucial step to enhance the depth and clarity of your jewelry piece, ensuring a flawless and refined appearance.
Make sure the initial layer has fully hardened, which typically takes around four hours, providing a sturdy base for the next pour.
Mix a fresh batch of epoxy resin carefully, adhering closely to the specific product instructions to maintain the proper proportions and prevent any curing problems. Gently pour the resin over the first layer, filling the mold evenly without spilling over the edges. This careful approach helps achieve a smooth and uniform finish.
To remove any bubbles that surface during this process, use a heat source like a heat gun or a small torch to lightly pass over the resin. Allow the piece to cure thoroughly, following the recommended curing time, which is usually about 72 hours for optimal strength and durability.
Keep these pointers in mind:
- Ensure the first layer is completely cured before applying the next.
- Mix the resin thoroughly to avoid any curing complications.
- Pour the resin slowly and steadily to control the thickness and prevent overflow.
- Use heat to gently eliminate air bubbles for a clear finish.
Curing The Resin
Ensuring your resin pieces cure correctly is a crucial step in crafting jewelry that not only looks stunning but also stands the test of time. The curing phase transforms the liquid resin into a solid, glossy finish, making it essential to create the perfect environment for this process.
Most epoxy resins, such as UltraClear varieties, demand a curing period ranging from 24 up to 72 hours. Allowing a full 72 hours ensures the resin reaches its maximum hardness and durability, preventing any softness or tackiness that can compromise your design.
Temperature plays a significant role during curing. Keeping your workspace consistently between 75°F and 80°F helps the resin set evenly. Sudden temperature changes or drafts might cause uneven hardening, leaving your jewelry sticky or marred with imperfections. Imagine dedicating hours to your project only to find it spoiled due to temperature fluctuations—it’s a frustration no artist wants to face.
Resist the urge to move or touch your resin while it’s hardening. Any disturbance can introduce bubbles or surface defects, detracting from the smooth, clear finish you’re aiming for. Choose a quiet, stable area where your creations can cure undisturbed and flourish.
Environmental factors like humidity and air circulation also influence the final outcome. Excess moisture in the air may cause haziness, while stagnant airflow can result in soft or uneven spots. Striking the right balance ensures your resin jewelry cures with a brilliant clarity and strength.
Treat the curing stage with care and patience, providing the resin with a steady, calm setting. Your efforts will be rewarded with beautifully solid, long-lasting pieces that truly shine.

Demolding The Jewelry
Demolding is a pivotal stage in resin jewelry crafting, marking the moment your creation takes its final shape. Handling this step with care ensures your pieces emerge flawless and ready for finishing touches. Allow the resin ample time to cure thoroughly—commonly a minimum of 24 hours as recommended by the manufacturer—to avoid any damage during removal.
Try these practical demolding methods and tips to preserve both your jewelry and molds:
- Carefully Bend the Mold: Slowly and gently flex the silicone mold to release the hardened resin. Avoid aggressive bending to prevent cracks or breaks in your jewelry.
- Chill for Easier Release: If the resin feels tacky or soft, place the mold inside the freezer for around 10 minutes. This cool-down firms up the resin, making it simpler to pop out.
- Employ Precision Tools: Use a craft blade or fine tweezers to carefully lift the resin piece from the mold edges, ensuring you don’t scratch or mar the surface.
- Examine and Refine: After removal, inspect your jewelry for any rough spots or imperfections. Lightly sanding any uneven areas will enhance the smoothness and polish of your finished item.
Assembling The Pieces
Bringing your resin jewelry components together is a crucial stage that transforms individual elements into a polished, wearable piece. This assembly phase requires attention to detail and a thoughtful approach to ensure each part fits seamlessly, enhancing the overall look and durability of your design.
Begin by gently extracting each resin piece from its mold, taking care to prevent any chips or cracks. This careful handling preserves the integrity of your work and allows you to evaluate how the colors and shapes interact. Reflect on the hardware choices—such as clasps, chains, or hooks—that will harmonize best with your resin elements and elevate the final aesthetic.
Using a pair of fine jewelry pliers, attach the necessary findings like jump rings, earring hooks, or necklace chains. This is where you can experiment with different combinations to craft truly personalized accessories. For charm-making, embedding a metal eye pin while the resin is still slightly soft ensures a strong hold, minimizing the chance of loosening over time.
For pieces like rings and brooches, apply a small amount of quick-drying adhesive to the metal base before positioning it onto the cured resin. This method secures the components firmly, providing lasting strength and professional finish to your handmade jewelry.
Final Touches And Storage
Completing your resin jewelry involves careful refinement and thoughtful storage to preserve its beauty and durability. Taking these final steps ensures each piece not only shines with a professional finish but also remains in pristine condition over time.
Begin by thoroughly examining your cured resin creations for any tiny flaws like trapped air bubbles or uneven edges. Smooth out these imperfections using fine-grit sandpaper or a polishing cloth to achieve a sleek, glass-like surface that catches the eye.
Once the surface is flawless, consider enhancing your pieces with subtle embellishments such as shimmering mica powders or delicate hand-painted details designed for resin. These accents can add an extra layer of charm and individuality to your jewelry.
Secure all hardware components—including clasps, jump rings, and earring hooks—firmly in place using precision jewelry pliers and strong adhesives suited for metal and resin bonding. This step not only ensures longevity but also guarantees that your creations are ready for everyday wear.
To protect your resin jewelry from dust, scratches, and environmental damage, keep the finished items stored in a gentle environment. Soft fabric-lined compartments, cushioned jewelry boxes, or velvet pouches are excellent choices that help maintain their pristine condition.
Consider enhancing the presentation of your pieces with creative packaging ideas:
- Use elegant gift boxes or rustic wooden crates to create a memorable unboxing experience.
- Craft custom display cards from recycled paper featuring your logo or artwork for a personalized touch.
- Include small care instruction cards that guide recipients on how to best preserve their jewelry.
- Attach handwritten thank-you notes to add warmth and gratitude to each gift.
Applying these finishing touches and presentation tips will elevate your resin jewelry, making each creation a treasured keepsake that delights its owner for years to come.
Frequently Asked Questions
Below are some common questions asked by beginners and enthusiasts alike about resin jewelry making, providing clear and concise answers to guide you through the process with confidence.
What Are The Basic Steps To Create Resin Jewelry For Beginners?
Start by carefully measuring and combining epoxy resin with its hardener as per the package directions. Introduce pigments or dyes to achieve your desired colors, then pour the mixture into your chosen molds. To eliminate air bubbles, gently wave a heat gun or torch over the surface. Let the resin cure fully, typically for about 72 hours, before removing it from the mold and attaching any jewelry components.
Is A Uv Light Required To Cure Resin Jewelry?
Using a UV light is only necessary when working with UV-sensitive resin formulas, which cure quickly under ultraviolet rays. Standard epoxy resins do not rely on UV light and will harden naturally over time at room temperature without any special equipment.
Should Resin Jewelry Be Sanded After Curing?
Sanding is an important step to refine the surface of resin jewelry. Employ a sequence of sandpapers starting with a coarse grit and progressing to finer ones, ideally with wet sanding techniques. This process smooths out rough edges and imperfections, resulting in a glossy, professional finish.
How Do You Make Resin Pieces Step By Step?
Choose the appropriate resin type and mix it thoroughly according to the manufacturer’s instructions. Add colors or inclusions to customize your design. Pour the mixture into molds and gently heat the surface to pop any bubbles. After the resin has fully cured, usually within a few days, finish your piece by attaching any necessary findings or hardware.
Conclusion
Wrapping up this creative adventure in resin jewelry crafting highlights the joy and satisfaction that come with each carefully executed step.
Begin by organizing your tools and materials in a clean, inviting area. Selecting vibrant dyes, shimmering glitters, or unique inclusions sparks inspiration and sets the tone for your project.
Combining resin and hardener is an exciting process, reminiscent of a precise chemistry experiment, where accurate ratios ensure the perfect consistency. Spreading the initial resin layer provides a smooth canvas, much like painting a fresh background.
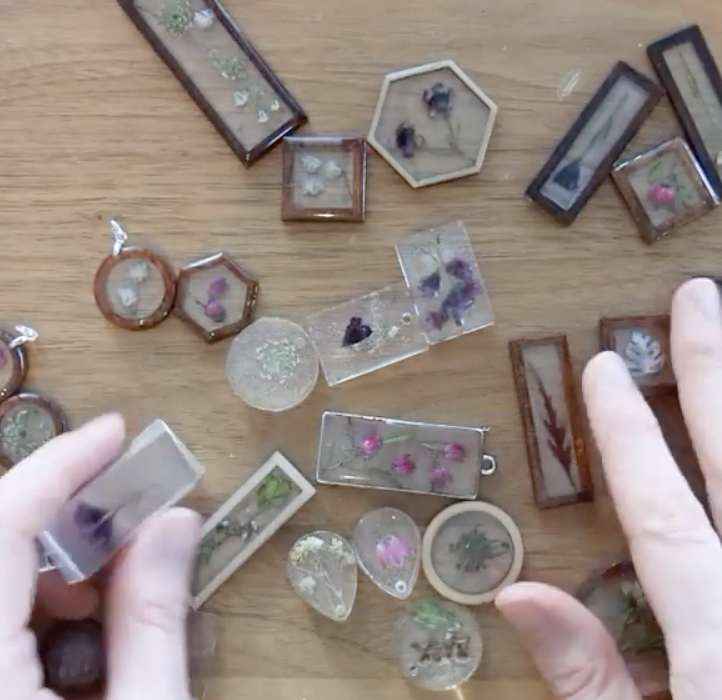
Embedding charming accents such as miniature seashells, tiny beads, or pressed botanicals adds personality and depth to your pieces.
Allowing the resin to cure requires patience, similar to waiting for a delicate souffle to rise. Once solidified, gently removing the cured resin reveals a dazzling surprise crafted by your own hands.
Finalizing your creation by attaching clasps, chains, or earring hooks transforms these resin forms into stunning wearable art. A gentle buff to enhance shine completes the process, resulting in exquisite, handcrafted jewelry perfect for personal use or gifting.
Each phase of resin jewelry making, from preparation to finishing touches, demands focus and care.
Perfecting techniques such as resin blending, pouring, and curing is crucial for producing polished, professional-grade designs.
Attention to detail and patience during drying foster distinctive, custom-made accessories.
With consistent practice, the steps become second nature, encouraging innovation and precision in future resin projects.
Check out these handy items for your crafting toolkit:
3 Pack Large Silicone Mats for Crafting and Resin Casting, Measuring 15.7” x 11.8” in Blue, Rose Red, and Green
Amazon
LET’S RESIN Liquid Mirror Chrome Metallic Markers – Glossy Epoxy Resin Tools in Three Vibrant Shades, Ideal for Painting and Detailing
Amazon
LUCISKY 136-Piece Set of Pressed Dried Leaves and Butterflies – Authentic Natural Embellishments Perfect for Resin Mold Decoration
Mastery Of Each Phase
Understanding and excelling in every step of the resin jewelry creation process—from accurately blending the resin components to carefully pouring and allowing the piece to cure—is vital for crafting stunning, high-quality designs that stand out.
Careful Attention To Detail
Meticulous focus and steady patience throughout the curing stage are essential for crafting resin jewelry that stands out with its distinctive, customized charm.
With Practice
Understanding resin jewelry making deepens significantly with repeated attempts, enabling artists to experiment boldly and achieve finer details with confidence.Consistent practice transforms resin crafting from a challenging task into a natural skill, empowering you to explore innovative designs and execute them with enhanced accuracy in your upcoming creations.
Frequently Asked Questions
What Materials Are Needed For Diy Resin Jewelry?
To make resin jewelry, you need resin, hardener, molds, mixing cups, stir sticks, gloves, and safety masks. Optional items include pigments, glitter, and embellishments. These materials ensure a smooth crafting process and help create unique, personalized jewelry pieces.
How Long Does Resin Take To Cure Completely?
Resin usually takes 24 to 72 hours to cure fully, depending on temperature and humidity. Room temperature and proper ventilation speed up curing. Patience is key to achieve a hard, glossy finish without sticky spots.
Can Beginners Easily Make Resin Jewelry At Home?
Yes, beginners can make resin jewelry with basic supplies and guidance. Start with simple molds and follow step-by-step instructions. Practice improves skills, resulting in beautiful, custom pieces. Resin crafting is accessible and rewarding for all skill levels.
How Do I Avoid Bubbles In Resin Jewelry?
To prevent bubbles, mix resin slowly and steadily. Use a heat gun or torch to gently remove surface bubbles. Warm resin and molds also reduce bubbles. Proper technique ensures a clear, smooth finish on your jewelry.
Conclusion
Creating resin jewelry is fun and rewarding. You only need a few materials and patience. Each piece you make shows your style and creativity. Keep practicing to improve your skills. Small mistakes help you learn and grow. Enjoy the process and wear your art proudly.
Start your DIY resin jewelry journey today. You will love making unique accessories.