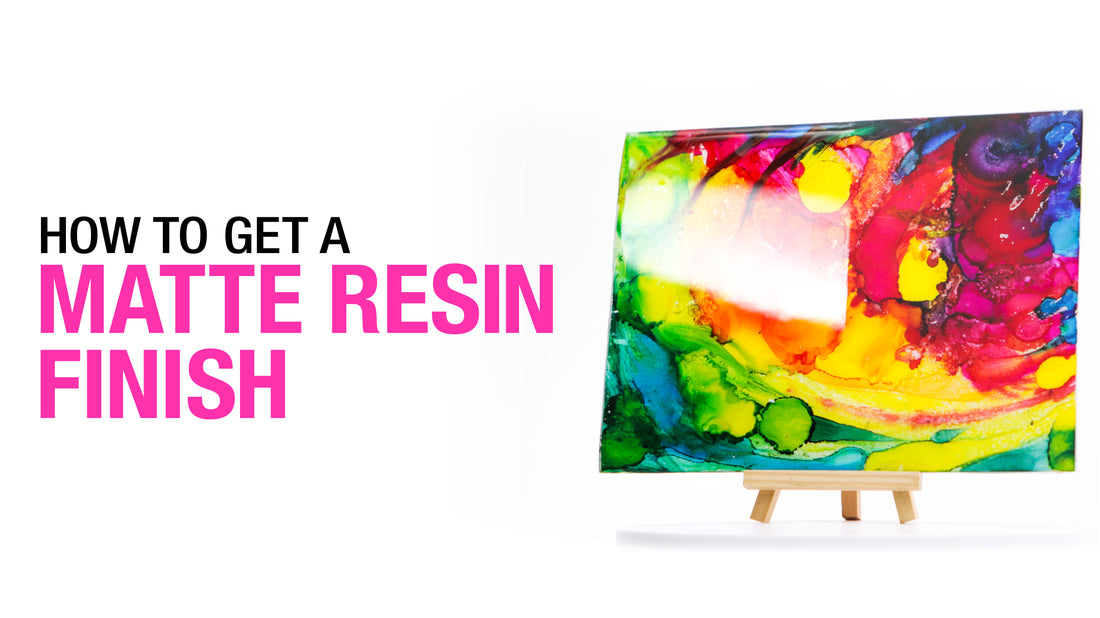
You want your resin art to shine with a flawless, glass-like finish that catches every eye. But achieving that perfect look can feel tricky if bubbles, uneven surfaces, or dull colors get in the way.
What if you could master simple steps that guarantee smooth edges, vibrant colors, and a durable finish every time? In this guide, you’ll discover easy techniques to prepare your surface, mix resin perfectly, and control bubbles like a pro. Ready to transform your resin projects and wow everyone with your craftsmanship?
Keep reading to unlock the secrets to stunning resin art finishes.

Key Takeaways
Perfect resin art needs clean workspaces and careful mixing. Patience during curing helps avoid bubbles and dull surfaces. Small details make big differences in glossy, smooth finishes.
Mastering the essentials of resin art can significantly enhance your ability to achieve pristine, glossy finishes. The following key points focus on preparation, mixing techniques, bubble control, and material quality—all crucial for professional-looking results.- Start by properly prepping your workspace and surface, using a suitable primer and carefully applied masking tape to create crisp, clean borders.
- Heat the resin gently before blending, stirring thoroughly to incorporate pigments sparingly for vivid colors and to minimize air pockets.
- Eliminate trapped bubbles by applying gentle heat tools, inspecting your piece from eye level, and working in an environment with low moisture.
- Choose premium, eco-friendly resins with UV protection and measure components accurately to ensure a strong, long-lasting finish.
Preparation Techniques
Mastering resin art begins with meticulous preparation to ensure a smooth, glass-like finish. Taking the right steps before pouring resin can make all the difference between a stunning piece and one marred by imperfections.
Start by preparing your workspace and materials carefully. Organize everything beforehand since resin tends to cure quickly, often within 30 to 45 minutes. Ensuring your work surface is perfectly level is crucial; using a spirit level or laser level helps prevent uneven resin pooling that could spoil your artwork.
Priming your substrate is another essential step, especially when working with absorbent surfaces like MDF boards or canvases. These materials can soak up moisture, compromising resin adhesion and curing. Applying two or more coats of primer or acrylic paint on all sides creates a sealed barrier, protecting your piece and enhancing resin performance.
Applying painter’s tape, preferably green tape, along the edges or underside of your substrate helps catch any resin drips. This simple trick saves you time cleaning up and maintains a neat edge to your project.
To reduce the thickness of the resin and minimize trapped bubbles, gently warming the resin containers in warm water before mixing is a helpful tip. This lowers viscosity, making the resin flow more easily and resulting in a clearer, smoother finish.
Employing these preparation strategies sets a solid foundation for creating flawless, glossy resin artwork.
Mixing And Coloring
Mastering the art of resin begins with precise mixing and thoughtful coloring to ensure a stunning, consistent result. Proper technique in these areas enhances both the depth and brilliance of your resin projects, setting the stage for a flawless glossy finish.
Start by blending the resin and hardener thoroughly for a solid 3 to 5 minutes, making sure to scrape the container’s edges frequently to incorporate every bit of the mixture evenly. Introduce pigments sparingly—never surpassing 10% of the total resin volume—to avoid interfering with the curing process or diminishing clarity.
Opt for premium colorants such as mica powders or alcohol-based inks, which deliver rich, vivid hues without compromising the resin’s strength. To improve flow and reduce trapped air, gently warm the resin by placing its container in a warm water bath prior to mixing. This step softens the resin, making it easier to pour smoothly.
| Step | Action |
|---|---|
| 1 | Mix resin thoroughly for 3-5 minutes, scraping sides regularly |
| 2 | Incorporate pigment carefully, keeping it under 10% of resin volume |
| 3 | Warm resin in a hot water bath before mixing and pouring |
Understanding pigment behavior and color blending plays a crucial role in achieving a seamless appearance. Pour the resin slowly and steadily to minimize bubble formation, resulting in a pristine, glossy surface. Following these guidelines will help your resin creations shine with vivid, harmonious colors and impeccable clarity.
Bubble Management
Mastering bubble control is crucial for crafting resin art with a smooth, glass-like surface. Achieving this requires keen observation and precise methods to prevent and eliminate air pockets that can mar the final piece.
Begin by examining your resin canvas closely at eye level, scanning for any air bubbles or debris before applying any heat treatment. This step is vital to catch imperfections early and avoid complications later.
Utilizing a heat gun or a small butane torch set to a gentle flame can effectively dissolve bubbles. Glide the heat source swiftly and evenly over the resin’s surface, keeping a safe distance to prevent scorching. Remember, bubbles tend to form more readily in cool, moist conditions, so strive to work in an environment with humidity below 75% and a stable room temperature.
After thoroughly blending your resin, allow it to rest for a few minutes. This pause helps trapped air rise to the top, minimizing bubbles in the poured mixture. Once applied, gently tapping or vibrating the artwork can encourage lingering bubbles to surface and burst, leaving behind a flawless finish.
Safety And Tools
Ensuring a safe environment and having the right equipment on hand are crucial steps before diving into resin artistry. Protecting yourself and organizing your workspace sets the foundation for creating stunning, flawless resin pieces without unwanted hazards or interruptions.
Prioritize personal protection by equipping yourself with essential safety gear. A high-quality respirator fitted with organic vapor cartridges guards against the toxic fumes emitted during the resin’s mixing and curing stages, as many resin products release volatile organic compounds (VOCs) that can be harmful to breathe in.
Hand protection is equally important. Opt for nitrile gloves instead of latex; nitrile resists degradation and chemical penetration better, offering a solid shield against resin’s irritants and reducing the chance of allergic reactions or burns.
Eye protection cannot be overlooked. Safety goggles or glasses create a barrier that keeps resin splashes or airborne particles, especially from tools like heat guns and torches, from causing injury to your eyes.
Keeping your workspace tidy not only prevents accidents but also helps maintain the quality of your artwork. Cover tables and floors with disposable plastic sheets or protective cloths to catch drips and spills, making cleanup easier and avoiding unwanted blemishes on your resin projects.
Must-have Tools For Resin Art
Having the proper tools enhances both the safety and the aesthetic of your resin creations. A heat gun is perfect for creating mesmerizing effects by gently manipulating resin’s surface, while a small butane torch efficiently eliminates pesky air bubbles that can mar the finish.
For maintaining clean edges and preventing resin from sticking to unwanted areas, green painter’s tape is an indispensable item. It helps define crisp boundaries and makes post-pour cleanup simpler.
A Dremel rotary tool rounds out the toolkit by allowing precise sanding and polishing, refining your work to achieve that signature glossy, smooth finish that resin art is celebrated for.
Curing And Layering
Understanding the intricacies of curing and layering is vital for producing resin artwork with a pristine, glass-like finish. These steps not only affect the durability but also the visual clarity of your piece.
Epoxy resin generally requires a curing period of at least 24 hours before it can be handled safely, with optimal hardness and resilience developing over 72 hours. Maintaining a consistent environment during this time is crucial; temperatures between 73°F and 78°F paired with humidity levels below 75% help prevent common issues such as distortion or haziness in the resin surface.
Applying resin in successive layers enhances depth and detail, but it’s important to allow each coat to partially solidify before adding the next. This approach reduces trapped air bubbles and supports complex design work. For better bonding between layers, gently scuff the top of the cured resin using fine-grit sandpaper, ideally between 400 and 600 grit. This step ensures the new layer adheres smoothly, creating a unified and polished appearance.
To remove bubbles, carefully pass a heat source like a heat gun or a small torch over the surface. These tools help release trapped air effectively, but overheating must be avoided as it can cause yellowing or even scorch the resin, compromising the final look.

Quality Materials
Using premium supplies lays the groundwork for stunning resin artwork, complementing expert curing and layering practices.
Choosing the appropriate resin variety plays a vital role in crafting flawless finishes. Opting for a top-tier, two-part epoxy resin minimizes issues such as discoloration and tiny bubbles, which can detract from both the visual appeal and durability of your piece. Thoroughly exploring customer feedback and product specifications helps identify the ideal resin for your project.
Resins formulated to be non-toxic and resistant to UV rays significantly enhance the longevity of your creations while ensuring a safer environment by limiting hazardous fumes during hardening.
The selection of pigments also matters greatly. Whether incorporating mica powders or alcohol-based inks, keeping pigment amounts below 10% of the total resin volume maintains vibrant hues without compromising the resin’s curing quality.
Accuracy in mixing resin components is crucial. Employing precise measuring devices ensures the correct proportions, which is essential for proper curing and achieving a smooth, glass-like finish that lasts.
Sanding Techniques
Mastering the art of sanding is a crucial step toward achieving a pristine, glossy resin finish. Proper sanding methods ensure that your artwork’s surface becomes perfectly smooth, setting the stage for a professional polish and enhancing the overall appeal.
Start the sanding journey with medium grit sandpaper, typically between 120 and 160 grit, to gently smooth out any surface flaws and establish an even texture. Gradually transition to finer grits such as 1000, 1500, and up to 3000 grit. Keeping the resin surface damp during this process is vital to reduce dust buildup and avoid scratching.
Wipe the surface frequently with a soft cloth or microfiber towel to monitor your progress and maintain an even finish throughout. For larger resin pieces, using an electric sander can speed up the process, but it’s essential to use it delicately to prevent any accidental damage.
Starting With Medium Grits
Begin sanding your resin artwork using sandpaper in the 120-160 grit range. This initial step is fundamental for removing imperfections and creating a consistent surface texture that will enhance the final polish. Sanding with a smooth, circular motion helps avoid flat spots and uneven areas that can detract from the overall look.
Regularly clear away sanding residue to check your work and ensure uniform smoothing. Patience during this stage pays off, as rushing can lead to unwanted scratches or uneven surfaces that require additional correction later.
Once the initial sanding is complete, thoroughly rinse the resin surface to eliminate any leftover dust and debris. Allow it to dry fully before moving forward with finer sanding techniques.
Refining With Wet Sanding
After establishing a smooth base with medium grit sandpaper, move on to wet sanding to refine the resin surface and prepare it for polishing. Wet sanding helps minimize scratches and prevents sandpaper from clogging, resulting in a flawless finish.
Begin this phase with 1000-grit sandpaper, always keeping the surface moist while sanding in gentle circular motions. This approach softens abrasive effects and ensures the resin surface remains smooth without new scratches forming. Progress through finer grits such as 1500 and 3000 for a mirror-like sheen before polishing.
Polishing Techniques
Achieving a flawless, glass-like shine on resin artwork involves a careful polishing process that enhances its natural beauty. Mastering the art of polishing not only refines the surface but also brings out the vibrant depth of your resin piece.
Start the polishing journey by using coarse sandpaper, typically ranging from 120 to 160 grit. This step helps to eliminate any uneven spots or surface flaws left after curing. Progressively refine the surface by switching to wet sanding, beginning with around 1000 grit sandpaper. Keeping the resin damp during this phase reduces dust buildup and ensures that tiny scratches are smoothly leveled out.
Following wet sanding, employ a rotary polisher fitted with a foam or wool buffing pad. Apply a medium-grade polishing compound and move the tool in gentle, circular motions. This action works to dissolve any lingering fine scratches and sets the foundation for a radiant, mirror-like finish that makes your resin art truly stand out.
Complete the process by using a fine polishing compound to add that final layer of brilliance. This step enhances the sheen and removes any microscopic abrasions left behind. Regularly examine the surface throughout polishing and repeat any necessary steps to secure that impeccably smooth, glossy appearance that elevates your resin masterpiece.
Final Inspection
Conducting a thorough final inspection is crucial to ensure your resin artwork boasts a smooth, glossy surface with consistent shine throughout. This last review helps catch any minor flaws that might have escaped previous polishing stages. To guarantee an impeccable finish, consider these essential steps:
- Examine Closely: Study the entire resin surface carefully under bright, natural light. Check for any dull patches, scratches, or uneven textures that may require further refinement.
- Wipe Clean: Gently cleanse the piece using a soft, lint-free cloth slightly dampened with water. This removes residual polishing dust and reveals the true condition of the finish.
- Refine as Needed: Address any detected blemishes by selectively buffing those areas again. Testing various polishing products can help determine the best fit for your particular resin formulation.
- Learn from Experts: Consistent practice sharpens your polishing skills. Explore tutorial videos from trusted sources like Craft Resin’s YouTube channel to enhance your technique and stay updated on best practices.
Frequently Asked Questions
Below are some of the most common questions about resin art, providing clear and practical answers to help you achieve stunning, glass-like finishes in your projects.
How Can You Achieve Flawless Resin Art?
Creating flawless resin art starts with precise measurement and thorough mixing of the resin and hardener to avoid imperfections. Prepare a tidy, level surface to work on and ensure the curing environment is free from dust and maintains a consistent temperature. After curing, carefully wet sand with fine-grit paper and polish the piece to reveal a smooth, shiny finish.
What’s The Secret To Crystal Clear Resin?
To obtain crystal-clear resin, choose premium-grade resins formulated for transparency. Mix the components gently yet thoroughly to prevent introducing air bubbles. Keep your workspace clean and dust-free, and apply gentle heat with a heat gun or torch to remove any trapped bubbles for a pristine, glass-like clarity.
How Do You Get A Transparent, Glossy Resin Surface?
Ensuring a transparent, glossy surface requires following the resin manufacturer’s instructions closely, mixing well without rushing. Maintain stable environmental conditions such as temperature and humidity, and use a heat source to carefully pop bubbles during curing. This process helps maintain clarity and a smooth finish.
Which Resin Finish Produces The Best Results?
The highest quality resin finish combines a high-gloss resin formula with diligent finishing techniques. Employ progressive wet sanding with increasingly fine grits, then buff the surface using a polishing compound and a rotary tool. This method results in a durable, mirror-like shine that enhances the artwork’s beauty.
Conclusion
Wrapping up the journey of creating stunning resin art emphasizes a combination of careful planning and skilled execution throughout each phase.
Thorough surface preparation, accurate resin and pigment blending, along with diligent bubble elimination, form the foundation of a pristine finish.
Utilizing premium supplies, adhering to safety protocols, and expertly handling curing, layering, sanding, and polishing steps all play pivotal roles in achieving a high-gloss, professional look.
Conducting a detailed final review ensures every element aligns with quality expectations, delivering an exquisite resin artwork that truly stands out.
Frequently Asked Questions
What Materials Ensure A Smooth Resin Art Finish?
Using high-quality epoxy resin with proper mixing tools ensures a smooth finish. Clean molds and dust-free spaces also help. Proper curing conditions prevent bubbles and imperfections, enhancing the overall result.
How To Avoid Bubbles In Resin Art Projects?
Mix resin slowly and carefully to avoid air bubbles. Use a heat gun or torch gently to release trapped bubbles. Work in a warm, dust-free environment for best results.
What Is The Best Technique For Resin Layering?
Apply thin, even resin layers, allowing each to cure fully before adding the next. This prevents mixing and maintains clarity. Patience and precision are key to flawless resin layers.
How Long Does Resin Take To Cure Perfectly?
Resin typically cures in 24 to 72 hours, depending on brand and conditions. Avoid touching or moving the piece during this time to prevent imperfections.
Conclusion
Perfect resin art finishes come from patience and careful steps. Keep your workspace clean and use quality materials. Mix resin slowly to avoid bubbles. Let each layer dry fully before adding the next. Practice helps you improve with every project.
Enjoy the process and learn from small mistakes. Soon, your resin art will shine with a smooth, clear finish. Stay focused, follow these tips, and watch your work improve. Resin art can be simple and fun with the right approach.