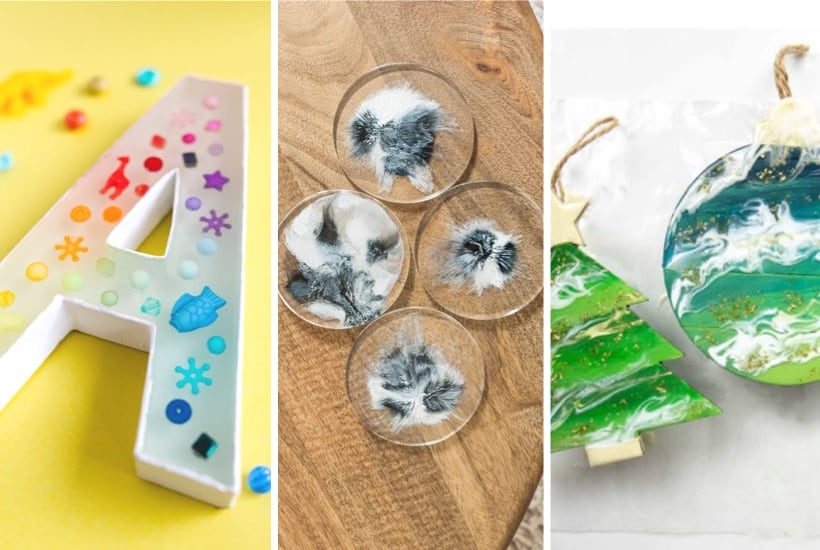
Are you ready to create stunning, personalized crafts that catch everyone’s eye? Resin crafts are the perfect way to turn your ideas into glossy, vibrant masterpieces.
Whether you want to make unique jewelry, beautiful coasters, or eye-catching decorations, this resin crafts tutorial DIY guide will walk you through every step. You don’t need to be an expert to start—just a bit of creativity and the right techniques.
Keep reading, and you’ll discover how easy and rewarding resin crafting can be, helping you bring your artistic vision to life with confidence and style.
Materials And Tools
Starting resin crafts requires the right materials and tools. These basics help create beautiful, lasting projects. Choosing good supplies makes crafting easier and more fun. Preparing your workspace with proper tools ensures smooth crafting. Safety is important to protect your health while working with resin.
Choosing The Right Resin
Select resin based on your project needs. Epoxy resin is popular for beginners because it is clear and easy to use. UV resin cures quickly under light but suits small items. Check curing times and finishes before buying. Choose resin that is non-toxic and safe for indoor use. Always buy from trusted brands for quality results.
Essential Tools For Beginners
Basic tools help you work neatly and safely. Get silicone molds in different shapes for easy demolding. Use mixing cups and sticks for accurate resin mixing. A heat gun or torch removes bubbles from poured resin. Gloves protect your skin from resin contact. Use a digital scale to measure resin and hardener precisely. Have a clean, flat work surface covered with plastic or paper.
Safety Tips And Precautions
Work in a well-ventilated area to avoid breathing fumes. Always wear nitrile gloves to protect your hands. Use a mask if you feel sensitive to resin smells. Avoid skin contact with resin and hardener. Keep resin away from children and pets. Clean spills immediately with paper towels and rubbing alcohol. Store resin products in a cool, dry place, away from sunlight.

Preparing Your Workspace
Preparing your workspace is the first step in any resin craft project. A well-organized area helps you work safely and efficiently. It also protects your materials and your surroundings from damage. Taking time to set up your space reduces stress and improves your results.
Setting Up A Clean Area
Choose a flat surface with good lighting for your resin work. Clear away all clutter and dust before you start. Dust and dirt can ruin your resin finish. Use a clean cloth to wipe down the table. Keep all your tools and materials nearby but separate.
Avoid working near open windows or fans. Airflow can cause dust to settle on your resin. A quiet, calm space helps you focus and avoid mistakes. Make sure you have enough room to move around freely.
Protecting Surfaces And Clothing
Cover your work surface with plastic, silicone mats, or disposable paper. These layers stop resin from sticking to your furniture. Protect your clothes by wearing old garments or a craft apron. Resin can stain fabric permanently.
Use gloves to keep resin off your hands. Keep paper towels or wipes close to clean spills quickly. Avoid touching your face or other surfaces while working. Keeping your workspace tidy prevents accidents and mess.
Mixing Resin
Mixing resin is a crucial step in any resin craft project. The right mix ensures a smooth, strong finish. It also prevents common problems like sticky or soft spots. Careful measuring and mixing keep your resin clear and bubble-free. This section breaks down simple steps for perfect resin mixing.
Measuring Resin And Hardener
Use a clean container for measuring resin and hardener. Always follow the ratio given on the product label. Most resins require a 1:1 or 2:1 ratio. Measure carefully with a digital scale or measuring cups. Avoid guessing or eyeballing amounts. Accurate measuring helps the resin cure properly and harden fully.
Pour resin first, then add hardener. Mix small batches if you are new to resin crafts. Too much resin mixed at once can harden before you finish your project.
Mixing Techniques To Avoid Bubbles
Stir resin slowly and steadily. Fast stirring traps air, causing bubbles in your craft. Use a flat wooden stick or silicone spatula for mixing. Scrape the sides and bottom of the container well. Mix for at least 3 to 5 minutes to blend resin and hardener fully.
After mixing, let the resin sit for a few minutes. This pause helps bubbles rise to the surface. You can also use a heat gun or torch to pop surface bubbles gently. Avoid shaking the resin container before mixing. It creates many tiny bubbles that are hard to remove.
Adding Colors And Effects
Adding colors and effects transforms plain resin into stunning art pieces. It brings life and personality to your resin crafts. Simple techniques create vibrant, eye-catching designs. Experimenting with colors and textures makes each project unique. Explore different materials to enhance your resin work.
Using Alcohol Inks And Pigments
Alcohol inks create bright, flowing colors inside resin. They spread easily, making beautiful patterns and gradients. Pigments add solid, rich tones and can be mixed for custom shades. Use small drops of ink or pigment and watch colors blend naturally. Stir gently to avoid bubbles and preserve the design.
Incorporating Glitter And Mica Powders
Glitter adds sparkle and shine to resin crafts. Choose fine or chunky glitter for different effects. Mica powders give a smooth, pearly finish with a slight shimmer. Mix glitter or mica powders directly into resin before pouring. These materials catch light and make your pieces glow beautifully.
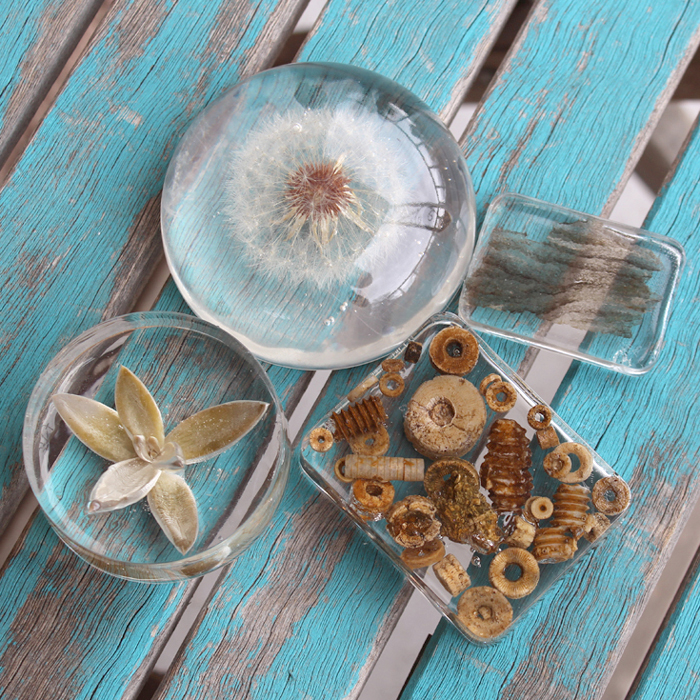
Embedding Objects And Inclusions
Embedding objects adds depth and interest to resin crafts. Small items like dried flowers, beads, or charms work well. Place objects carefully inside the resin mold before it cures. These inclusions create unique textures and stories within your art. Make sure objects are dry and clean for best results.
Pouring And Molding
Pouring and molding are key steps in resin crafts. These steps shape your resin into beautiful, lasting creations. Careful pouring ensures a smooth finish. Proper molding helps your craft keep its form and detail. Let’s explore how to choose molds, layer resin, and remove bubbles for perfect results.
Selecting Silicone Molds
Silicone molds are flexible and easy to use. They release resin pieces smoothly without damage. Choose molds that fit your project size. Look for clean, simple shapes for beginners. Clear or light-colored molds help you see resin fill. Avoid damaged or dirty molds to prevent defects.
Layering Techniques For Depth
Layering resin adds depth and dimension to your craft. Pour thin layers and let each cure before adding the next. This prevents colors from mixing too much. Embed small objects between layers for extra interest. Patience during layering creates rich, 3D effects in your design.
Removing Bubbles During Pouring
Bubbles can spoil the smooth resin surface. Use a heat gun or torch briefly to pop bubbles after pouring. Pour resin slowly to reduce air trapped inside. Stir resin gently to avoid creating bubbles. If bubbles appear, use a toothpick to lift them to the surface.
Curing And Finishing
After pouring resin into molds or creating your design, curing and finishing are crucial steps. Proper curing ensures your resin piece hardens fully without stickiness. Finishing adds smoothness and shine, making your craft look professional and durable.
Understanding curing and finishing helps you avoid common problems like bubbles, dull surfaces, or scratches. This section covers curing times, sanding, polishing, and protective coatings to complete your resin project.
Curing Times And Conditions
Resin needs time to harden. Most epoxy resins cure within 24 to 72 hours. Temperature affects curing speed. Ideal room temperature is between 70°F and 75°F (21°C to 24°C). Keep resin away from dust and direct sunlight during curing.
Use a level surface to prevent resin from pooling unevenly. Avoid touching resin until it is fully cured. Soft spots mean it needs more time.
Sanding And Polishing Resin Pieces
After curing, resin may have bumps or rough edges. Sanding smooths these imperfections. Start with coarse grit sandpaper (around 220 grit). Gradually move to finer grits, up to 1000 or 1500 grit, for a smooth finish.
Polish resin to bring out a clear shine. Use a plastic polish or a fine polishing compound. Buff with a soft cloth. Polishing removes small scratches and restores gloss.
Applying Protective Coatings
Protect your resin craft from scratches and yellowing with a clear coating. Use a UV-resistant spray or brush-on varnish designed for resin. This coating helps keep colors bright and surface strong.
Apply thin, even layers. Let each layer dry completely before adding the next. Protective coatings extend the life of your resin art and keep it looking new.
Beginner Project Ideas
Starting with resin crafts can be exciting and fun. Simple projects build skills and confidence. Beginner projects help you learn how resin works. They are quick and require few materials. Explore these easy ideas to create beautiful items.
Each project can be personalized with colors and shapes. These ideas use common molds and simple techniques. Perfect for your first steps in resin crafting.
Simple Resin Coasters
Resin coasters are perfect for beginners. Use silicone molds shaped like circles or squares. Mix resin with color pigments or glitter. Pour the resin into the mold and let it cure. Add leaves, dried flowers, or small decorations for a unique touch. Coasters dry fast and are easy to remove.
Jewelry Pieces Like Earrings And Pendants
Create small resin jewelry with simple molds. Earrings and pendants are quick to make. Add tiny objects like beads, glitter, or pressed flowers inside. Use resin tint for colorful effects. Attach jewelry findings after curing. These pieces make great gifts or personal accessories.
Decorative Home Accessories
Try small home items like resin trays or keychains. Use molds with fun shapes to keep it simple. Mix resin with mica powder or alcohol inks. Layer colors or embed small items for style. These accessories add charm to any room. They also help you practice layering and pouring skills.
Troubleshooting Common Issues
Troubleshooting common issues in resin crafts helps keep projects smooth and enjoyable. Many beginners face problems like cloudiness, stickiness, or resin sticking to surfaces. Knowing how to fix these issues saves time and materials.
Dealing With Cloudiness
Cloudiness happens when resin mixes with moisture or cures too fast. Work in a dry space to avoid moisture. Mix resin slowly to reduce air bubbles. Use a heat gun or torch gently to clear small bubbles. Store resin at room temperature for best results.
Fixing Sticky Or Soft Resin
Sticky resin means it did not cure fully. Check your resin’s mixing ratio carefully. Mix resin and hardener thoroughly for at least 3 minutes. Avoid pouring resin in very cold or humid places. If resin stays sticky, add a thin layer of fresh resin on top and let it cure.
Preventing Resin From Sticking To Surfaces
Use silicone molds or surfaces with a non-stick coating. Cover work surfaces with plastic or wax paper. Apply a release spray if needed. Avoid using materials like polypropylene or polyethylene, as resin won’t stick well. Proper preparation helps remove resin easily after curing.
Advanced Techniques
Advanced resin techniques allow crafters to explore new styles and effects. These methods bring creativity and precision to your projects. Learning these skills expands what you can make with resin. Experimenting with different materials and tools adds texture and depth. The following techniques focus on enhancing your resin craft skills.
Using Uv Resin For Quick Cures
UV resin cures fast under ultraviolet light. This saves time compared to traditional epoxy resin. It is perfect for small projects and detailed designs. You can work layer by layer without waiting hours. UV resin also reduces bubbles and gives a smooth finish. Use a UV lamp or sunlight to cure your piece quickly.
Creating Resin Art With Flowers
Embedding flowers in resin creates beautiful and natural art. Dry flowers work best to avoid moisture problems. Arrange flowers carefully in your mold or frame. Pour resin slowly to prevent moving the flowers. This technique preserves the delicate details and colors of the blooms. Floral resin art makes unique gifts and decorations.
Combining Resin With Other Craft Materials
Mix resin with wood, metal, or fabric for mixed media crafts. This combination adds texture and visual interest. Seal porous materials before applying resin to prevent absorption. Use resin as a glue or a protective coating. Layering resin with different materials creates depth and shine. This method broadens the scope of resin art projects.
Selling Resin Crafts
Selling resin crafts offers a chance to turn your passion into profit. Handmade resin items attract many buyers because of their unique designs and vibrant colors. Understanding how to price, market, and ship your creations will help you succeed in this craft business. Below are key tips to get started.
Pricing Your Creations
Set prices based on materials, time, and effort spent. Calculate the cost of resin, pigments, molds, and other supplies. Add the hours you spend crafting each piece. Research similar products online to see common price ranges. Avoid pricing too low, or you may lose money. Too high prices might scare buyers away. Find a balance that values your work fairly.
Marketing Tips For Beginners
Start by sharing your crafts on social media platforms. Use clear photos showing your items from different angles. Write simple descriptions explaining the materials and uses. Join craft groups or local markets to meet potential customers. Ask friends and family to spread the word. Offer promotions or discounts for first buyers. Keep your posts regular to maintain interest.
Packaging And Shipping
Use sturdy boxes to protect your resin crafts during transit. Wrap each item carefully with bubble wrap or tissue paper. Choose eco-friendly packaging to appeal to conscious buyers. Label packages with clear addresses and return info. Offer tracking options to build buyer trust. Ship orders quickly to keep customers happy. Good packaging and prompt delivery encourage repeat sales.
Frequently Asked Questions
How To Start Resin Art As A Beginner?
Start resin art by gathering epoxy resin, hardener, molds, and safety gear. Mix resin and hardener carefully. Pour into molds, add colors or objects, then let cure fully. Practice with simple projects like coasters to build skills and confidence.
What Should You Not Put In Resin?
Avoid putting items that contain moisture, silicone, Teflon, polyethylene, polypropylene, or anything porous in resin. These prevent proper curing and adhesion.
What Is The Best Beginner Resin Project?
The best beginner resin project is making coasters. Use silicone molds, mix epoxy resin with colorants, and pour. Coasters are simple, quick, and allow creative designs with alcohol inks, mica powders, or glitter. This project helps beginners practice resin pouring and curing easily.
How To Make Resin Crafts At Home?
Prepare your workspace and molds. Mix epoxy resin with hardener as instructed. Add colors or objects, then pour into molds. Use toothpicks to adjust elements. Let cure fully before removing crafts.
Conclusion
Resin crafts offer a fun and creative way to make unique art. Start with simple projects like coasters or keychains. Use clear instructions and quality materials for best results. Practice patience while waiting for the resin to cure. Enjoy experimenting with colors, shapes, and designs.
Each project helps you improve your skills. Resin crafting can be a relaxing hobby for all ages. Keep your workspace clean and organized for safety. Share your beautiful creations with friends and family. Dive into resin crafts and discover endless creative possibilities.