Are you ready to turn delicate flowers into stunning keepsakes that last forever? Resin crafts with flowers offer a beautiful way to capture nature’s charm in a clear, glossy finish.
Whether you want to create unique jewelry, coasters, or decorative art pieces, this resin crafts tutorial will guide you step-by-step to achieve professional-looking results. You don’t need to be an expert—just a bit of patience and creativity. Imagine your favorite blooms preserved perfectly, ready to brighten your space or make thoughtful gifts.
Keep reading, and you’ll discover easy techniques that anyone can master to bring your floral resin projects to life.

Materials And Tools
Gathering the right materials and tools ensures a smooth resin craft experience. Each item plays a key role in creating beautiful flower designs. Understanding these essentials helps beginners work confidently and avoid mistakes.
Choosing The Right Resin
Select a clear epoxy resin for flower crafts. It cures with a glossy, glass-like finish. Choose a resin with low odor to keep your workspace pleasant. Check the curing time; some resins harden quickly, while others take longer. Make sure the resin is UV resistant to prevent yellowing over time. Avoid resin types that produce excessive bubbles or shrink during curing.
Selecting Fresh And Dried Flowers
Pick flowers that match your design style and size. Fresh flowers need drying before using in resin to stop moisture problems. Dried flowers work well and keep their shape nicely. Pressed flowers fit flat resin projects like bookmarks or jewelry. Avoid flowers with thick petals or high moisture content, as they may trap air bubbles or spoil. Use tweezers to handle delicate flowers gently.
Additional Supplies Needed
Gather silicone molds in various shapes for easy resin removal. Use mixing cups and stirring sticks for precise resin preparation. Gloves protect your hands from resin chemicals. A heat gun or torch helps remove resin bubbles. Sandpaper smooths edges after curing. Work on a flat, clean surface covered with wax paper or plastic. Have paper towels ready for quick cleanups and spills.
Preparing Flowers For Resin
Preparing flowers for resin crafts is a key step to create beautiful and lasting art pieces. Fresh flowers contain moisture that can cloud resin or cause decay. Proper preparation helps maintain the flower’s shape, color, and detail inside the resin. This section covers simple methods to dry and preserve flowers for resin projects. Follow these tips for clear, vibrant results.
Drying Techniques
Drying flowers removes moisture and prevents mold inside resin. Pressing flowers between heavy books or using a flower press works well for flat flowers. Silica gel drying preserves three-dimensional shapes by absorbing moisture quickly. Air drying is another option; hang flowers upside down in a dry, dark place for several days. Choose the method that suits your flower type and project needs.
Preserving Flower Colors
Colors can fade during drying or after resin casting. To keep colors bright, dry flowers away from direct sunlight. Silica gel drying often preserves colors better than air drying. You can also spray flowers lightly with hairspray or a floral sealant before resin to protect pigments. Using fresh, vibrant flowers at the start improves color retention. Bright colors add charm to your resin art.
Avoiding Air Bubbles
Air bubbles can spoil the clear look of resin crafts. To reduce bubbles, gently tap resin molds after pouring. Use a toothpick or needle to pop small bubbles on the flower surface. Mixing resin slowly limits trapped air. Also, warm resin slightly before use to improve flow. Proper flower drying reduces moisture that causes bubbles. Careful handling ensures smooth, glass-like resin finishes.
Basic Resin Flower Techniques
Basic resin flower techniques form the foundation of beautiful resin crafts. These methods help you create clear, lasting pieces with real flowers. Understanding these steps makes your projects easier and more enjoyable.
Focus on mixing resin well, embedding flowers carefully, and layering for a realistic look. Each technique adds value to your resin flower art. Follow these simple guides to start crafting with confidence.
Mixing Resin Properly
Measure resin and hardener in equal parts. Pour both into a clean cup. Stir slowly for at least three minutes. Avoid whipping air into the mixture. Proper mixing ensures clear, bubble-free resin. Use a wooden stick or silicone spatula for best results.
Embedding Flowers Step-by-step
Choose dry, pressed flowers for best results. Pour a thin layer of resin into the mold. Place flowers gently on the resin layer. Use a toothpick to adjust flower position. Pour more resin slowly to cover flowers. Remove bubbles with a heat gun or torch. Let resin cure fully before handling.
Layering For Depth
Create depth by pouring resin in thin layers. Add flowers or decorations between each layer. Allow each layer to cure before adding the next. This technique gives a 3D effect to your flowers. Layering makes your resin art look professional and lively.
Creative Floral Design Ideas
Creative floral designs bring a fresh and natural touch to resin crafts. Using flowers in resin lets you capture their beauty forever. These ideas inspire you to make charming and unique pieces. They are easy to create and perfect for gifts or home decor.
Coasters And Trinket Dishes
Embed dried flowers in resin to make colorful coasters. Choose bright petals or delicate small blooms. Layer flowers carefully to avoid bubbles. Seal with clear resin for a glossy finish. Trinket dishes with floral designs add a personal touch to any space. They hold jewelry or keys while showing off natural beauty.
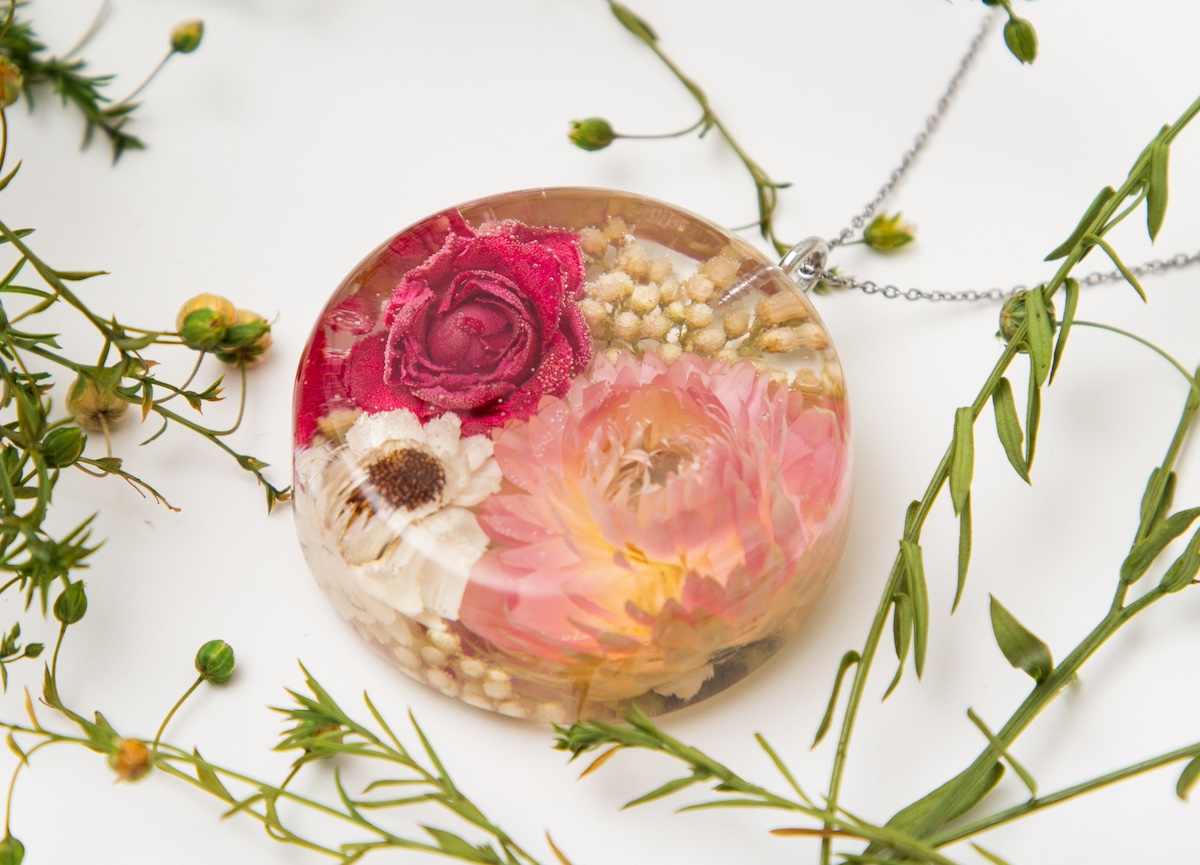
Jewelry And Pendants
Floral resin jewelry looks elegant and timeless. Tiny flowers pressed in resin create lovely pendants and earrings. Use molds in different shapes for variety. Add gold flakes or glitter for extra shine. These pieces make great gifts and can match any outfit. Resin protects flowers and keeps them looking fresh for years.
Wall Art And Decorative Pieces
Floral resin art brightens up any room. Arrange flowers on a flat surface and pour resin over them. Create abstract or patterned designs with various flower types. Use frames or wooden bases to display the art. Large resin pieces with flowers become eye-catching wall decor. They bring nature indoors with a modern twist.
Advanced Resin Crafting
Advanced resin crafting opens new paths for floral art. This level involves mixing materials and techniques to make unique pieces. It requires patience and practice but yields stunning results. Experiment with wires, colors, and 3D shapes to bring flowers to life in resin.
Explore how to combine metal and resin, add vibrant hues, and create depth. These steps push your skills and help craft eye-catching floral designs.
Incorporating Wire And Resin
Wire adds structure and detail to resin flowers. Shape thin wire into petals or stems before pouring resin. The wire holds form and supports delicate resin parts. Use copper or aluminum wire for easy bending. Embed wire frames in resin layers to build complex shapes. This technique gives flowers a natural, lifelike look.
Using Colorants And Embellishments
Add colorants to resin for bright, custom flowers. Mix pigments, dyes, or mica powders into resin before pouring. Create gradients or marbled effects by blending colors gently. Embellishments like glitter or tiny beads add sparkle and texture. Place these carefully inside resin layers to avoid clumping. These touches make floral crafts stand out with vivid beauty.
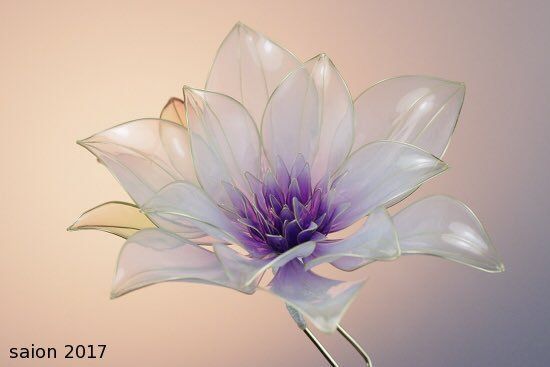
Creating 3d Floral Effects
Build flowers in three dimensions by layering resin and elements. Pour thin resin layers, adding petals or leaves between pours. Let each layer cure before adding the next. This method creates depth and realism in your flowers. Use molds or freehand shapes with resin and wire. 3D effects give your crafts a striking, lifelike appearance that draws attention.
Troubleshooting Tips
Troubleshooting common issues in resin flower crafts helps create beautiful, clear pieces. Simple problems like yellowing, bubbles, or wrong materials can spoil your work. Knowing how to fix these issues saves time and materials. Below are key tips to keep your resin crafts flawless and long-lasting.
Preventing Yellowing And Uv Damage
Yellowing happens when resin reacts to sunlight and heat. Use UV-resistant resin to slow this process. Keep your finished pieces out of direct sunlight. Store them in cool, dark places. Adding UV inhibitors to your resin mix helps protect colors. These steps keep flowers bright and resin clear for years.
Fixing Bubbles And Imperfections
Bubbles form when air gets trapped during mixing or pouring. Mix resin slowly to reduce air bubbles. Use a heat gun or torch lightly over the surface to pop bubbles. If bubbles remain, use a toothpick to remove them carefully. Sand rough spots with fine-grit sandpaper after curing. Polishing after sanding restores shine and smoothness.
What Not To Embed In Resin
Some materials do not work well with resin. Avoid fresh flowers because they release moisture and cause cloudiness. Do not use plastics like polyethylene, polypropylene, or silicone, as resin won’t stick. Metals may rust inside resin unless sealed properly. Always use dried or sealed flowers and safe materials for clear, lasting results.
Care And Maintenance
Caring for resin floral crafts helps keep their beauty intact. Proper care prevents damage and preserves shine. Resin flowers are delicate and need gentle handling. Follow simple steps to maintain your resin floral art for years.
Cleaning Resin Floral Crafts
Use a soft cloth to clean resin flowers. Avoid harsh chemicals or abrasive materials. Mild soap with water works best for dirt removal. Gently wipe the surface without scrubbing. Dry with a soft towel to prevent water spots.
Storage Recommendations
Store resin crafts in a cool, dry place. Keep them away from direct sunlight to avoid yellowing. Avoid high heat and humidity, which can cause damage. Use a dust-free container or display case for protection. Handle carefully to prevent scratches or cracks.
Ensuring Longevity
Keep resin flowers out of harsh environments. Avoid exposure to strong sunlight or extreme temperatures. Regularly dust them with a soft brush or cloth. Protect your crafts from drops or impacts. Proper care helps your resin flowers stay vibrant and beautiful.
Frequently Asked Questions
How To Make Resin Flowers For Beginners?
Start by drying flowers completely. Mix resin and hardener as per instructions. Pour resin into a mold, place flowers carefully, then add more resin to cover. Let it cure fully in a dust-free area. Sand edges if needed for a smooth finish.
What Should You Not Put In Resin?
Avoid putting moisture, food, wax, or oily items in resin. Also, skip plastics like polyethylene, polypropylene, silicone, and Teflon. These materials prevent resin from curing or sticking properly.
How To Put Flowers In Resin?
Dry flowers completely before use. Pour a thin resin layer in the mold. Place flowers gently on resin. Add more resin to cover flowers fully. Cure resin as per instructions.
Will Dried Flowers Last Forever In Resin?
Dried flowers sealed in resin can last indefinitely. Resin protects them from air and moisture, preserving color and shape. Over time, UV light may cause slight yellowing. Store resin pieces away from direct sunlight to maintain their appearance longer.
Conclusion
Creating resin flower crafts brings joy and beauty to any space. The process is simple and fun to try at home. Each piece you make holds a special, lasting memory. Experiment with colors and shapes to find your style. Keep practicing, and your skills will grow every day.
Enjoy the art of preserving nature’s charm in resin. Start crafting today and see where your creativity leads.