Are you ready to create a stunning resin keychain that’s uniquely yours? Whether you want to make a personalized gift or add a stylish accessory to your keys, this resin crafts tutorial will guide you step-by-step.
You don’t need any prior experience—just a bit of creativity and a few simple materials. Imagine holding a beautiful keychain you made yourself, filled with colors, glitter, or even tiny keepsakes. Keep reading, and you’ll discover easy techniques that turn your ideas into eye-catching resin art.
Let’s dive in and make something amazing together!

Materials Needed
Creating resin keychains requires specific materials. Gathering the right supplies ensures a smooth crafting process. This section covers essential items for your resin crafts.
Resin Types
Choose clear epoxy resin for a glossy finish. UV resin cures quickly under sunlight or a UV lamp. Polyester resin is strong but has a strong odor. Pick resin based on your project needs and workspace.
Molds And Accessories
Silicone molds come in many shapes and sizes. They make demolding easy and protect your resin. Use keychain hardware like jump rings and chains to complete your keychain. Mixing cups and stir sticks help blend resin and hardener well.
Decorative Elements
Add dried flowers, glitter, or tiny beads for decoration. Use stickers or small charms to personalize your keychain. Colors and pigments let you create unique designs. Choose lightweight decorations to avoid affecting the resin’s cure.
Preparing Your Workspace
Preparing your workspace is the first step in making a resin keychain. A clean and organized area helps you work safely and efficiently. Setting up right makes the crafting process smooth and enjoyable. Take time to arrange everything before you start.
Safety Precautions
Resin contains chemicals that can irritate your skin and lungs. Always wear gloves to protect your hands. Use a mask to avoid breathing in fumes. Work in a well-ventilated space, like near an open window. Keep food and drinks away from your area. Have a fire extinguisher nearby, just in case.
Organizing Tools
Gather all your tools before you begin. You will need mixing cups, sticks, molds, and keychain rings. Place them within easy reach on your table. Use a tray or container to hold small items. Keep paper towels and cleaning supplies close by. A tidy workspace helps you focus and avoid mistakes.
Mixing Resin
Mixing resin is a key step in creating beautiful resin crafts like keychains. Proper mixing ensures the resin hardens well and looks clear and smooth. It requires attention to detail and patience. Small mistakes can cause the resin to stay sticky or have bubbles.
Understanding how to measure, mix, and avoid bubbles will improve your resin projects. Follow each step carefully for the best results.
Measuring Resin And Hardener
Measure the resin and hardener carefully. Use a clean container with clear markings. The common ratio is 1:1 or 2:1, depending on your resin type. Check the instructions on your resin package. Accurate measurement ensures the resin cures properly. Too much hardener or resin causes problems. Always use a disposable cup for mixing. This keeps the process clean and simple.
Mixing Techniques
Pour both parts into the mixing cup slowly. Stir gently but thoroughly for at least 3 to 5 minutes. Use a wooden stick or plastic spatula. Mix from the bottom to the top. Scrape the sides of the cup well. Avoid whipping air into the mixture. A slow and steady stir works best. Proper mixing activates the hardening process evenly.
Avoiding Bubbles
Bubbles can ruin the clear look of your keychain. After mixing, let the resin sit for a few minutes. This allows bubbles to rise and pop. You can also tap the cup gently on a hard surface. Use a heat gun or a small torch carefully to remove surface bubbles. Avoid overheating the resin. Pour the resin slowly into your mold to reduce bubbles. Taking these steps gives your keychain a smooth finish.
Creating Keychain Designs
Creating keychain designs with resin is a fun way to make personal accessories. Resin lets you trap small objects inside clear, hard plastic. This craft is simple and gives many chances to be creative. You can mix colors, add decorations, or use small keepsakes inside your keychain. Each piece becomes unique and special.
Designing your resin keychain starts with picking what to put inside. Small items look great and tell a story. The next step is arranging these items in the mold before pouring resin. The resin will hold everything in place and protect it. Your design can be bright, shiny, or filled with memories. Here are some popular ideas to try.
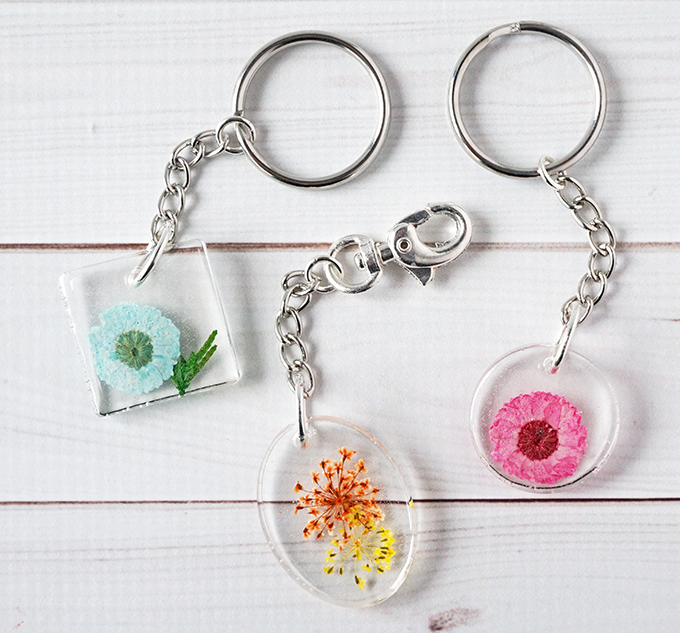
Using Dried Flowers
Dried flowers add a natural and delicate touch. Press and dry flowers flat for best results. Place them carefully in the resin mold. The clear resin shows the flower’s color and shape well. Choose small petals or tiny blossoms. They fit easily and look detailed inside the keychain. Dried flowers create a soft, pretty design anyone can enjoy.
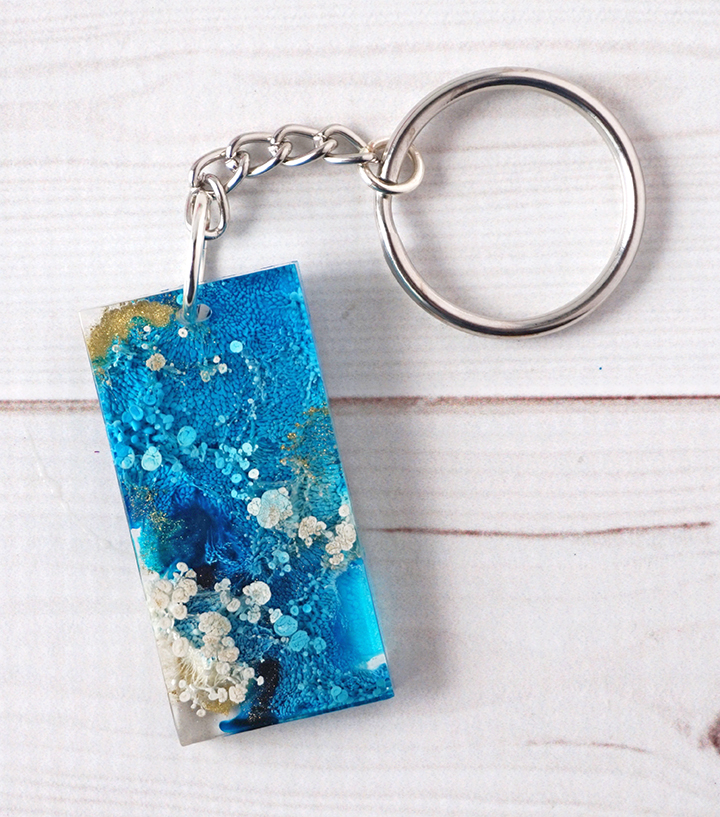
Adding Glitter And Beads
Glitter brings sparkle and shine to resin crafts. Sprinkle glitter evenly in the mold before pouring resin. Mix different colors or sizes for a fun effect. Beads add texture and depth to the keychain. Use small beads to avoid lumps. Spread them around or group them for patterns. Both glitter and beads catch light and make your keychain stand out.
Embedding Photos And Letters
Photos and letters hold special meaning in resin keychains. Print small images or cut letters from paper. Use a thin layer of resin to fix them inside the mold first. This keeps the photo or letter from moving. Cover them with more resin for a smooth finish. These designs keep memories or names close. Personal touches like these make your keychain truly yours.
Pouring Resin Into Molds
Pouring resin into molds is a key step in making beautiful resin keychains. This process shapes your resin into the form you want. It also sets the base for adding colors and decorations. Pouring resin carefully helps avoid mistakes like spills and uneven surfaces.
Prepare your workspace and wear gloves for safety. Mix the resin and hardener according to the instructions. Stir slowly to reduce bubbles. Once mixed, pour the resin into the mold gently. Fill the mold to the top but do not overflow. Pouring slowly gives you control over the shape.
Layering Techniques
Layering resin creates depth and adds interest to your keychain. Pour a thin layer of resin first and let it cure slightly. Add decorations like dried flowers or glitter on this layer. Then pour another layer of resin to cover the decorations. Repeat these steps for more layers. Allow each layer to firm up before adding the next. This method prevents colors from mixing and keeps designs clear.
Removing Air Bubbles
Air bubbles can spoil the smooth look of your resin keychain. Use a heat gun or a small torch lightly over the resin surface. The heat helps bubbles rise and pop quickly. You can also use a toothpick to gently pop bubbles on the surface. Pour resin slowly and stir gently to reduce bubbles. Removing bubbles early ensures a clear and shiny finish.
Curing Process
The curing process is a vital step in making resin keychains. It helps the resin harden and become strong. Proper curing ensures your keychain looks clear and lasts a long time. Skipping or rushing this step can cause soft or sticky resin. Understanding the right temperature and time for curing improves your craft.
Optimal Temperature
Resin cures best at a warm and stable temperature. Aim for around 70 to 75 degrees Fahrenheit (21 to 24 degrees Celsius). Too cold can slow down curing and cause bubbles. Too hot may cause resin to yellow or crack. Keep your workspace free of drafts and direct sunlight. This helps maintain even temperature for smooth curing.
Curing Time Tips
Most resin keychains need 24 to 48 hours to fully cure. Follow the instructions on your resin package closely. Avoid touching or moving the keychain during this time. Use a clean, dust-free area to prevent particles from sticking. Patience is key to get a hard, clear finish. If unsure, wait longer rather than less.
Finishing Touches
The finishing touches are essential for a beautiful resin keychain. They improve the look and feel. These final steps make your craft professional and durable. Pay close attention to sanding, polishing, and attaching key rings. Each step adds value and charm to your piece.
Sanding And Polishing
Start by sanding the resin keychain edges. Use fine-grit sandpaper to smooth rough spots. Sand gently to avoid scratches or damage. After sanding, polish the surface for shine. Use a polishing compound or resin polish. Buff the keychain with a soft cloth. This step brings out a clear, glossy finish. It enhances color and detail inside the resin.
Attaching Key Rings
Choose a sturdy key ring that fits your design. Use a small metal jump ring to connect the keychain. Open the jump ring with pliers carefully. Slide the resin charm and key ring onto it. Close the jump ring tightly to secure the parts. Make sure the connection is strong to avoid losing the keychain. This step completes your craft and makes it ready to use or gift.
Troubleshooting Tips
Troubleshooting is an important skill in resin crafts. Small errors can affect the final look of your keychain. Knowing how to spot and fix problems saves time and materials. This section covers common mistakes and ways to fix imperfections in your resin keychains.
Common Mistakes
One common mistake is mixing resin and hardener incorrectly. This can cause sticky or soft resin. Avoid this by measuring carefully and stirring slowly. Air bubbles often appear if you stir too fast. Let the mixture sit for a few minutes before pouring. Using dirty molds or tools can cause defects. Always clean your workspace and equipment before starting.
Fixing Imperfections
Small bubbles can be popped with a toothpick or heat gun. If the surface feels rough or has dust, lightly sand it with fine-grit sandpaper. Apply a thin layer of resin to smooth the surface again. For yellowing or cloudiness, check the resin’s expiration date and storage conditions. If your keychain has sharp edges, use a file to round them off gently. These fixes help you achieve a polished and professional look.
Creative Design Ideas
Creative design ideas bring life to resin keychain crafts. They allow you to express personality and style. Crafting resin keychains offers endless possibilities for unique creations. Simple touches transform plain resin into standout pieces. Explore different concepts to make your keychains special and eye-catching.
Personalized Keychains
Personalized keychains make perfect gifts and keepsakes. You can add names, initials, or special dates using resin letters or decals. Embedding small photos or meaningful charms creates a unique touch. Use color combinations that reflect the recipient’s taste. Personalization adds sentimental value and makes each keychain one of a kind.
Themed Collections
Themed collections tell a story through matching designs. Choose themes like nature, holidays, or hobbies for cohesive sets. Incorporate tiny objects like dried flowers, glitter, or miniature figures inside resin molds. Themes help organize your craft and appeal to specific interests. Collections can inspire new ideas and keep your creativity flowing.
Gift And Sale Tips
Crafting resin keychains is fun and rewarding. Sharing your creations as gifts or selling them adds joy. Proper presentation and smart pricing make your work stand out. These tips help you present and price your resin crafts well.
Packaging Ideas
Choose simple, neat packaging to highlight your resin keychains. Clear plastic boxes protect your crafts and show their beauty. Use small, reusable bags with a soft cloth inside for a personal touch. Add a small thank-you card or care instructions to connect with buyers. Natural materials like kraft paper and twine create a warm, handmade feel. Avoid bulky or flashy packaging that hides the keychain’s details.
Pricing Your Crafts
Calculate the cost of materials before setting prices. Include resin, molds, key rings, and any decorations. Add your time spent crafting; value your skill and effort. Check prices of similar resin keychains online to stay competitive. Start with a fair price and adjust as demand grows. Offer discounts for bulk orders or repeat customers to encourage sales. Keep prices clear and simple to avoid confusion.
Frequently Asked Questions
What Materials Are Needed For Resin Keychain Crafting?
You need epoxy resin, hardener, molds, mixing cups, and keychain rings. Optional items include dried flowers, glitter, and pigments for decoration.
How Long Does Resin Curing Take For Keychains?
Resin typically cures in 24 to 48 hours. The curing time depends on the resin type and environmental conditions like temperature.
Can Beginners Easily Make Resin Keychains?
Yes, resin keychains are beginner-friendly. With basic tools and step-by-step guidance, anyone can create beautiful resin crafts.
How To Add Dried Flowers In Resin Keychains?
Place dried flowers carefully in the resin mold before pouring resin. Ensure flowers are fully dry to avoid moisture issues.
Conclusion
Creating resin keychains is fun and simple. You can personalize each piece your way. Use dried flowers, glitter, or small charms inside the resin. Mix and pour carefully to avoid bubbles. Let the resin cure fully for the best results.
These keychains make unique gifts or personal accessories. Practice a few times to improve your skill. Enjoy crafting and showing off your handmade resin keychains!