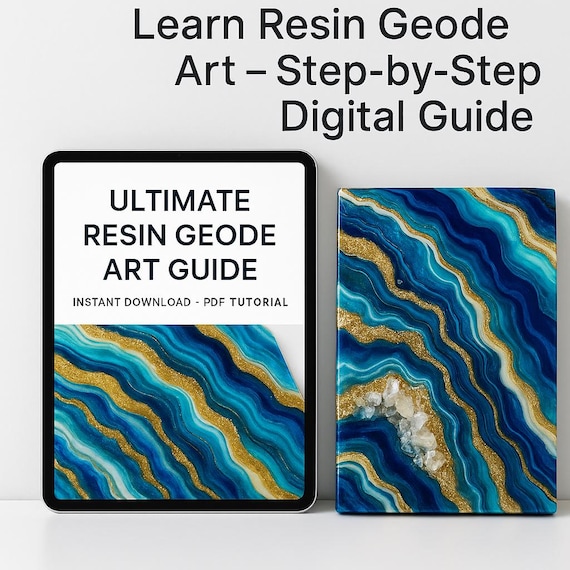
Have you ever wanted to create stunning art that looks like it came straight from nature? Resin geode art lets you do just that, turning simple materials into dazzling, colorful pieces that catch everyone’s eye.
In this step-by-step guide, you’ll learn exactly how to make your own resin geode art, even if you’ve never worked with resin before. By the end, you’ll have the skills to create beautiful designs that you’ll be proud to display or gift.
Ready to unlock your creativity? Let’s dive in!
Materials Needed
Creating resin geode art requires specific materials to achieve stunning, crystal-like effects. The right supplies ensure your project looks professional and lasts long. This section covers essential materials needed, including resin types, colorants, pigments, and tools. Understanding each category helps in selecting the best products for your artwork.
Resin Types
Choosing the correct resin is the first step in resin geode art. There are mainly two types of resin used by artists:
- Epoxy Resin: Popular for its clear finish and easy use. It cures slowly, giving time to work on details.
- Polyester Resin: Dries faster but has a strong smell. Not ideal for beginners due to its quick curing time.
Epoxy resin is the preferred choice because it offers a smooth, glossy surface and less toxicity. It also resists yellowing over time. Key features to consider include:
| Resin Type | Working Time | Finish | Safety |
|---|---|---|---|
| Epoxy Resin | 20-40 minutes | Clear, glossy | Low odor, safer |
| Polyester Resin | 10-20 minutes | Glossy but less clear | Strong odor, less safe |
Always buy resin kits that include both resin and hardener. Mix them in the right ratio for best results. Use gloves and work in a well-ventilated area for safety.
Colorants And Pigments
Colorants bring life to resin geode art. They create layers, depth, and the beautiful look of natural geodes. Use pigments designed for resin to avoid clumping or fading. Common options include:
- Alcohol Inks: Bright, transparent colors. They spread easily and blend well.
- Powder Pigments: Opaque and vibrant. Perfect for solid colors and metallic effects.
- Liquid Dyes: Concentrated colors that mix smoothly with resin.
Mix small amounts of colorants to control the shade. Too much pigment can affect resin curing. Here is a simple guideline for pigment use:
- Start with a small drop or pinch.
- Mix well to see the true color.
- Add more if needed, slowly.
Using white or black pigments helps create contrast and highlights. You can also add mica powders for shimmer and sparkle. Test colors on a small resin batch before applying to your project.
Tools And Supplies
Having the right tools makes resin geode art easier and more precise. Gather these essential supplies:
- Mixing Cups: Disposable, clear cups with measurement marks.
- Stir Sticks: Wooden or plastic sticks for mixing resin and hardener.
- Silicone Molds: Shapes like circles or freeform for pouring resin.
- Heat Gun or Torch: Removes bubbles from resin surface.
- Protective Gear: Gloves, masks, and aprons for safety.
- Palette Knives or Toothpicks: For spreading resin and placing details.
- Measuring Scale: Ensures accurate resin and hardener ratios.
Organize your workspace with paper towels and plastic sheets to catch spills. Keep a level surface for curing resin evenly. Proper lighting helps you see color layers clearly. Clean tools immediately after use to avoid hardened resin buildup.

Preparing The Workspace
Creating resin geode art requires a well-prepared workspace to ensure smooth crafting and beautiful results. Preparing the workspace means organizing tools, protecting surfaces, and setting a safe environment. A neat area helps avoid mistakes and makes the process more enjoyable. Clear space reduces distractions and keeps your materials within reach. This section guides you through setting up a clean area and taking important safety steps before starting your resin geode project.
Setting Up A Clean Area
A clean, organized workspace is vital for resin art. Resin can spill easily and stick to surfaces. Protect your area with disposable coverings like plastic sheets or silicone mats. Choose a flat, sturdy table with good lighting. Natural light works best, but bright lamps also help you see details clearly.
Keep all your tools and materials ready before you start. Use small containers or trays to hold pigments, glitter, and resin cups. This helps prevent clutter and accidental spills.
- Cover your workspace: Use plastic, parchment paper, or silicone mats.
- Organize tools: Brushes, mixing sticks, cups, and pigments close by.
- Have paper towels or wipes: For quick cleanups.
- Set a trash bin nearby: For easy disposal of waste.
Keep your work area free of dust and dirt. Dust can stick to resin and ruin your art’s smooth finish. Wipe surfaces with a damp cloth before starting. Work in a well-ventilated room to help resin cure properly and reduce fumes.
| Item | Purpose | Tips |
|---|---|---|
| Plastic Sheet or Silicone Mat | Protects table from resin spills | Choose a size larger than your project |
| Mixing Cups | Hold resin and pigments | Use disposable cups for easy cleanup |
| Brushes and Sticks | Mix and spread resin | Clean or dispose after use |
| Paper Towels | Clean spills and wipe tools | Keep extra rolls nearby |
Safety Precautions
Working with resin requires careful safety steps. Resin contains chemicals that can irritate skin and lungs. Protect yourself to avoid health problems. Always wear gloves made from nitrile or latex to stop resin from touching your skin. Avoid touching your face or eyes while working.
Use a mask or respirator to avoid breathing in fumes. Resin fumes can cause headaches or dizziness. Work near an open window or use a fan to keep fresh air flowing. Keep your workspace away from children and pets to prevent accidents.
- Wear protective gloves: Nitrile or latex gloves work best.
- Use a respirator mask: Rated for organic vapors.
- Protect your clothes: Wear old clothes or an apron.
- Ventilate the room: Open windows and use fans.
- Keep a first aid kit nearby: For quick response to spills or skin contact.
Store resin and hardener containers tightly closed and out of direct sunlight. Dispose of resin waste properly by following local hazardous waste rules. Never pour resin down the drain or in regular trash bins.
| Safety Item | Reason | Additional Tips |
|---|---|---|
| Gloves | Prevent skin contact with resin | Change gloves if torn or sticky |
| Respirator Mask | Protect lungs from fumes | Check mask fit and filter regularly |
| Ventilation | Reduce harmful fumes in air | Use fans and open windows |
| Proper Storage | Keep resin safe and effective | Store in cool, dry place |
Design Planning
Design planning is a vital step in creating resin geode art. This phase sets the foundation for your project’s success. Careful planning helps you visualize the final piece and guides your material choices. It also saves time and reduces mistakes during crafting. Focus on two main areas: selecting the geode shape and deciding on color schemes and patterns. Both affect the appearance and style of your resin art. Thoughtful design planning makes your geode art unique and beautiful.
Choosing A Geode Shape
The shape of your resin geode determines the overall look of the artwork. Geodes come in many shapes, from simple circles to irregular forms. Pick a shape that fits your skill level and design idea. Here are some common options:
- Round: Classic and easy to work with.
- Oval: Adds elegance and smooth lines.
- Freeform: Irregular, natural look.
- Slice: Thin, flat shapes resembling real geode cross-sections.
Consider the size as well. Larger geodes show more detail but take more resin and time. Smaller shapes work well for coasters or jewelry. Use the table below to compare shapes and their uses:
| Shape | Difficulty | Best Use | Visual Effect |
|---|---|---|---|
| Round | Easy | Coasters, wall art | Balanced, clean |
| Oval | Medium | Jewelry, decor pieces | Elegant, smooth |
| Freeform | Hard | Unique art pieces | Natural, organic |
| Slice | Medium | Ornaments, coasters | Realistic, detailed |
Choose a shape that excites you. Sketch it on paper or use software to plan. This helps avoid surprises during crafting.
Color Schemes And Patterns
Color choices bring your resin geode to life. Select colors that match your style and mood. Bright colors create energy, while soft tones feel calm. Combine colors to mimic natural stones or create abstract designs.
Start by picking a main color. Then add two or three accent colors. These accents highlight edges or inner layers of the geode. Use the tips below for color planning:
- Use contrasting colors for bold effects.
- Choose analogous colors for smooth blends.
- Include metallic pigments for shimmer.
- Test colors by mixing small resin batches.
Patterns make your geode unique. Common patterns include:
- Concentric rings: Layers radiate from the center outward.
- Crystals: Small shapes with sharp edges inside the geode.
- Veins: Thin lines crossing the design.
- Marbling: Swirls of mixed colors.
Try combining these patterns for complex looks. Use tools like toothpicks or brushes to create shapes in wet resin. Plan the order of colors and patterns carefully. This control ensures a neat and beautiful final piece.
| Color Scheme | Effect | Example Colors |
|---|---|---|
| Monochrome | Simple, elegant | Various blues |
| Analogous | Harmonious, smooth | Green, teal, blue |
| Complementary | Vibrant, eye-catching | Purple and yellow |
| Metallic | Shiny, luxurious | Gold, silver, copper |
Mixing Resin
Mixing resin is a crucial step in creating beautiful resin geode art. The quality of your mix affects the final look and durability of your piece. Resin usually comes in two parts: resin and hardener. These parts must be mixed in the right amounts and with care. A good mix ensures the resin cures properly and stays clear and strong. Mixing resin well also helps to avoid bubbles, which can spoil the smooth, glass-like finish. This section explains how to measure and combine resin and hardener correctly and how to reduce bubbles during mixing.
Measuring And Combining Resin And Hardener
Resin and hardener must be measured accurately to get the best results. Most resins use a 1:1 or 2:1 ratio by volume. Always check the instructions on your resin kit. Use clear measuring cups or syringes for precision.
- Use clean tools: Make sure your mixing cups and sticks are clean and dry.
- Measure slowly: Pour resin and hardener carefully to avoid mistakes.
- Mix in a clean container: Use a container large enough for easy stirring.
After measuring, combine the resin and hardener in your mixing cup. Stir the mixture slowly and steadily for at least 3 to 5 minutes. Stirring too fast creates bubbles, stirring too slow might not mix well. Scrape the sides and bottom of the cup often to ensure a uniform mix.
| Step | Action | Tips |
|---|---|---|
| 1 | Measure resin | Use a clear cup, pour slowly |
| 2 | Measure hardener | Match resin ratio exactly |
| 3 | Combine parts | Use a larger cup for mixing |
| 4 | Stir mixture | Stir slowly for 3-5 minutes |
| 5 | Scrape sides and bottom | Ensure even mixing |
Avoiding Bubbles
Bubbles ruin the clear, glossy look of resin geode art. Small bubbles trapped inside the resin make it look cloudy. Bubbles form when mixing, pouring, or curing. Use these tips to reduce bubbles:
- Mix slowly: Fast stirring adds air to the resin.
- Warm the resin: Slightly warm resin flows better and bubbles rise faster.
- Use a heat gun or torch: Lightly pass a heat source over the surface to pop bubbles after pouring.
- Pour resin carefully: Pour from a low height to avoid trapping air.
- Let resin sit: After mixing, let resin rest for a few minutes to release bubbles.
Some artists use a vacuum chamber or pressure pot for bubble-free resin. These tools are not necessary but help achieve a perfect finish. Remember, patience is key. Take your time during mixing and pouring to avoid bubbles.
By following these simple steps, your resin geode art will have a smooth, clear surface. Avoiding bubbles improves the shine and makes colors look vibrant and deep.
Creating The Base Layer
Creating the base layer is the first and most important step in making resin geode art. This layer sets the foundation for the entire piece. It affects the depth, color, and texture of the final design. Taking time to do this step carefully will make your geode art look professional and vibrant. The base layer also helps the resin flow smoothly and hold the other layers well.
Pouring Resin Base
Start by preparing your workspace and materials. Make sure your surface is clean and level. Use gloves and work in a well-ventilated area. Mix the resin and hardener according to the product instructions. Stir slowly to avoid bubbles. Pour the mixed resin slowly onto your canvas or mold.
- Pour resin in the center first.
- Use a spreader or a stick to move resin toward the edges.
- Keep the layer thin and even to avoid pooling.
- Use a heat gun or torch briefly to remove air bubbles on the surface.
Here is a quick checklist for pouring the resin base:
| Step | Action | Tip |
|---|---|---|
| 1 | Mix resin and hardener | Stir slowly for 3-5 minutes |
| 2 | Pour resin on surface | Start in the middle |
| 3 | Spread resin evenly | Use a spreader or stick |
| 4 | Remove bubbles | Use a heat gun carefully |
Let the resin settle for a few minutes. Avoid touching or moving the base layer until it starts to harden. This step usually takes 12 to 24 hours depending on the resin brand and room temperature.
Adding Initial Colors
After pouring the base layer, add colors to create the look of natural geodes. Use resin pigments, mica powders, or alcohol inks for bright and clear colors. Mix small amounts of color into separate resin batches before adding them to the base layer.
Work with contrasting colors to highlight the geode’s natural beauty. Use light colors for the base and darker shades for the center or edges. This contrast adds depth and interest.
- Pour colored resin in small sections on the base layer.
- Use a stick or toothpick to swirl or blend colors softly.
- Create layers by letting some colors dry before adding others.
- Experiment with glitter or metallic powders for sparkle.
Here is a simple color layering order for a realistic geode effect:
- Start with pale blue or white as the first color.
- Add medium blue or purple around the edges.
- Use dark blue or black at the center for depth.
- Finish with metallic gold or silver highlights.
Adding initial colors carefully helps the geode look more natural and detailed. Take your time to create smooth blends and interesting textures. This step defines the mood and style of your resin art.
Building Geode Details
Building geode details is a crucial part of creating resin geode art. This step gives your piece depth and a natural look. It involves adding layers, colors, and textures that mimic real geodes. Carefully designing these details makes your art more eye-catching and realistic. Focus on layering colors and adding sparkling elements like crystals and glitter to enhance the visual effect. Each layer adds complexity and richness to the final piece.
Layering Colors
Layering colors creates the unique rings and patterns seen in natural geodes. Start with a base color and add thinner layers of contrasting shades. Use different tones of blues, purples, pinks, or any colors you prefer. This method builds depth and makes the resin look like real stone.
Follow these tips for effective layering:
- Use transparent and opaque colors: Transparent colors add glow, while opaque colors add solid patterns.
- Alternate light and dark shades: This contrast highlights the layers and makes the design pop.
- Allow each layer to cure: Wait until the resin is slightly hardened before adding the next layer to avoid mixing colors.
- Apply thin coats: Thin layers dry faster and prevent colors from blending too much.
Here is a simple color layering plan you can follow:
| Layer | Color Type | Purpose |
|---|---|---|
| 1 | Light base color | Sets the background tone |
| 2 | Darker shade | Creates depth and shadow |
| 3 | Medium tone | Builds mid-layer detail |
| 4 | Highlight color | Adds brightness and contrast |
Remember, patience is key. Let each layer dry properly to keep colors clear and sharp.
Incorporating Crystals And Glitter
Crystals and glitter bring sparkle and realism to your resin geode art. They mimic the natural shine and texture of real geodes. Use different sizes and shapes of crystals for a natural look. Glitter adds a subtle shimmer that catches light beautifully.
Steps to add crystals and glitter:
- Choose crystals that complement your color scheme.
- Place crystals carefully on partially cured resin so they stick well.
- Sprinkle glitter lightly around crystals and on the resin surface.
- Seal crystals and glitter with a thin resin layer to secure them.
Types of crystals and glitter to consider:
| Material | Effect | Best Use |
|---|---|---|
| Quartz crystals | Clear, natural sparkle | Center of geode |
| Amethyst chips | Purple tint, textured | Accent areas |
| Fine glitter | Soft shimmer | Background layers |
| Chunky glitter | Bold sparkle | Highlights and edges |
Use a toothpick or tweezers for precise crystal placement. Avoid overloading the resin with glitter to keep the design balanced. The final sealing layer protects the sparkle and adds a smooth finish.
Adding Texture And Depth
Adding texture and depth brings your resin geode art to life. It creates a three-dimensional effect that makes the piece look natural and vibrant. Without texture, the artwork may seem flat and less interesting. Using simple techniques, you can add layers and details that mimic real geodes. These details capture light and create shadows, enhancing the overall beauty of your art. The right tools and methods allow you to shape the resin and colors into stunning designs. This section explains how to use heat tools and create veins and patterns for a rich, textured look.
Using Heat Tools
Heat tools are essential for shaping resin and adding texture. A heat gun or butane torch works best to move and blend the resin. The heat makes the resin thinner and easier to manipulate.
- Softening resin: Apply heat gently to soften thick resin. It helps spread resin smoothly and create waves or ripples.
- Removing bubbles: Heat pops trapped air bubbles quickly. This ensures a clear, clean finish.
- Creating cells: Moving the heat tool over resin can create small cells or holes. These look like natural geode crystals.
- Layer blending: Heat helps to blend colors together softly, adding depth and gradual color changes.
Tips for safe and effective use of heat tools:
| Tip | Explanation |
|---|---|
| Keep tool moving | Prevents resin from burning or overheating in one spot. |
| Use low to medium heat | Controls resin flow without causing damage. |
| Work in a well-ventilated area | Ensures safety from fumes. |
| Wear protective gloves | Protects hands from heat and resin contact. |
Using heat tools skillfully gives your resin geode art a lively texture. It opens creative possibilities for shaping and blending your resin layers.
Creating Veins And Patterns
Veins and patterns mimic the natural lines inside real geodes. These details add complexity and make your art more realistic. You can create veins by adding thin lines or using different pouring techniques.
How to create veins and patterns:
- Choose contrasting colors: Use colors that stand out to form clear veins.
- Use a thin brush or stick: Draw fine lines in wet resin to form veins.
- Pour resin layers carefully: Pour slowly to let colors flow and blend in natural patterns.
- Drag or pull resin: Use a toothpick or needle to pull resin in different directions, creating organic veins.
- Add mica powder or glitter: Sprinkle along veins for shimmer and texture.
Example pattern techniques:
| Technique | Description | Effect |
|---|---|---|
| Marbling | Swirling two or more resin colors together | Soft, flowing veins with mixed colors |
| Line drawing | Painting thin lines after pouring base layer | Sharp, defined veins for contrast |
| Dotting | Adding small resin dots along veins | Textured, bubbly appearance |
Adding veins and patterns takes patience and attention. These details add depth, making your resin geode art truly captivating.
Curing Process
The curing process is a crucial step in creating resin geode art. It transforms the liquid resin into a solid, glossy finish that protects your artwork. Proper curing ensures your piece is durable and vibrant. Without correct curing, resin can stay sticky or develop imperfections. Understanding how to create the best environment and timing for curing helps you avoid common issues and get the best results.
Optimal Conditions
The right environment speeds up the curing process and improves the resin’s clarity. Resin cures best at a steady temperature and away from dust or moisture. Maintaining these conditions keeps your art free from bubbles and cloudiness.
- Temperature: Keep the room between 70°F and 75°F (21°C to 24°C). Resin cures slower in cold and faster in heat.
- Humidity: Aim for less than 50% humidity. High moisture can cause a cloudy or dull finish.
- Clean Space: Work in a dust-free area to avoid particles sticking to the resin surface.
- Ventilation: Good air flow helps resin cure safely but avoid strong drafts that cause uneven curing.
Use a small heater or fan to control temperature and airflow if needed. A tabletop enclosure or plastic cover can protect your piece from dust. Check these conditions regularly during the curing time.
| Condition | Recommended Range | Effect on Resin |
|---|---|---|
| Temperature | 70°F – 75°F (21°C – 24°C) | Ensures even curing and clear finish |
| Humidity | < 50% | Prevents cloudiness and sticky surface |
| Dust Level | Minimal | Avoids particles on resin surface |
| Airflow | Gentle ventilation | Supports safe curing, avoids bubbles |
Curing Timeframes
Curing time varies by resin type and thickness of the pour. Most resin geode art needs at least 24 hours to harden. Full curing, where resin reaches maximum strength, can take up to 72 hours.
Follow these timing guidelines:
- Initial set: Resin feels tacky but firm after 12-24 hours.
- Handle with care: After 24-48 hours, resin is stronger but still delicate.
- Full cure: 72 hours or more for maximum hardness and durability.
Thicker layers take longer to cure. Thin pours may harden faster but can still need 24 hours for best results.
Use the table below to estimate curing times based on resin thickness:
| Resin Thickness | Estimated Curing Time | Notes |
|---|---|---|
| 1/8 inch (3 mm) | 12-24 hours | Surface hardens, still needs gentle handling |
| 1/4 inch (6 mm) | 24-48 hours | Better strength, avoid heavy pressure |
| 1/2 inch (12 mm) or more | 48-72 hours or longer | Full cure and maximum durability |
Patience is key. Avoid rushing curing by touching or moving the piece too soon. Doing so can cause dents or fingerprints. After curing, your resin geode art will shine with a smooth, glass-like finish.
Finishing Touches
Finishing touches bring your resin geode art to life. These final steps enhance the shine, smooth the surface, and protect your masterpiece. Taking time with these details gives your artwork a professional look. Your geode will sparkle like real stones and last longer. Focus on sanding, polishing, and sealing to complete your piece perfectly.
Sanding And Polishing
Sanding removes rough edges and uneven spots on your resin geode. Start with a coarse grit sandpaper (around 220 grit) to smooth large bumps. Then, use finer grits (400, 600, up to 1000) to polish the surface. Always sand in a circular motion for even results.
- Wear a mask and work in a well-ventilated area to avoid dust.
- Use wet sanding to reduce dust and get a smoother finish.
- Rinse the piece often to check your progress.
After sanding, polishing makes your resin shine bright like glass. Use a polishing compound or a fine polishing paste. Apply it with a soft cloth or a buffing wheel. Polish in small circles, applying gentle pressure. This step brings out the colors and depth in your geode.
| Step | Tool/Material | Purpose |
|---|---|---|
| 1 | 220 grit sandpaper | Remove large bumps and uneven surfaces |
| 2 | 400 to 1000 grit sandpaper | Smooth and refine the surface |
| 3 | Polishing compound and soft cloth | Bring out shine and depth |
Tip: Take your time sanding and polishing. This stage defines the quality of your final piece.
Sealing The Artwork
Sealing protects your resin geode from scratches, dust, and yellowing. It also adds a glossy finish that enhances colors. Choose a clear resin or a spray sealant made for resin art.
Before sealing, clean your piece with a soft cloth to remove dust. Make sure your artwork is fully dry and cured.
- Apply a thin, even layer of sealant using a brush or spray.
- Allow it to dry as per product instructions, usually a few hours.
- For extra protection, apply a second coat.
Here is a comparison table of common sealants:
| Sealant Type | Finish | Dry Time | Best For |
|---|---|---|---|
| Clear Resin Topcoat | Glossy | 24 hours | High shine, durable finish |
| Acrylic Spray Sealant | Matte or Glossy | 1-2 hours | Quick, easy application |
| Polyurethane Varnish | Glossy or Satin | 4-6 hours | Scratch resistance |
Important: Avoid thick sealant layers. Thin coats dry better and prevent bubbles.
Sealing locks in your resin geode’s beauty and ensures it lasts for years. This step finishes your artwork with a polished, protected surface.

Common Mistakes To Avoid
Creating resin geode art is fun and rewarding. Yet, many beginners face simple errors that can spoil their work. Avoiding these common mistakes saves time and materials. It helps create beautiful, clear resin geodes every time. Below are key mistakes to watch out for during your resin geode project.
Not Measuring Resin And Hardener Correctly
Resin and hardener must be mixed in exact ratios. Too much or too little hardener can stop resin from curing properly.
- Use a digital scale for accuracy.
- Follow manufacturer instructions carefully.
- Mix slowly to avoid bubbles.
Ignoring Proper Workspace Preparation
A clean, dust-free workspace is crucial. Dust and debris can stick to wet resin, ruining the finish.
- Cover your table with plastic or paper.
- Work in a low-dust area with good ventilation.
- Wear gloves to avoid fingerprints on resin.
Using Incorrect Resin Types
Not all resins suit geode art. Some resins yellow over time or remain sticky.
| Resin Type | Suitability for Geode Art |
|---|---|
| Epoxy Resin | Best choice; clear and durable |
| Polyester Resin | Not recommended; strong odor and yellowing |
| UV Resin | Good for small projects; hardens quickly |
Applying Resin In Thick Layers
Pouring thick resin layers can trap bubbles and cause uneven curing.
- Pour resin in thin layers.
- Allow each layer to cure before adding the next.
- Use a heat gun or torch to remove bubbles gently.
Skipping The Use Of Mold Release
Not using mold release makes resin stick to molds and damages your art.
- Spray or apply mold release before pouring resin.
- This helps resin pop out easily after curing.
Overusing Colorants And Additives
Too many pigments or glitters can affect resin curing and clarity.
- Use colors sparingly to keep resin clear.
- Test additives in small batches first.
Tips For Advanced Techniques
Diving deeper into resin geode art reveals exciting ways to enhance your pieces. Advanced techniques bring more texture, depth, and sparkle. These tips help you experiment with colors, layers, and effects. They make your art stand out and feel more professional.
Using Alcohol Inks For Vibrant Color Effects
Alcohol inks add bright, flowing colors to resin. Drop small amounts on the resin surface and watch colors spread and blend naturally. Use a heat gun or straw to move the ink and create unique patterns.
- Work quickly before resin starts to harden.
- Mix inks gently for soft color transitions.
- Try layering different ink colors for depth.
Adding Metallic Powders And Mica For Shine
Metallic powders and mica create a sparkling look inside resin geodes. Mix them into resin before pouring or sprinkle on top of each layer. They catch light and add dimension.
| Material | Effect | How to Use |
|---|---|---|
| Mica Powder | Shimmer and subtle color shift | Mix with resin for even color |
| Metallic Powder | Bright shine and sparkle | Sprinkle on resin surface |
| Glitter | Extra sparkle and texture | Add between layers |
Creating Realistic Crystal Textures
Build crystal effects by layering resin and adding chunky elements. Use crushed glass, quartz chips, or coarse sand. Pour resin in stages, letting each layer partially cure.
- Pour a thin resin base layer.
- Scatter crystal pieces carefully.
- Add resin to cover and secure crystals.
- Repeat for height and depth.
Using Heat Tools To Shape Resin
Heat tools like a torch or heat gun help shape resin edges and remove bubbles. They also push pigment around for interesting effects.
- Keep heat moving to avoid burning resin.
- Use gentle bursts to control flow.
- Experiment with angles to create waves or curves.
Frequently Asked Questions
What Materials Do I Need For Resin Geode Art?
You need epoxy resin, resin pigments, geode molds, glitter, and protective gear. These essentials help create vibrant and durable resin geode art pieces.
How Do I Mix Resin For Geode Art Correctly?
Mix resin and hardener in a 1:1 ratio. Stir slowly to avoid bubbles. Proper mixing ensures smooth curing and a clear finish.
Can I Add Crystals To Resin Geode Art?
Yes, adding crystals enhances texture and realism. Place crystals carefully before resin cures for secure embedding and stunning effects.
How Long Does Resin Take To Cure For Geode Art?
Resin typically cures in 24 to 48 hours. Curing time depends on temperature and resin type. Patience ensures a hard, glossy finish.
Conclusion
Creating resin geode art is a fun and creative process. Follow each step carefully to get the best results. Practice helps you improve your skills over time. Use the right materials and tools for a smooth experience. Enjoy the colors and patterns as you work.
Your unique art will brighten any space. Keep experimenting with designs to find your style. Resin geode art offers endless chances to create beauty. Start your project with confidence and patience. The results will be worth your effort.