Ready to unlock your creative side with resin crafts? Whether you’re looking to make stunning coasters, unique jewelry, or eye-catching décor, resin offers endless possibilities.
But where do you start? This Resin Crafts Tutorial is designed just for you—breaking down every step with simple tips and tricks so you can create beautiful pieces without feeling overwhelmed. Imagine turning your ideas into glossy, vibrant art that friends and family will admire.
Keep reading, and you’ll discover how easy and fun resin crafting can be, even if you’ve never tried it before!

Materials Needed
Starting resin crafts requires specific materials to create beautiful and lasting pieces. Knowing what you need helps prepare your workspace and avoids interruptions. This list covers the types of resin, essential tools, and safety gear necessary for your projects.
Types Of Resin
Choose the right resin for your craft. Epoxy resin is clear and easy to use. It works well for jewelry, coasters, and small items. Polyester resin cures faster but has a strong smell. It suits larger projects and molds. UV resin hardens quickly under UV light. It is perfect for tiny details and quick crafts.
Essential Tools
Gather basic tools before starting. Mixing cups help measure resin and hardener. Stir sticks are needed to mix resin thoroughly. Silicone molds give shape to your crafts and are reusable. A heat gun or torch removes bubbles for a smooth finish. Gloves protect your hands from sticky resin. Disposable pipettes can add colors or small details precisely.
Safety Gear
Protect yourself during resin crafts. Wear nitrile gloves to avoid skin contact. Use a mask to prevent inhaling fumes. Work in a well-ventilated area or near an open window. Safety glasses protect your eyes from splashes. Keep your workspace clean and organized to reduce risks. Always read the resin label for specific safety instructions.
Preparing Your Workspace
Preparing your workspace is the first step in creating beautiful resin crafts. A clean and organized area helps you work safely and efficiently. It also protects your surroundings from damage. Setting up the right environment makes your crafting experience more enjoyable.
Choosing A Work Area
Select a space with enough room to spread out your materials. A sturdy table or desk works best. Avoid areas with carpet or fabric that could catch resin spills. Choose a spot where you can leave your project undisturbed while it cures. This reduces the risk of dust or debris landing on your resin.
Surface Protection
Cover your work surface with plastic, silicone mats, or disposable paper. These materials prevent resin from sticking and protect furniture from stains. Use painter’s tape to secure the cover and keep edges safe. Clean spills quickly using paper towels and rubbing alcohol. This stops resin from hardening on your surface.
Ventilation Tips
Work in a well-ventilated room to avoid breathing fumes. Open windows and doors for fresh air flow. Use a small fan to push air outside if possible. Avoid working in closed spaces or near heat sources. Wearing a mask can add extra protection during mixing and pouring. Good ventilation keeps your workspace safe and comfortable.
Basic Resin Mixing
Basic resin mixing is the first step in crafting beautiful resin art. It sets the foundation for smooth, clear, and strong pieces. Proper mixing ensures the resin cures correctly without sticky or soft spots. Understanding the right ratio and technique helps avoid common problems.
Careful preparation and attention to detail improve your results. This section explains how to measure resin and hardener, mix them well, and prevent bubbles.
Measuring Resin And Hardener
Accurate measuring is key for resin to cure properly. Use a digital scale or clear measuring cups for precision. Follow the product instructions for the correct resin-to-hardener ratio, often 1:1 or 2:1. Avoid guessing to prevent soft or sticky resin. Measure both parts separately before mixing.
Mixing Techniques
Pour resin and hardener into a clean container. Stir slowly with a wooden stick or silicone spatula. Mix for at least 3 to 5 minutes to combine fully. Scrape the sides and bottom while stirring. Slow mixing reduces air bubbles and ensures even curing. Avoid vigorous stirring that creates foam.
Avoiding Bubbles
Bubbles spoil the smooth finish of resin crafts. Mix resin gently to minimize air introduction. Use a heat gun or small torch to pass over the surface and pop bubbles. Let resin sit for a few minutes before pouring. Pour resin slowly and close to the mold surface. These steps help keep your resin clear and flawless.

Simple Resin Projects
Simple resin projects are perfect for beginners. They need few materials and give great results. These crafts help you learn resin techniques without stress.
Try small items that you can use daily or gift to friends. These projects are fun and quick to make. They also let you explore colors and shapes easily.
Making Resin Coasters
Resin coasters are easy and useful crafts. Use silicone molds to shape the resin. Add colors like alcohol inks or glitter for style. Pour resin carefully, then let it cure flat. You get a shiny, durable coaster ready to use.
Creating Jewelry Pieces
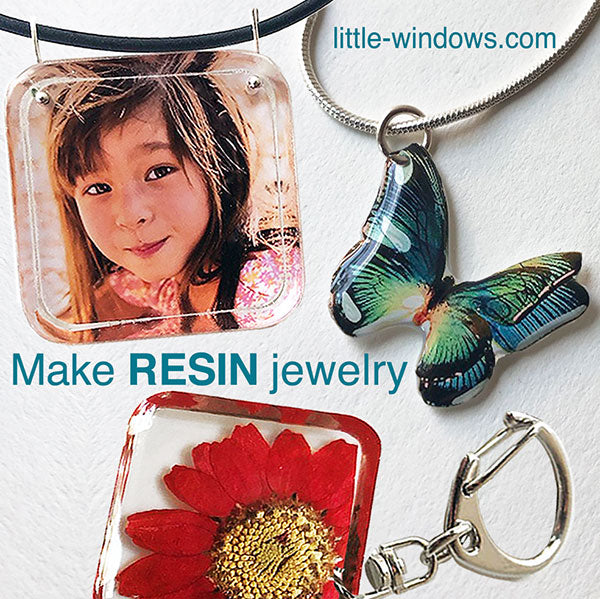
Resin jewelry is small and creative. Use tiny molds for rings, pendants, or earrings. Mix resin with pigments or small decorations inside. Pour resin slowly to avoid bubbles. After curing, polish the edges for a smooth finish.
Decorative Keychains
Keychains made from resin are unique and personal. Choose simple shapes like hearts, stars, or circles. Embed small items like dried flowers or glitter. Attach a key ring after the resin hardens. These keychains make great gifts or accessories.
Adding Color And Effects
Adding color and effects to resin crafts brings life and uniqueness to every piece. This step lets you customize your project with vibrant hues and interesting textures. Simple techniques create stunning results that catch the eye. Experimenting with different materials expands your creative options. Below are popular ways to add color and effects to resin.
Using Alcohol Inks
Alcohol inks are perfect for bright, translucent colors in resin. They spread easily and create beautiful patterns. Drop a small amount into resin and watch the color flow. Mixing inks can produce new shades and gradients. Use a heat gun or straw to move the inks around. This technique works well for coasters, jewelry, and art pieces.
Incorporating Mica Powders
Mica powders add shimmer and depth to resin projects. They come in many colors and give a pearly finish. Stir mica powder into resin before pouring to get an even color. Adjust the amount to control the shimmer intensity. Mica works well alone or combined with other pigments. It is great for making jewelry and decorative items.
Embedding Glitter And Objects
Glitter adds sparkle and catches light inside resin. Choose fine or chunky glitter based on the look you want. Mix glitter into resin or sprinkle it on layers for a 3D effect. Embedding small objects like dried flowers, beads, or charms creates unique designs. Place objects carefully to avoid bubbles and ensure they stay in place. This method personalizes resin crafts beautifully.
Using Silicone Molds
Using silicone molds is a popular way to create resin crafts. These molds offer flexibility and easy release. They come in many shapes and sizes, perfect for custom designs.
Silicone molds make resin pouring simple. Their non-stick surface helps resin pieces come out cleanly. Understanding how to choose, prepare, and remove resin from molds improves your craft results.
Choosing The Right Mold
Select molds made from 100% food-grade silicone for safety. Check the mold’s thickness; thicker molds hold shape better. Choose a mold with smooth surfaces to avoid texture marks. Pick a size that fits your project needs. Simple shapes are easier for beginners to use.
Preparing Molds For Pouring
Clean the mold with soap and water before use. Dry it completely to avoid bubbles in resin. Apply a mold release spray if the mold is new or sticky. Pour resin slowly to reduce air bubbles. Fill the mold to the desired level without overflowing.
Demolding Techniques
Wait for resin to cure fully before removing it. Gently bend the silicone mold to loosen the edges. Push from the bottom to pop the resin piece out. Avoid sharp tools that can damage the mold or resin. Clean the mold after each use to keep it flexible and ready.
Advanced Techniques
Advanced techniques in resin crafts open new creative doors. They help you create unique, professional pieces. These methods require patience and practice but offer amazing results.
Understanding these techniques improves your resin skills. You gain control over the final look and feel of your work. Let’s explore some popular advanced methods.
Layering Resin
Layering resin adds depth and dimension to your projects. Pour a thin layer and let it partially cure. Add objects or colors, then pour the next layer.
This process creates a 3D effect. It also lets you trap items like flowers or glitter inside the resin. Be careful to avoid bubbles between layers.
Creating Resin Art
Resin art uses pigments and additives to form stunning visuals. Mix resin with dyes, mica powders, or alcohol inks. Pour and spread the resin on a flat surface.
Use tools like heat guns or brushes to move the resin. This technique creates swirls, waves, and other abstract patterns. Experiment with colors to find your style.
Using Uv Resin
UV resin cures quickly under ultraviolet light. It is perfect for small, detailed projects. Apply the resin in thin layers and expose it to a UV lamp.
This method allows fast fixing and easy corrections. UV resin is less messy and needs no mixing. It works well for jewelry, charms, and tiny decorations.
Troubleshooting Common Issues
Troubleshooting common issues is a key part of resin crafting. Problems can arise during or after the pour. These issues may affect the look and feel of your project. Understanding how to fix them saves time and materials. Below are solutions to some frequent resin problems.
Dealing With Sticky Resin
Sticky resin usually means it did not cure fully. This happens if the mix ratio is off or the resin was not stirred well. To fix sticky resin, let it cure longer in a warm, dust-free space. Avoid touching or moving the piece while curing. If it remains sticky, apply a thin layer of fresh resin on top. Use a heat gun briefly to help it harden evenly.
Removing Bubbles Post-pour
Bubbles are common in resin crafts and can spoil the finish. To remove bubbles after pouring, use a heat source like a torch or heat gun. Pass the heat quickly over the surface to pop bubbles. Another trick is to spray isopropyl alcohol lightly on the resin surface. Work fast to avoid marks. For deep bubbles, try poking them gently with a toothpick before curing completes.
Fixing Yellowing Resin
Yellowing resin looks old and less clear. It often happens due to UV exposure or using the wrong resin type. To prevent yellowing, use resin with UV inhibitors. If yellowing occurs, sanding the surface lightly can help. Then, apply a fresh, clear resin coat to restore shine. Store finished resin pieces away from direct sunlight to keep them clear longer.
Safety Precautions
Working with resin is exciting but demands care. Safety precautions keep your crafting fun and injury-free. Resin contains chemicals that may irritate skin, eyes, and lungs. Protect yourself by following safety rules every time you create. Proper handling, protection, and disposal lower risks and keep your workspace safe.
Handling Resin Safely
Always work in a well-ventilated area. Open windows or use a fan to move air. Measure resin and hardener carefully to avoid spills. Mix slowly to reduce bubbles and splashes. Keep resin containers closed when not in use. Store resin away from heat and direct sunlight. Read product labels for specific handling instructions.
Protecting Skin And Eyes
Wear disposable gloves to stop resin from touching skin. Use safety goggles to protect eyes from splashes. Avoid touching your face during resin work. If resin contacts your skin, wash it off immediately with soap and water. Keep a clean cloth nearby to wipe spills quickly. Wear long sleeves to reduce skin exposure.
Disposal Tips
Do not pour leftover resin down drains. Harden small amounts of resin before disposal. Place hardened resin in a sealed container. Dispose of containers according to local regulations. Recycle empty resin bottles if possible. Keep waste out of reach of children and pets.
Tips For Stunning Results
Achieving stunning results in resin crafts depends on several key steps. Paying attention to timing, curing conditions, and finishing techniques makes a big difference. These tips help you avoid common mistakes and create beautiful, lasting pieces. Follow these simple guidelines to improve your resin projects with ease.
Timing Your Pour
Pour resin carefully during the right time. Mixing and pouring too fast causes bubbles and uneven layers. Wait a few minutes after mixing to let bubbles rise. Pour slowly and steadily for a smooth finish. Work in small sections if your project is large. Proper timing ensures clear and clean resin layers.
Optimizing Curing Conditions
Maintain a stable temperature for curing resin. Ideal room temperature is between 70 to 75°F (21 to 24°C). Avoid drafts or sudden temperature changes that can cause cracks. Keep your project covered to protect it from dust. Curing takes at least 24 hours, so be patient. Good conditions help resin harden evenly and clearly.
Finishing And Polishing
After curing, sanding smooths rough edges and surfaces. Start with coarse sandpaper, then use finer grits for shine. Use wet sanding to avoid dust and scratches. Apply a polishing compound to bring out a glossy shine. Clean your piece with a soft cloth to remove residue. Proper finishing enhances the look and feel of your resin craft.
Frequently Asked Questions
How To Start Resin Art For Beginners?
Start resin art by gathering epoxy resin, silicone molds, and pigments. Mix resin carefully, pour into molds, and add colors or glitter. Work in a ventilated area with gloves. Practice simple projects like coasters to build skills and confidence.
What Should You Not Put In Resin?
Avoid putting food, paper, fabric, or anything porous in resin. Also, do not embed silicone, Teflon, or polyethylene plastics as resin won’t adhere to them.
What Is The Best Beginner Resin Project?
The best beginner resin project is making coasters. Use silicone molds, add colors or glitter, and pour epoxy resin easily.
What Is The Downside Of Resin?
Resin can emit harmful fumes and cause skin irritation during curing. It requires ventilation and protective gear. Resin may also yellow over time and is difficult to remove once cured.
Conclusion
Resin crafting offers a fun and creative way to make unique art pieces. Start with simple projects like coasters to build confidence. Use safe practices, such as working in a ventilated space and wearing gloves. Experiment with colors and molds to create designs you love.
Enjoy the process and learn from each attempt. Resin crafts can bring joy and personal touch to your home or gifts. Keep practicing, and you will improve with every project. Crafting with resin is both relaxing and rewarding.