Are you ready to create a stunning pendant necklace that’s truly one of a kind? With resin crafts, you can turn simple materials into beautiful, wearable art that reflects your style and creativity.
This resin crafts tutorial will guide you step-by-step to make your own pendant necklace, even if you’ve never worked with resin before. Imagine wearing a piece that catches the light perfectly and draws compliments everywhere you go. Keep reading, and you’ll discover the secrets to mastering resin jewelry, the best tips to avoid common mistakes, and how to customize your necklace to make it uniquely yours.
Your new favorite accessory is just a few easy steps away!
Materials Needed
Creating a beautiful resin pendant necklace starts with gathering the right materials. Each item plays a key role in shaping your final piece. Having quality supplies helps you work smoothly and enjoy the process. Knowing what you need makes crafting easier and more fun.
Types Of Resin
Epoxy resin is popular for its clear finish and durability. UV resin cures quickly under a UV light. Polyester resin dries fast but has a strong smell. Choose resin based on your project’s needs and safety preferences.
Tools And Supplies
Basic tools include mixing cups, stirring sticks, and gloves. A digital scale helps measure resin and hardener accurately. Sandpaper smooths edges after curing. A heat gun or torch removes bubbles for a clear look.
Choosing Molds And Embellishments
Silicone molds come in many shapes like circles, hearts, or teardrops. Pick molds that suit your necklace design. Embellishments such as dried flowers, glitter, or small charms add charm. Use items that fit well inside your mold and inspire your style.

Preparing Resin
Preparing resin is a key step in making a beautiful pendant necklace. Resin must be mixed carefully for a smooth and clear finish. This process affects the strength and look of your jewelry piece. Follow the steps below to get your resin ready for crafting.
Mixing Resin And Hardener
Start by measuring equal parts of resin and hardener. Use a clean cup for mixing. Pour the resin first, then add the hardener slowly. Stir gently with a stick for about three minutes. Mix until the liquid looks clear and even. Avoid rushing to prevent bubbles from forming.
Adding Colors And Glitter
Add color drops or glitter after mixing resin and hardener. Use resin dyes or alcohol inks for bright colors. Sprinkle glitter in small amounts to avoid clumps. Stir the mixture lightly to spread colors and sparkle evenly. Test a small amount on paper to check the shade.
Avoiding Bubbles
Bubbles can ruin the smooth look of your pendant. Mix resin slowly and steadily to reduce bubbles. Tap the cup gently on the table to bring bubbles to the surface. Use a heat gun or a small torch for quick bubble removal. Work in a warm, dust-free place for best results.
Creating The Pendant
Creating the pendant is the heart of making a resin necklace. This step shapes your vision into a beautiful piece. It involves careful pouring, placing decorations, and building layers. Each part matters for a clear and strong pendant. Follow these simple steps to craft your unique resin pendant.
Pouring Resin Into Molds
Start by mixing your resin according to the instructions. Pour the resin slowly into your chosen mold. Fill it just enough to cover the base. Avoid pouring too fast to prevent bubbles. Use a toothpick to pop any bubbles on the surface. Let the resin settle for a few minutes before adding decorations.
Embedding Decorations
Choose small decorations like dried flowers, glitter, or tiny charms. Place them gently on the resin surface. Use a stick or tweezers for precise placement. Press decorations lightly so they stay in place. Make sure they do not touch the mold edges. This helps keep clean lines around your pendant.
Layering Techniques
Create depth by adding resin in layers. Pour a thin layer first and let it cure partially. Add decorations on this layer if you want them inside the pendant. Pour another resin layer on top to cover the decorations. Repeat the process for more layers and effects. Each layer should dry before adding the next to avoid mixing.
Curing Process
The curing process is a vital step in crafting a resin pendant necklace. It transforms the liquid resin into a hard, durable surface. Proper curing ensures the pendant is strong and looks beautiful. This step affects the final appearance and longevity of the jewelry piece.
Understanding the differences between resin types and managing curing time helps achieve the best results. A smooth finish without bubbles or imperfections is key for a professional look. Below are important tips and comparisons for the curing process.
Uv Resin Vs Epoxy Resin
UV resin cures quickly under UV light, often within minutes. It is ideal for small projects and fast results. Epoxy resin takes longer to cure, usually 24 to 72 hours. It cures at room temperature without special light. Epoxy resin is stronger and better for thicker pieces. Choose UV resin for speed and epoxy resin for durability.
Curing Time Tips
Follow the manufacturer’s instructions for curing time. Avoid moving the pendant during curing to prevent marks. Use a clean, dust-free area to cure your resin. For epoxy, patience is key as rushing can cause soft spots. For UV resin, ensure even light exposure for a full cure. Proper curing time improves hardness and clarity.
Ensuring A Smooth Finish
Remove bubbles by gently blowing or using a heat gun before curing. Pour resin slowly to avoid trapping air. Use a silicone mold for easy release and smooth edges. Lightly sand rough spots after curing for a polished look. Apply a thin topcoat if needed for extra shine. A smooth finish makes your pendant necklace stand out.
Finishing Touches
The finishing touches are vital for your resin pendant necklace. They help your piece look polished and professional. Taking time at this stage improves the overall appearance. Small details make a big difference in jewelry craft.
Removing Pendant From Mold
Carefully take the pendant out of the mold once fully cured. Gently flex the mold to loosen the pendant. Avoid pulling too hard to prevent damage or cracks. Use a soft tool if needed to ease the pendant out. Make sure the resin is completely hardened before removal.
Sanding And Polishing
Sand the edges to smooth out any rough parts or flash. Start with coarse grit sandpaper and move to finer grits. Wet sanding helps reduce dust and achieve a smooth surface. After sanding, polish the pendant with a soft cloth. Polishing restores shine and highlights the resin’s clarity.
Adding Necklace Findings
Attach a jump ring or bail to the pendant’s loop or hole. Use pliers to securely close the jump ring. Choose a chain or cord that matches your pendant style. Add a clasp to the chain for easy wearing and removal. Check all findings are tight and safe before wearing.
Design Ideas
Designing resin pendant necklaces opens many creative doors. Choose styles that match your taste and skill level. Explore simple to intricate designs to make unique jewelry pieces. Experimenting with different elements helps you find your signature style.
Here are some inspiring design ideas to start your resin pendant necklace journey. Each idea suits various occasions and personal preferences.
Minimalist Styles
Minimalist resin pendants emphasize clean lines and simple shapes. Use clear or lightly tinted resin for a subtle look. Small geometric forms like circles, squares, or triangles work well. These pendants pair easily with any outfit. Keep embellishments minimal for a modern and elegant style.
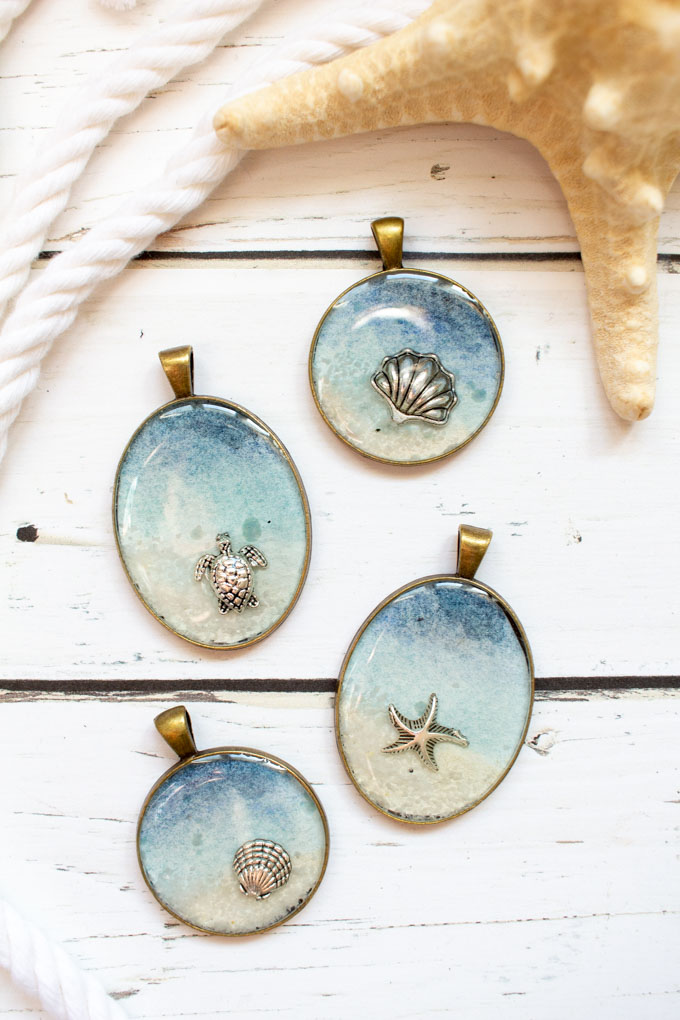
Nature-inspired Pendants
Nature themes bring beauty and calm to your resin crafts. Embed dried flowers, leaves, or tiny twigs inside the resin. You can also add small shells or sand for a beachy touch. Use soft, earthy colors to enhance the natural feel. These pendants create a connection to the outdoors.
Using Metallic Leaf And Glitter
Metallic leaf adds a touch of luxury and shine to resin pendants. Gold, silver, or copper leaf pieces float beautifully in clear resin. Glitter offers sparkle and fun, perfect for bold designs. Combine both for a dazzling effect. Apply in thin layers to keep the pendant smooth and eye-catching.
Care Tips
Taking care of your resin pendant necklace ensures it stays beautiful for a long time. Resin jewelry is delicate and needs special attention to keep its shine and shape. Simple care steps protect your handmade piece from damage and wear. Follow these care tips to enjoy your resin necklace every day.
Cleaning Resin Jewelry
Use a soft cloth to wipe your resin necklace gently. Avoid harsh chemicals or abrasive cleaners. Mild soap with lukewarm water works best for stubborn dirt. Rinse well and dry with a clean cloth. Never soak your resin jewelry in water for a long time.
Storage Recommendations
Store your resin pendant in a cool, dry place. Keep it away from direct sunlight to prevent yellowing. Use a soft pouch or box to avoid scratches. Separate resin jewelry from other pieces to prevent tangling or damage. Proper storage maintains its color and shine.
Handling To Prevent Damage
Handle your resin necklace with care to avoid cracks or chips. Remove it before swimming, showering, or exercising. Keep away from perfumes, lotions, and chemicals. Avoid dropping or bending the pendant. Gentle use preserves its beauty and lasts longer.
Troubleshooting
Troubleshooting is a key part of making resin pendant necklaces. Small mistakes can affect the final look. Knowing how to fix common issues saves time and materials. This guide helps you solve problems quickly and easily.
Fixing Bubbles And Imperfections
Bubbles often appear when mixing or pouring resin. Use a toothpick to pop them on the surface. A heat gun or torch on low heat also helps release trapped air. Avoid stirring too fast to reduce bubbles. Sand rough spots gently after curing for a smooth finish.
Dealing With Sticky Resin
Sticky resin means it is not fully cured. Check the mixing ratio of resin and hardener carefully. Mix slowly and thoroughly for at least three minutes. Keep the resin at room temperature while curing. If sticky, leave it to cure longer in a warm place. Do not touch or move the pendant during curing.
Preventing Resin Yellowing
Yellowing happens when resin reacts to sunlight or heat. Choose UV-resistant resin for longer-lasting clarity. Store finished pendants away from direct sunlight. Use clear molds and avoid dark pigments that speed yellowing. Clean the pendant gently with a soft cloth to keep it bright.

Frequently Asked Questions
How Do You Make Resin Pendants?
Mix resin and hardener, pour into a mold, add decorations, and cure under UV light or air dry. Remove and polish.
What Should You Not Put In Resin?
Avoid putting polyethylene, polypropylene, Teflon, food, or wet materials in resin. These prevent proper curing and adhesion.
How Long Does A Resin Pendant Last?
A resin pendant can last several years with proper care. Avoid prolonged sun exposure and harsh chemicals to maintain its shine and durability.
How Do You Avoid Bubbles In Resin Pendants?
Avoid bubbles in resin pendants by mixing resin slowly and thoroughly. Use a heat gun or torch gently to release trapped air. Pour resin in thin layers. Work in a warm environment to reduce bubble formation.
Conclusion
Creating a resin pendant necklace is fun and rewarding. You can personalize your design with colors and shapes. The process is simple and suits beginners well. Practice helps improve your skills and results. Enjoy making unique jewelry that shows your style.
Keep experimenting with new ideas and materials. Resin crafts offer endless chances to create beauty. Start your next resin project with confidence today.