Are you ready to dive into the exciting world of DIY resin crafts but don’t know where to start? You’re in the right place.
This beginner-friendly tutorial will guide you step-by-step through creating beautiful resin projects with ease. Imagine turning simple materials into stunning coasters, jewelry, or decorative pieces that wow your friends and family. By the end of this guide, you’ll feel confident handling resin, mixing colors, and mastering techniques that bring your creative ideas to life.
Keep reading—you’re just one project away from discovering a fun, rewarding new hobby that anyone can enjoy.
Materials And Tools
Starting with DIY resin crafts requires knowing the right materials and tools. These help you work easily and get good results. Choosing quality supplies makes your craft look professional. This section explains the key materials and tools for beginners.
Types Of Resin
Epoxy resin is the most common choice for beginners. It cures clear and is easy to use. UV resin hardens quickly under a UV light. It is perfect for small projects. Polyester resin is cheaper but has a strong smell and is harder to work with. Pick resin based on your project needs and experience level.
Essential Supplies
You need mixing cups and stir sticks to blend resin and hardener. Silicone molds shape your resin into coasters, jewelry, or decorations. Use measuring tools to get the correct resin-to-hardener ratio. Pigments, glitters, and alcohol inks add color and effects. A heat gun or torch removes bubbles for a smooth finish.
Safety Gear
Resin can irritate skin and lungs. Always wear nitrile gloves to protect your hands. Use a mask or respirator to avoid breathing fumes. Work in a well-ventilated area or outside. Safety glasses keep resin from splashing into your eyes. Keep all safety gear ready before starting your craft.
Preparing Your Workspace
Preparing your workspace is the first step in your resin craft journey. Setting up a clean, organized, and safe area helps you work with confidence. A well-prepared space reduces mistakes and keeps your project neat. It also protects your home from damage and keeps you safe from fumes. Follow these tips to create the ideal workspace for your resin crafts.
Choosing A Work Area
Pick a flat, stable surface for your resin work. A table or desk in a quiet room works well. Avoid areas with direct sunlight or dust. Choose a spot close to a power source for your tools. Keep your workspace away from children and pets. Having enough space to move freely makes crafting easier.
Protecting Surfaces
Cover your work surface with plastic sheeting or disposable tablecloths. Use silicone mats or wax paper to catch drips and spills. Place newspapers or old towels under your area for extra protection. Wear gloves and an apron to protect your skin and clothes. Clean up spills immediately to avoid stains or damage.
Ventilation Tips
Work in a well-ventilated room to avoid breathing fumes. Open windows and doors to let fresh air in. Use a small fan to help circulate air if needed. Avoid working in small, closed spaces without airflow. Proper ventilation keeps you safe and helps resin cure faster.
Basic Resin Techniques
Basic resin techniques form the foundation of every successful resin craft project. Learning these skills helps beginners create beautiful and lasting pieces. These techniques include mixing resin and hardener, avoiding bubbles, and adding color or effects. Each step requires attention and care to ensure the best results.
Mixing Resin And Hardener
Start by measuring equal parts of resin and hardener. Use a clean cup for mixing. Stir slowly and steadily for at least three minutes. Mix until the liquid is clear and uniform. Avoid rushing to reduce air bubbles. Proper mixing ensures the resin cures fully and hardens well.
Avoiding Bubbles
Bubbles can spoil the smooth surface of resin crafts. To prevent them, stir gently and slowly. Let the mixture rest for a few minutes after mixing. Use a heat source, like a small torch or heat gun, to pop bubbles on the surface. Work in a warm room to help bubbles rise and escape quickly.
Adding Color And Effects
Resin can be customized with colors and effects for unique designs. Add pigments, mica powders, or alcohol inks to the mixed resin. Stir gently to blend the color evenly. Layer colors for depth or swirl them for a marbled effect. Glitter and small objects can add sparkle and texture. Experiment with small amounts to avoid overloading the resin.
Simple Projects For Beginners
Starting resin crafts can feel exciting and simple with the right projects. Beginners need easy ideas to practice and build confidence. Simple projects help understand resin’s flow, curing time, and adding colors or objects. These crafts require minimal tools and materials, making them perfect for first-timers. Here are some easy resin projects to try at home.
Resin Coasters
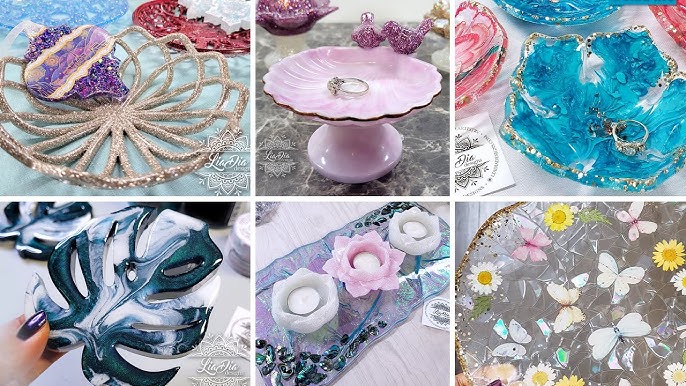
Resin coasters are one of the easiest projects to begin with. Use silicone molds shaped as circles or squares for best results. Mix resin with pigments like alcohol inks or glitter for a unique look. Pour resin into molds carefully to avoid bubbles. Let it cure fully before removing from molds. These coasters are both practical and decorative.
Jewelry Pieces
Creating resin jewelry is fun and allows creativity. Small silicone molds shaped like pendants, earrings, or rings work well. Add dried flowers, tiny beads, or colored powders inside the resin. Pour resin slowly to avoid air bubbles and let it set. After curing, attach jewelry findings like chains or hooks. These pieces make great personalized gifts.
Decorative Trays
Decorative trays offer a bigger surface for resin art. Use wooden or silicone tray molds for easy shaping. Mix resin with mica powders or pigments for a shimmering effect. You can add small stones or shells for extra texture. Pour resin evenly and spread to cover the tray base. After curing, these trays brighten any room with style.
Using Molds And Silicone
Using molds and silicone simplifies resin crafting for beginners. Molds shape the resin into beautiful, consistent forms. Silicone molds are flexible and easy to use. They release cured resin smoothly without damage. This section explains how to select molds, demold projects, and care for reusable molds.
Selecting Molds
Choose silicone molds with smooth surfaces for easy release. Pick shapes that match your project idea. Start with simple shapes like circles or squares. Check mold size to fit your resin amount. Ensure molds are clean and dry before use. Avoid molds with cracks or damage to prevent leaks.
Demolding Tips
Wait until resin is fully cured before removing from mold. Gently flex the silicone mold to loosen the resin piece. Peel the mold back slowly to avoid breaking the craft. Use a plastic tool to help release edges if needed. Avoid forcing the piece out to prevent cracks or warping.
Reusable Mold Care
Clean molds with warm, soapy water after each use. Avoid harsh chemicals that can damage silicone. Dry molds completely before storing to prevent mold growth. Store molds flat or hanging to keep their shape. Use mold release spray if resin sticks often. Proper care extends mold life and saves money.
Creative Additions
Creative additions bring life and personality to your resin projects. They let you customize pieces with colors, textures, and objects. Small touches make your crafts unique and eye-catching.
Using simple materials, you can create stunning effects that impress. These ideas work well for beginners and add fun to your crafting journey.
Incorporating Flowers And Glitter
Pressed flowers add natural beauty to resin crafts. They keep their shape and color when sealed in resin. Glitter brings sparkle and shine. Mix glitter into resin before pouring for a shimmering look. Combine flowers and glitter for a delicate, bright effect.
Embedding Small Objects
Small objects make resin art personal and interesting. Things like beads, charms, or tiny toys fit well. Place objects carefully in the mold. Pour resin slowly to avoid bubbles. The objects will look like they float inside the clear resin.
Using Alcohol Inks
Alcohol inks create vibrant, flowing colors in resin. Drop inks on resin’s surface and watch them spread. Use a stick or heat gun to move the colors. This technique adds a marbled or tie-dye effect. It is simple and adds depth to your pieces.
Troubleshooting Common Issues
Troubleshooting common issues helps beginners avoid frustration. Resin crafting can be tricky at first. Small mistakes often cause problems. Knowing how to fix them saves time and materials.
Some problems happen often. Resin may stay sticky or soft. Cracks and yellowing can appear. Surface imperfections might spoil the look. Understanding each issue is key to success.
Sticky Or Soft Resin
Sticky resin means it did not cure properly. This happens if the mixing was not thorough. Stir resin and hardener slowly but well. Wrong resin-to-hardener ratio also causes softness. Use a digital scale for accuracy. Low temperature slows curing. Work in a warm room around 75°F (24°C). Avoid adding too much pigment or additives.
Cracking And Yellowing
Cracks form if resin cures too fast or too slow. Pour resin in thin layers to prevent cracking. Avoid direct sunlight during curing. Yellowing occurs from UV light exposure or old resin. Use UV-resistant resin to reduce yellow tint. Store resin in a cool, dark place. Clean molds and tools before use.
Surface Imperfections
Bubbles and dust cause surface imperfections. Mix resin slowly to reduce bubbles. Use a heat gun or torch to remove bubbles after pouring. Cover your work area to prevent dust. Sand rough spots gently with fine sandpaper. Polish the surface for a smooth finish. Practice patience for the best results.

Curing And Finishing
Curing and finishing are crucial steps in resin crafting. Proper curing ensures your piece hardens perfectly. Finishing adds a smooth, polished look. These steps protect your work and enhance its beauty. Follow simple guidelines for the best results.
Optimal Curing Conditions
Resin cures best in a dust-free area. Keep the temperature between 70°F and 75°F. Avoid high humidity to prevent cloudiness. Place your project on a level surface. Let it cure undisturbed for 24 to 72 hours. Check the manufacturer’s instructions for exact times.
Sanding And Polishing
After curing, sanding removes bumps and rough edges. Start with coarse sandpaper, then use finer grits. Sand gently in a circular motion. Clean the piece with a damp cloth between sanding steps. Polishing brings a glossy shine to your resin. Use a polishing compound or a soft cloth for buffing.
Applying A Protective Coat
A protective coat keeps your craft safe from scratches. Use a clear resin topcoat or varnish. Apply a thin, even layer with a brush or spray. Allow it to dry completely before handling. This step adds durability and a vibrant finish to your creation.
Tips For Successful Resin Crafts
Successful resin crafting needs patience and careful planning. Small mistakes can affect the final look. Follow some simple tips to improve your results and enjoy the process more.
Time Management
Resin takes time to cure properly. Check the instructions for the right curing period. Do not rush or move your project too soon. Plan your work in stages. Allow enough time for each layer to dry before adding the next. Prepare your workspace and materials before starting. This saves time and reduces stress.
Organizing Materials
Keep all your tools and supplies within reach. Use containers or trays to hold small items like glitter or pigments. Label your resin bottles clearly to avoid confusion. Measure your resin and hardener carefully for the best mix. Organize your workspace to prevent spills or accidents. A tidy space helps you focus and work faster.
Cleaning Up
Clean your tools immediately after use. Use paper towels and rubbing alcohol to remove resin residue. Dispose of waste safely according to local rules. Protect your surfaces with plastic sheets or old newspapers. Store leftover resin in sealed containers to keep it fresh. Good cleaning habits make your next project easier and safer.

Selling Your Resin Creations
Selling your resin creations can turn your hobby into a source of income. Many beginners find joy in crafting, but sharing and selling their work brings extra satisfaction. It also helps you grow as an artist and understand market demand. To succeed, focus on popular products, smart pricing, and effective marketing. These steps will guide you to reach more buyers and build a loyal customer base.
Popular Products To Sell
Resin coasters are easy to make and always in demand. Small jewelry pieces like pendants and earrings attract many buyers. Keychains with unique designs also sell well. Decorative trays and bowls appeal to home decor lovers. Phone cases with colorful resin art catch attention. Choose products that match your skill level and style.
Pricing Strategies
Calculate the cost of materials first. Include resin, molds, pigments, and packaging. Add your time and effort to the price. Research similar products online to see average prices. Start with competitive pricing to attract buyers. Increase prices as your skill and reputation grow. Offer discounts or bundles to encourage multiple purchases.
Marketing Ideas
Use social media platforms to show your work. Share photos and short videos of the making process. Join craft groups and online marketplaces to reach more people. Ask happy customers to leave reviews. Participate in local craft fairs or markets. Create a simple website or online store. Consistent posting and clear photos improve sales chances.
Frequently Asked Questions
What Is The Best Beginner Resin Project?
The best beginner resin project is making coasters. Use silicone molds and add inks or glitter for custom designs.
How To Start Resin Art For Beginners?
Start resin art by gathering epoxy resin, silicone molds, gloves, and mixing tools. Mix resin and hardener as instructed. Pour into molds, add colors or inclusions, then cure in a dust-free area. Begin with simple projects like coasters to practice techniques.
What Should You Not Put In Resin?
Avoid putting food, water, silicone, polyethylene, polypropylene, Teflon, or anything that reacts poorly with resin. These materials prevent proper curing and adhesion.
What Kind Of Resin Art Sells The Most?
Jewelry, especially resin earrings, sells the most due to high profit margins. Coasters and decorative trays also sell well for their practical and aesthetic appeal.
Conclusion
Starting resin crafts can be simple and fun for anyone. Use basic tools and follow safety steps carefully. Try small projects like coasters or jewelry first. Experiment with colors and shapes to find your style. Practice helps improve your skills over time.
Enjoy the creative process without rushing results. Resin crafts offer a great way to express yourself. Keep your workspace clean and organized for best outcomes. Remember, patience and creativity make every project special. Happy crafting and keep exploring new ideas!