Are you looking for a simple way to create stunning decorations that add warmth and charm to your space? Making beautiful beeswax ornaments is easier than you think, and you don’t need to be an expert to get it right.
In this tutorial, you’ll discover step-by-step how to craft unique, natural ornaments that glow with a soft, inviting light. Imagine the feeling of pride and joy when your handmade creations catch the eye of everyone who visits your home. Keep reading, and by the end, you’ll have everything you need to start making your own beeswax ornaments today.
Materials Needed
Gathering the right materials is key to making beautiful beeswax ornaments. Good quality supplies ensure your decorations look great and last long. Prepare all items before starting to keep the process smooth and fun.
Choosing Quality Beeswax
Select pure beeswax for the best results. Avoid mixed or synthetic waxes. Look for a natural, golden-yellow color. Fresh beeswax has a mild, sweet scent. This wax melts easily and shapes well.
Essential Tools
You need basic tools to craft your ornaments. A double boiler or a heat-safe bowl works well for melting wax. Use silicone molds for easy shaping. Have a thermometer to check wax temperature. Keep wooden sticks or toothpicks for stirring. Scissors and string help finish the ornaments.
Optional Decorative Items
Enhance ornaments with simple decorations. Dried flowers add a natural touch. Small beads or glitter create sparkle. Colored wax sheets let you add patterns. Use ribbon or twine to hang ornaments. These extras make your crafts unique and charming.

Preparing Beeswax
Preparing beeswax is an important step in making beautiful beeswax ornaments. Clean and soft beeswax melts easily, making it easier to shape into attractive designs. Proper preparation helps ensure the ornaments look smooth and last longer.
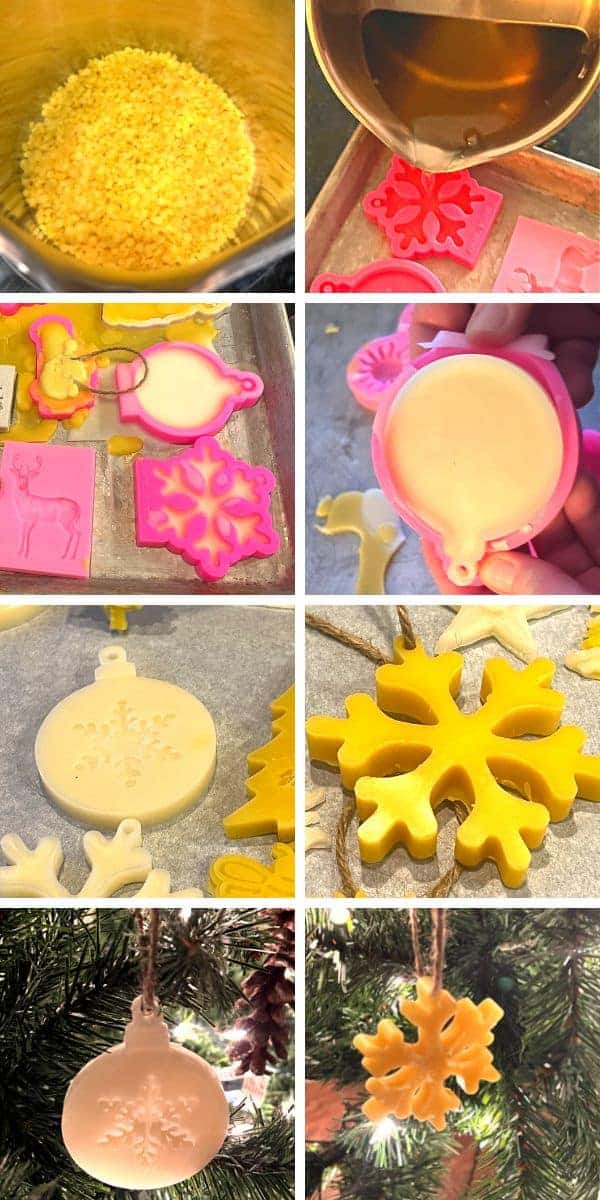
Melting Techniques
Use a double boiler to melt beeswax safely. Place beeswax pieces in the top pot and heat water below. This method prevents direct heat, stopping the wax from burning. Stir the wax gently as it melts to keep it smooth. Avoid high heat to keep the beeswax clear and clean.
Safety Tips
Never leave melting beeswax unattended. It can catch fire if overheated. Work in a well-ventilated area to avoid breathing fumes. Keep a fire extinguisher nearby just in case. Use heat-resistant gloves to protect your hands from burns. Always handle hot beeswax with care to avoid accidents.
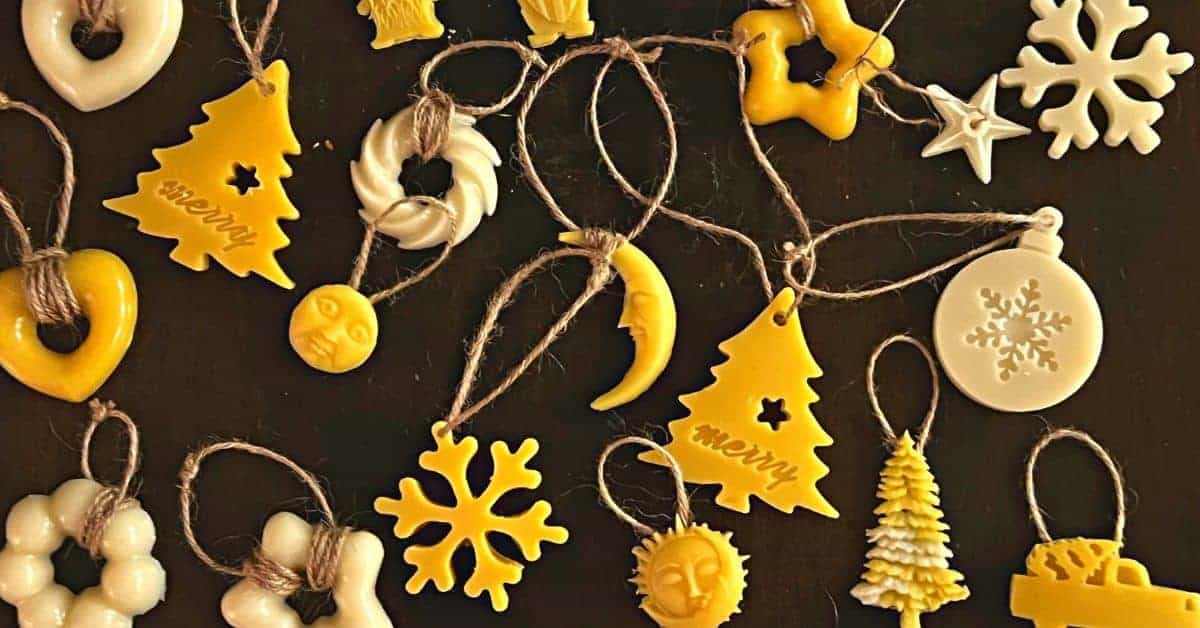
Basic Ornament Shapes
Creating beautiful beeswax ornaments starts with choosing the right shape. Basic shapes are easy to make and look charming. These forms set the foundation for your design. You can use simple molds or shape the wax by hand. Both ways give unique results and are fun to try.
Simple Molds
Simple molds help create clean, uniform shapes quickly. You can find molds in many forms like stars, hearts, or circles. Pour melted beeswax into the mold and let it cool. After hardening, pop the ornament out carefully. Molds save time and make ornaments look neat.
Hand-shaping Methods
Hand-shaping lets you create unique, personalized designs. Warm the beeswax until soft but not liquid. Shape the wax using your fingers or simple tools. Twist, pinch, or roll the wax to form your desired shape. This method gives each ornament a special touch and charm.
Adding Color And Texture
Adding color and texture to beeswax ornaments makes them unique and eye-catching. It brings life to the soft, natural wax. Simple techniques can transform plain beeswax into beautiful art pieces. Experimenting with colors and textures adds depth and charm to your ornaments.
Natural Dyes For Beeswax
Natural dyes give beeswax a warm, earthy tone. You can use ingredients like turmeric, beetroot, or spirulina. These dyes are safe and easy to work with. To color beeswax, melt it first and mix in the dye powder or juice. Stir well to spread the color evenly. Use small amounts to keep the wax soft and workable. Let the wax cool before shaping your ornament. Natural dyes create gentle, pleasing colors that blend well with beeswax’s golden hue.
Creating Patterns And Designs
Patterns add texture and interest to beeswax ornaments. Use simple tools like toothpicks, stamps, or lace to press designs into soft wax. You can also layer different colors of wax for a striped or marbled look. Carve shapes carefully after the wax cools but before it hardens completely. Small details make your ornament stand out. Try dots, swirls, or leaf prints for nature-inspired designs. Patterns give your creation a personal touch and make it more beautiful.
Assembling Ornaments
Assembling your beeswax ornaments is a key step to make them ready for display. This process brings your creation to life. It adds charm and allows easy hanging. Careful assembly ensures your ornaments last longer and look beautiful on your tree or wall.
Attaching Hooks And Strings
Start by choosing small hooks or eye pins. Gently push the hook into the top edge of the beeswax shape. Make sure it is secure but avoid cracking the wax. Use thin string, twine, or ribbon for hanging. Tie the string firmly to the hook. Adjust the string length to fit your display needs.
Layering Techniques
Layering creates depth and texture in your ornament. Cut different beeswax shapes in various sizes. Place smaller shapes on top of larger ones. Use a little heat to soften the wax edges slightly. Press layers together gently to fuse them. Avoid over-heating to keep the wax clear and smooth.
Finishing Touches
Finishing touches bring your beeswax ornaments to life. They enhance the natural shine and smooth out rough edges. These steps make your ornaments look polished and ready to display. Taking time here adds beauty and durability to your work.
Polishing And Smoothing
Use a soft cloth to gently polish the surface. This removes dust and light scratches. Rub in small circles to bring out a soft glow. Avoid harsh pressure to keep the wax intact. For rough edges, lightly sand with fine-grit sandpaper. Smooth edges feel better and look clean.
Preserving Your Ornaments
Keep your ornaments away from heat and direct sunlight. Beeswax can melt or discolor under strong light. Store them in a cool, dry place when not in use. You may spray a thin layer of natural beeswax spray for extra protection. This helps keep the surface fresh and shiny for a longer time.
Creative Ideas
Creative ideas make beeswax ornaments special and fun. They help you design unique pieces that stand out. You can use simple shapes or mix colors and scents. The possibilities are endless and inspiring.
Try new patterns or add natural elements. Each ornament can tell a story or fit a mood. Creativity turns basic beeswax into beautiful art.
Seasonal Themes
Seasons offer great ideas for beeswax ornaments. Use autumn leaves or snowflakes for winter. Bright flowers work well for spring. Summer designs can include suns or seashells.
Change colors to match each season. Warm tones for fall, cool blues for winter. These choices make your ornaments more meaningful.
Gift-worthy Designs
Beeswax ornaments make lovely gifts. Choose classic shapes like stars or hearts. Add ribbons or small tags for a personal touch.
Craft sets of matching ornaments to create a theme. These thoughtful gifts show care and creativity. Perfect for friends, family, or neighbors.
Troubleshooting Common Issues
Making beeswax ornaments can be fun but sometimes tricky. Small problems can affect your final piece. Knowing how to fix these issues helps you get better results. This section shares quick tips to solve common problems during crafting.
Avoiding Cracks
Cracks happen when wax cools too fast or unevenly. Keep the temperature steady while working. Warm your mold slightly before pouring the wax. Pour the wax slowly and in thin layers. Let each layer cool a bit before adding the next. Avoid moving the ornament until it fully hardens. Store finished pieces in a cool, dry place to prevent cracks later.
Fixing Imperfections
Small dents or rough spots can spoil the look. Use a warm, soft cloth to smooth the surface gently. You can also melt a little wax and apply it to the damaged area. Let the wax cool and then shape it softly with your fingers. For bigger flaws, try light sanding with fine-grit sandpaper. Work slowly to keep the ornament’s details intact.
Frequently Asked Questions
What Materials Are Needed For Beeswax Ornaments?
You need pure beeswax sheets, cookie cutters, a rolling pin, parchment paper, and string. These simple materials help create beautiful, natural ornaments easily.
How Do I Soften Beeswax For Shaping?
Gently warm beeswax sheets with your hands or a hairdryer. Softened wax is easier to mold without cracking or breaking.
Can I Add Scents To Beeswax Ornaments?
Yes, add a few drops of essential oils while softening wax. This gives your ornaments a pleasant, natural fragrance.
How Long Do Beeswax Ornaments Last?
Beeswax ornaments can last for years if stored properly. Keep them away from heat and direct sunlight to prevent melting.
Conclusion
Creating beeswax ornaments is fun and rewarding. You can decorate your home with natural beauty. The steps are simple and easy to follow. Use basic tools and safe materials. Enjoy the warm glow these ornaments bring. Crafting also helps you relax and focus.
Try different shapes and colors to personalize. Share your creations with friends and family. Keep practicing to improve your skills. Making beeswax ornaments adds charm to any space. Start your project today and enjoy the process!