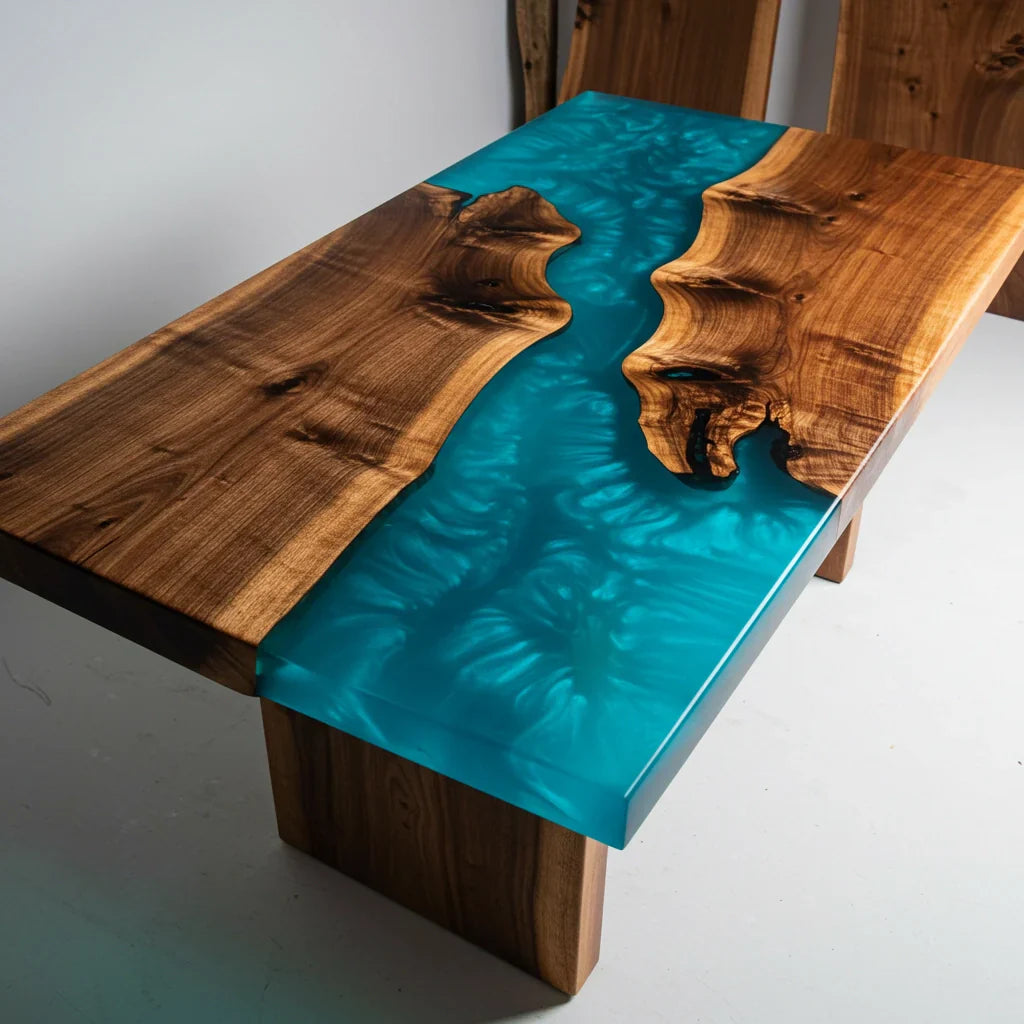
Making tables with resin is a fun and creative way to build furniture. Resin can make your table look shiny, smooth, and strong. You can use resin to cover wood or other materials and make a beautiful table. This guide will help you learn how to make tables with resin step by step.
What Is Resin?
Resin is a liquid that becomes hard when it dries. People use resin for art, crafts, and furniture. It looks like glass but is lighter and safer. Resin is clear or colored. It can protect wood and make the surface smooth and shiny.
Why Use Resin for Tables?
- Protects the surface: Resin stops water, heat, and scratches.
- Easy to clean: Just wipe with a cloth.
- Looks good: It adds shine and shows the wood grain.
- Strong and long-lasting: Resin makes the table last many years.
Materials You Will Need
Before you start, gather these materials:
| Material | Purpose |
|---|---|
| Wood board or table base | Main surface of the table |
| Epoxy resin kit | Clear or colored resin and hardener |
| Measuring cups | To measure resin and hardener |
| Mixing sticks | To mix resin and hardener |
| Sandpaper (various grits) | To smooth wood and resin |
| Painter’s tape or masking tape | To protect edges and stop leaks |
| Plastic drop cloth or newspaper | To protect your workspace |
| Gloves | To keep hands clean and safe |
| Heat gun or torch (optional) | To remove bubbles from resin |
| Mixing container | To mix resin and hardener |
Credit: spetools.com
Step 1: Prepare Your Workspace
Choose a clean and flat area to work. Cover the surface with a plastic drop cloth or newspaper. Resin can drip and damage surfaces. Wear gloves to protect your hands. Make sure the room is warm and well-ventilated. Resin dries best in warm places. Avoid dust and wind. Dust can stick to resin and make it rough.
Step 2: Prepare the Wood Surface
Choose a smooth wood piece for your table. Sand the wood with medium sandpaper (around 120 grit). This will remove bumps and rough spots. After that, use finer sandpaper (220 grit) to make it smooth. Wipe the wood with a damp cloth to remove dust. Let it dry completely before using resin.

Credit: lancasterliveedge.com
Step 3: Build a Mold or Frame (If Needed)
If your wood is not sealed on the edges, use tape to build a mold. This stops resin from leaking out. Put painter’s tape around the edges of the wood. Press the tape firmly so no resin can drip. Make sure the tape is smooth and covers all edges.
Step 4: Mix the Resin
Resin usually comes in two parts: resin and hardener. You must mix them in the right ratio. Check the instructions on your resin kit. Usually, it is 1 part hardener to 1 part resin. Measure both parts carefully using measuring cups. Pour the resin and hardener into a mixing container.
Mix slowly with a stick for about 3-5 minutes. Mix well but do not stir too fast. Stirring fast can add bubbles in the resin. Make sure to scrape the sides and bottom of the container while mixing.
Step 5: Pour the Resin on the Wood
Pour the mixed resin slowly onto the wood surface. Start from one corner and move evenly across. Use a stick or brush to spread the resin if needed. Pour enough resin to cover the wood fully. Resin will flow and level by itself.
If you see bubbles, use a heat gun or torch lightly. Move the heat source over the surface to pop bubbles. Be careful not to burn the resin or wood. If you do not have a heat gun, wait for bubbles to rise and pop naturally.
Step 6: Let the Resin Dry
Leave the table in a dust-free place to dry. Resin usually takes 24 to 48 hours to harden. Check the instructions for exact drying time. Avoid touching the surface while drying. If dust falls on the resin, it can stick and ruin the finish.
Step 7: Add More Layers (Optional)
If you want a thicker layer, you can add more resin. Wait until the first layer is sticky but not fully dry. Sand the surface lightly with fine sandpaper (400 grit). Clean dust before pouring another layer. Repeat pouring and drying as needed.
Step 8: Finish the Table
Once resin is fully dry, remove the tape mold carefully. Sand the edges of the table to smooth any rough spots. Use fine sandpaper for a clean finish. If needed, add a clear coat of resin or varnish for extra shine.
Attach table legs or bases if you have not done so. Your resin table is now ready to use!
Tips for Making Great Resin Tables
- Work in a warm room to help resin dry well.
- Mix resin slowly to avoid bubbles.
- Use tape to stop resin from leaking.
- Protect your workspace from dust and dirt.
- Wear gloves to keep your hands clean.
- Be patient and wait for resin to dry fully.
- Try adding color or objects inside resin for decoration.
Common Problems and How to Fix Them
| Problem | Cause | Solution |
|---|---|---|
| Sticky surface after drying | Wrong resin mix ratio or cold temperature | Mix resin carefully; dry in warm place |
| Bubbles in resin | Mixing too fast or dirty wood surface | Mix slowly; use heat gun to pop bubbles |
| Resin leaks under tape | Tape not sealed well or loose edges | Press tape firmly; use strong painter’s tape |
| Dust stuck on resin | Working in dusty area | Work in clean room; cover resin while drying |
Creative Ideas for Resin Tables
Resin tables can be very unique. You can add many things inside resin:
- Small stones or shells
- Colored pigments or dyes
- Wood chips or leaves
- Glitter or metallic flakes
- Pictures or paper designs
These objects will be clear and shiny under resin. It gives your table a special look. Try different colors and items for fun designs.
Frequently Asked Questions
What Type Of Resin Is Best For Making Tables?
Epoxy resin is best due to its strong, clear, and durable finish.
How Long Does Resin Take To Cure On Tables?
Resin usually cures in 24 to 72 hours, depending on thickness.
Can I Use Wood And Resin Together For Tables?
Yes, wood and resin make a great combination for unique tables.
What Tools Are Needed To Make Resin Tables?
Basic tools include mixing cups, stir sticks, gloves, and a heat gun.
Conclusion
Making tables with resin is a simple and fun project. It needs patience and care but the result is worth it. Resin makes your table strong, shiny, and beautiful. Follow the steps carefully and use the right materials. You can make a table that looks like art. Remember to work safely and in a clean space. Enjoy your new resin table!