Are you ready to create a stunning resin clock that not only tells time but also becomes a unique piece of art in your home? This resin crafts tutorial clock guide is designed just for you—whether you’re a beginner or looking to sharpen your skills.
Imagine crafting a beautiful, custom clock that matches your style perfectly, using simple materials and easy-to-follow steps. Stick with me, and you’ll discover insider tips to avoid common mistakes, how to keep your resin bubble-free, and creative ideas to make your clock truly one-of-a-kind.
Let’s dive in and turn your crafting dreams into a timeless reality!
Materials And Tools
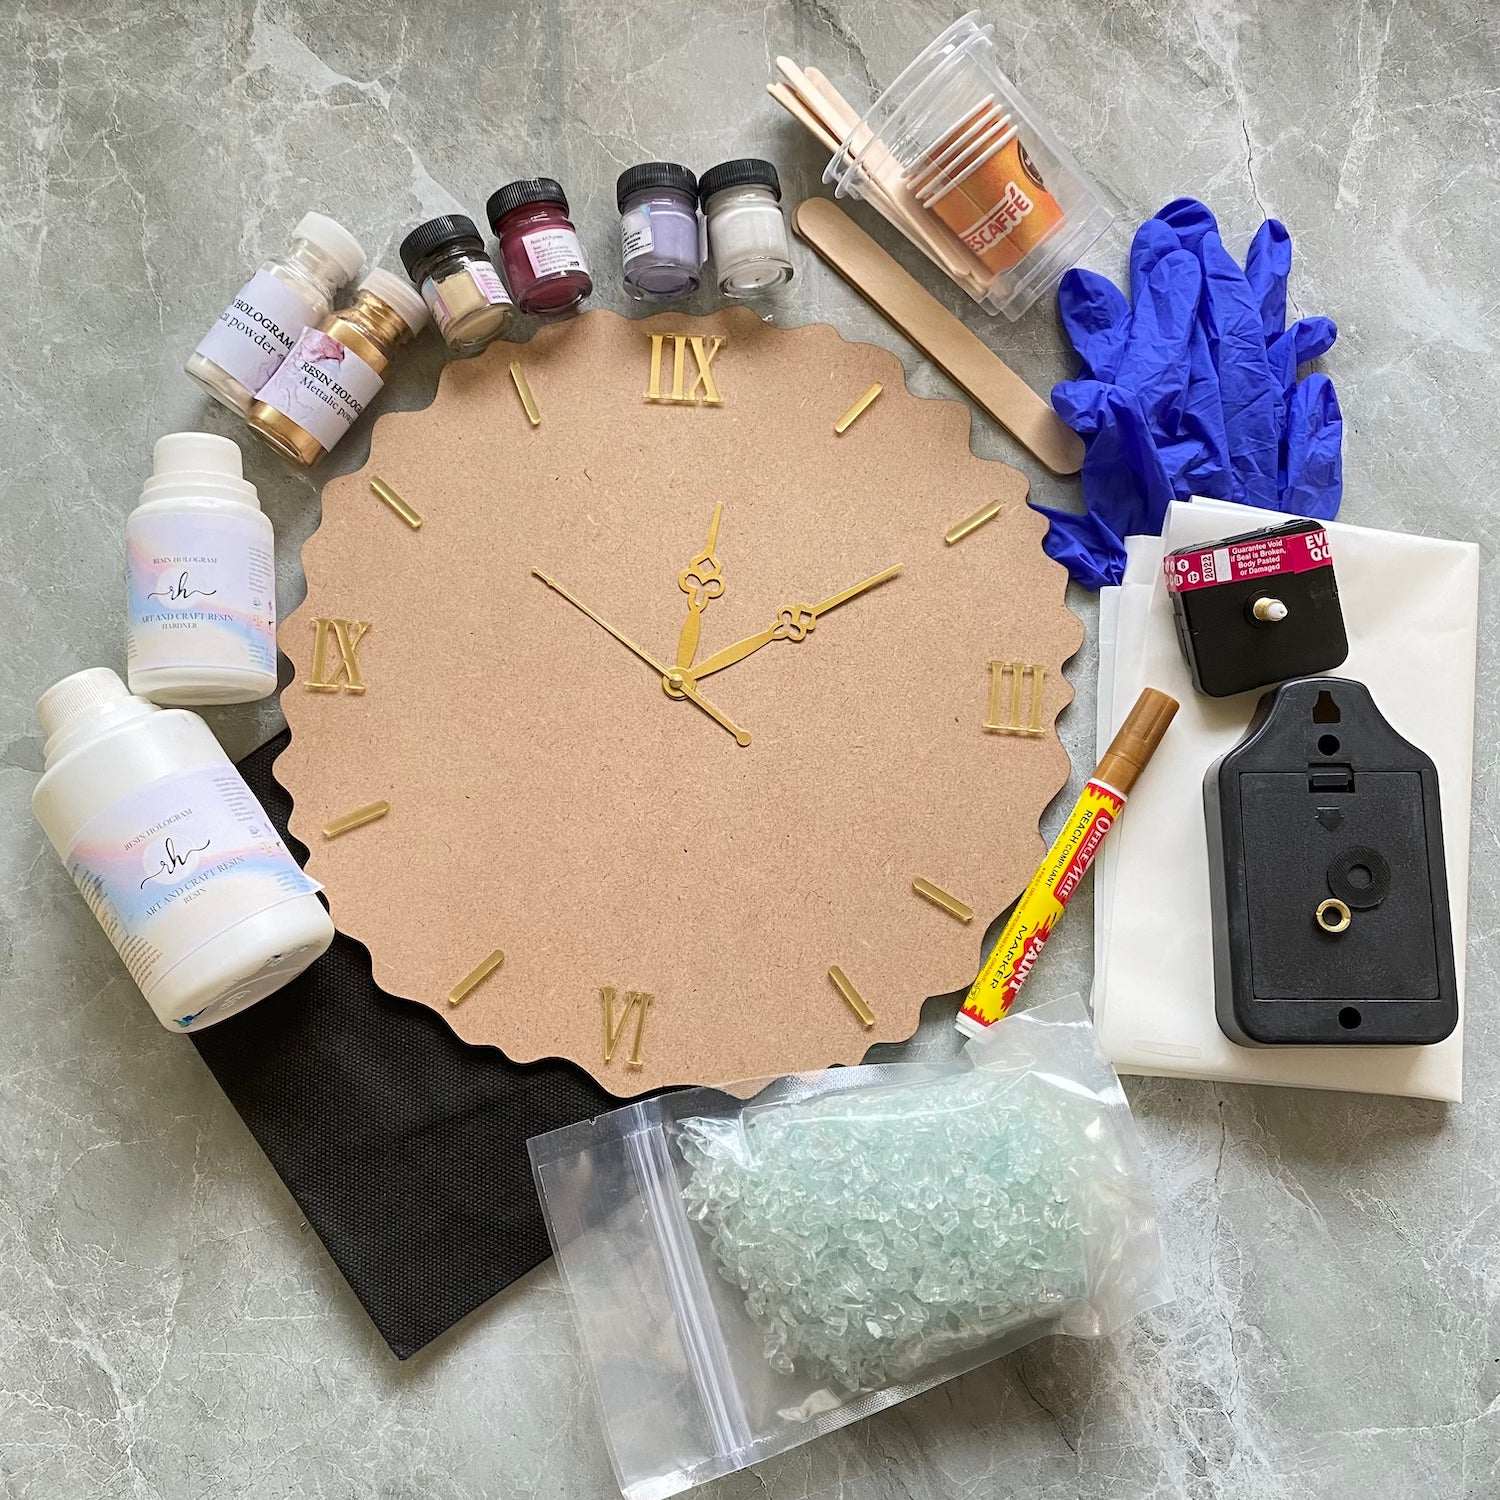
Creating a resin clock requires specific materials and tools. Choosing the right items ensures your project turns out well. Gathering everything before starting saves time and frustration. This section covers essential supplies, resin types, and clock parts.
Essential Supplies
Start with a clean workspace and protective gear like gloves and masks. You need resin and hardener, mixing cups, stir sticks, and measuring tools. Silicone molds or a flat surface for casting are helpful. Sandpaper, a heat gun or torch, and polishing cloths improve the finish. Paints or pigments add color and style to your clock face.
Choosing The Right Resin
Use epoxy resin for its clarity and durability. It cures without yellowing and is easy to work with. Check the resin’s cure time to fit your schedule. Some resins are UV resistant, which helps prevent fading. Avoid polyester resin since it has a strong odor and shrinks when curing. Pick a resin designed for crafts and art projects for the best results.
Clock Mechanism Parts
Buy a clock mechanism kit with hands and a motor. Ensure the shaft length fits the thickness of your resin piece. Quartz movements are reliable and quiet. Choose clock hands that match your design but are not too heavy. Secure the mechanism with nuts and washers included in the kit. Test the parts before embedding them in resin.
Design Ideas
Designing a resin clock allows endless creativity. The choices you make affect the look and feel. Pick colors, textures, and elements that suit your style. Experimentation leads to unique, eye-catching clocks. These ideas help spark your imagination.
Color And Texture Choices
Choose colors that match your room or mood. Bright colors add energy, soft tones bring calm. Mix glossy and matte finishes for contrast. Add glitter or metallic flakes for sparkle. Layer colors to create depth and interest.
Incorporating Natural Elements
Natural items add charm and uniqueness. Small leaves, flowers, or wood pieces work well. Pressed flowers create a delicate, timeless look. Tiny shells or stones bring a coastal feel. Seal elements carefully to keep them safe in resin.
Marble And Geode Effects
These effects mimic natural stone beauty. Use swirling colors to imitate marble veins. Create geode effects with crystals and metallic powders. Pour resin in layers to build texture. These designs give your clock a luxurious touch.
Preparing The Base
Preparing the base is the first step in making a resin clock. A strong base supports the resin and clock parts. It helps the resin stick well and keeps the clock stable. Taking time to prepare the base leads to better results and a smooth finish.
Follow simple steps to get the base ready. Focus on choosing the right material and sealing its surface. This ensures your resin clock looks great and lasts long.
Selecting Wood Or Mold
Choose a wood piece or mold that fits your clock size. Wood gives a natural look and can be cut into any shape. Molds are good for creating round or creative shapes. Pick smooth surfaces to avoid resin bubbles or uneven layers.
Consider thickness. A thicker base holds the clock parts better. Avoid wood with cracks or rough spots. Clean the surface well before starting.
Sealing And Priming Surfaces
Seal wood or molds to stop resin from soaking in. Use clear sealers or primer made for crafts. Apply a thin, even coat and let it dry fully. This creates a smooth layer for resin to stick.
Priming prevents bubbles and cracks. It also improves the shine of your resin finish. For molds, check if they need a special release agent. This helps remove the clock easily after resin cures.
Mixing And Pouring Resin
Mixing and pouring resin is a crucial step in creating a stunning resin crafts tutorial clock. It shapes the final look and ensures a smooth finish. Proper techniques help avoid common problems like bubbles and uneven layers. Understanding the right process makes your resin clock project easier and more fun.
Measuring And Mixing Techniques
Start by measuring resin and hardener in exact amounts. Use a digital scale for accuracy. Pour both parts into a clean container. Stir slowly with a wooden stick or plastic spatula. Mix for at least three minutes. Scrape the sides and bottom often. Avoid stirring too fast to reduce air bubbles. Proper mixing ensures the resin cures well and stays clear.
Avoiding Bubbles
Bubbles ruin the smooth surface of your resin clock. Mix resin gently to prevent air from entering. After mixing, let resin sit for a few minutes. This allows bubbles to rise and pop naturally. Use a heat gun or torch lightly over the surface. Move the heat source quickly to avoid burning. These simple steps give your resin a glass-like finish without bubbles.
Layering And Adding Effects
Pour resin in thin layers to control depth and design. Wait for each layer to cure slightly before adding the next. This method helps build texture and color effects. Add pigments, glitter, or small objects between layers for unique looks. Use a toothpick to create swirls or patterns. Layering creates a rich, dynamic clock face with depth and interest.
Embedding Clock Components
Embedding clock components into your resin craft is a key step. It turns your art piece into a working clock. Precision and care are essential to ensure it functions well. Follow the steps carefully for a neat, professional look.
Marking And Drilling Center Hole
First, find the exact center of your resin clock face. Use a ruler or measuring tape to measure both sides. Mark the center point with a pencil gently. Use a small drill bit designed for your clock material. Drill a hole straight through at the marked center. Keep the hole size just right for the clock mechanism shaft. Avoid making the hole too big or too small. Smooth the edges of the hole with fine sandpaper to prevent damage.
Attaching Mechanism And Hands
Insert the clock mechanism shaft through the drilled hole carefully. Secure the mechanism on the back with its mounting nut. Follow the instructions that come with your clock kit. Attach the clock hands starting with the hour hand. Next, place the minute hand on the shaft. If your clock has a second hand, attach it last. Press each hand gently but firmly in place. Check that the hands move freely without touching the resin surface. Test the clock by inserting batteries and setting the time.

Finishing Touches
Finishing touches bring your resin clock to life. They perfect the look and protect your hard work. Simple steps can make your clock shine and last longer. Focus on smoothing, sealing, and personalizing the surface.
Sanding And Polishing
Start by sanding the resin surface gently. Use fine-grit sandpaper for a smooth finish. Sand in circular motions to avoid scratches. After sanding, polish the clock with a soft cloth. Polishing enhances the shine and clarity of resin. This step removes any dull spots or rough edges.
Adding Protective Coatings
Apply a clear protective coating to protect the resin from damage. Use a resin-safe varnish or sealant. This layer guards against scratches and UV damage. Apply thin coats and let each dry fully. Protective coatings keep the clock looking new for years.
Customizing With Paint Or Decals
Customize your clock with paint or decals for a unique style. Use acrylic paint to add designs or numbers. Stick decals carefully on the smooth resin surface. Seal painted or decal areas with a clear coat. Custom touches make your clock truly one-of-a-kind.
Common Mistakes To Avoid
Creating a resin clock is fun but tricky. Avoiding common mistakes helps you make a perfect clock. These errors can ruin your project or waste your materials. Focus on key areas to improve your work and enjoy the process.
Misalignment Issues
Placing the clock mechanism off-center causes big problems. The hands may hit each other or get stuck. Measure carefully before drilling the hole. Use a ruler or template to find the exact center. Take your time and double-check alignment.
Using Incompatible Parts
Not all clock parts fit together well with resin art. Heavy clock hands can slow or stop the mechanism. Choose lightweight hands designed for resin clocks. Check the size and type of the movement. Match parts that work well to avoid failure.
Handling Resin Safely
Resin can harm your skin and lungs if not handled right. Always wear gloves and work in a well-ventilated area. Avoid breathing in resin fumes. Follow product instructions on safety precautions. Clean spills quickly to prevent damage or injury.
Maintenance Tips
Keeping your resin crafts tutorial clock in great shape takes little effort. Simple maintenance helps preserve its shine and function. Follow these tips to keep your resin clock looking fresh and working well over time.
Cleaning Resin Surfaces
Use a soft, dry cloth to wipe dust off the resin surface. For sticky spots, dampen the cloth slightly with water. Avoid harsh chemicals or abrasive cleaners. They can scratch or dull the resin. Gently clean in circular motions for best results.
Replacing Clock Batteries
Remove the clock from the wall before changing batteries. Open the battery compartment carefully. Use the correct battery type as recommended. Insert the new battery with the right polarity. Test the clock hands to ensure it runs smoothly again.
Preventing Resin Yellowing
Place your resin clock away from direct sunlight. UV rays cause resin to turn yellow over time. Use UV-resistant resin for added protection. Keep the clock in a cool, dry place. Regular cleaning also helps maintain its clear finish.
Creative Variations
Exploring creative variations in resin crafts for clocks opens many design paths. Resin offers flexibility to craft unique, personalized timepieces. Different styles and materials change the look and feel of each clock. Experimenting with these ideas can inspire your next project.
Let’s dive into some popular creative variations to enhance your resin clock.
Wall Clocks Vs. Table Clocks
Wall clocks provide a large canvas for resin art. They often showcase bold designs and vibrant colors. Table clocks, smaller in size, allow for intricate details and textures. Both types fit different spaces and purposes. Choose the style that suits your room and usage.
Combining Resin With Wood
Wood adds warmth and natural beauty to resin clocks. Mixing resin with wood creates a striking contrast between smooth and grainy textures. You can pour resin over wood or embed wood pieces inside resin. This blend offers a rustic yet modern look. It also strengthens the clock’s structure.
Using Metallic Powders And Pigments
Metallic powders bring shimmer and depth to resin crafts. Gold, silver, and copper pigments add a luxurious touch. Swirling pigments inside resin creates a marbled, dynamic effect. These colors catch light and draw attention. Use them sparingly for highlights or fully cover the surface for boldness.

Frequently Asked Questions
How To Make Resin Clocks For Beginners?
Start by mixing epoxy resin and hardener slowly to avoid bubbles. Pour into a clock mold, add colors or decorations. Let cure fully. Attach clock mechanism and hands carefully at the center. Ensure all parts fit well for accurate timekeeping.
What Should You Not Put In Resin?
Avoid putting oily, wet, or porous items, food, or heat-sensitive materials in resin. Plastics like polyethylene, polypropylene, silicone, and Teflon also resist bonding with resin.
What Are Common Mistakes In Diy Clock Making?
Common DIY clock making mistakes include misaligning the center hole, using heavy clock hands, poor resin mixing, and ignoring curing times. Avoid incompatible parts and rushing steps to ensure proper function and durability.
How Do You Avoid Bubbles In Resin Clocks?
Mix resin slowly to reduce air bubbles. Warm resin slightly before mixing. Use a toothpick or heat gun to remove surface bubbles. Pour resin in thin layers. Avoid vigorous stirring to prevent whipping air into the resin.
Conclusion
Creating a resin clock blends creativity with function. Each step lets you add personal touches easily. Careful mixing prevents bubbles and keeps the finish smooth. Choosing the right clock parts ensures your clock works well. This craft suits beginners and offers room to grow skills.
Enjoy making a unique clock that fits your style. Try this project to bring art into everyday life. Resin crafts like this add charm to any space. Keep practicing to improve and create even better pieces.