Are you ready to create stunning resin jewellery that reflects your unique style? Making resin jewellery is not only fun but also a fantastic way to unleash your creativity.
Imagine wearing a one-of-a-kind pendant or bracelet made by your own hands—each piece telling a story only you can share. Whether you want to capture the beauty of pressed flowers, add sparkling glitter, or craft elegant earrings, this guide will walk you through simple resin jewellery ideas and step-by-step instructions.
Stick with me, and you’ll discover easy techniques to make beautiful accessories that turn heads and spark conversations. Let’s dive into the world of resin jewellery and start crafting your next favorite piece!
Materials Needed
Types of resin include epoxy, polyester, and UV resin. Epoxy is popular for its clear finish and strength. UV resin cures fast with a UV light. Polyester resin has a strong smell and needs good ventilation.
Molds and tools are essential. Use silicone molds for easy removal. Metal or plastic molds work too but may need extra care. Tools include mixing cups, stir sticks, gloves, and a heat gun or torch to remove bubbles.
Decorative elements add beauty to your jewelry. Use dried flowers, glitter, beads, or small charms. You can also add color with resin dyes or alcohol inks. Arrange decorations carefully before pouring resin.

Preparing Resin
Measure the resin and hardener carefully using a clear container. Use the exact ratio given on the package for the best results. Stir slowly and steadily for at least 3 minutes to mix the two parts well.
To avoid bubbles, stir gently and avoid shaking the mixture. Let the resin sit for a few minutes so bubbles rise and pop. You can also use a heat gun or torch lightly to remove surface bubbles.
Always work in a well-ventilated space to avoid breathing in fumes. Wear gloves to protect your skin from resin contact. Keep resin away from children and pets while working.
Basic Techniques
Pouring resin is the first step in many jewelry projects. Mix the resin carefully and pour it slowly into a mold. This helps avoid air bubbles and creates a smooth finish.
Layering colors creates a beautiful depth in resin jewelry. Pour one color, let it set a little, then add another layer. This technique gives a unique look with different shades.
Embedding objects makes resin jewelry special and personal. Small items like dried flowers, beads, or glitter can be placed in the resin before it hardens. These objects stay clear and visible inside the resin.
Design Ideas
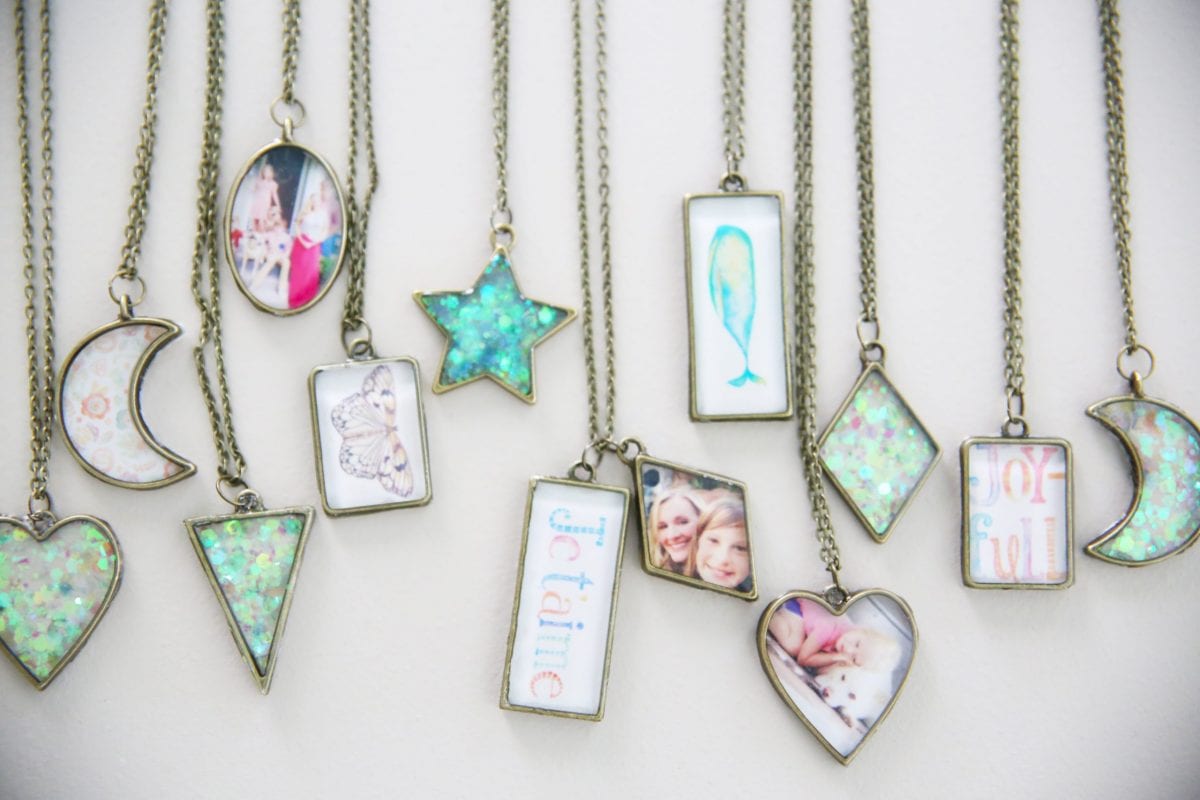
Floral motifs bring natural beauty into resin jewellery. Tiny dried flowers or petals can be embedded in clear resin for a delicate look. Layering different blooms adds depth and charm. These pieces often look like miniature gardens on your fingers or neck.
Glitter and pigments create sparkle and color. Mixing fine glitter or colorful pigments into resin makes each piece unique. You can use shimmering powders or bright dyes to change the resin’s look. This style is perfect for those who love shiny and bold jewellery.
| Design | Key Features | Effect |
|---|---|---|
| Floral Motifs | Dried flowers, petals | Natural, delicate, layered |
| Glitter and Pigments | Fine glitter, colorful dyes | Shiny, bold, unique |
| Geometric Shapes | Squares, triangles, circles | Modern, clean, stylish |
Geometric shapes keep designs simple and modern. Use molds for squares, triangles, or circles. These shapes look neat and can mix well with other styles. Clear or colored resin works well for this clean, stylish look.
Creating Jewelry Pieces
Necklaces and pendants can be made by pouring resin into molds. Add small flowers, glitter, or tiny charms for a personal touch. Use a metal chain or cord to finish the piece. Let the resin cure fully before wearing.
Earrings and studs are easy to craft with resin. Use small silicone molds or create your own shapes. Attach earring posts or hooks once dry. These pieces are lightweight and colorful, perfect for daily wear.
Bracelets and rings need sturdy molds. Pour resin mixed with pigments or small decorations into the molds. After curing, smooth edges with fine sandpaper. Attach clasps for bracelets and fit rings with a comfortable size.
Finishing Touches
Sanding smooths rough edges on resin pieces. Use fine-grit sandpaper for best results. Sand gently to avoid scratches. Polishing brings a shiny finish. A soft cloth and polishing compound work well to make the surface gleam.
Adding findings means attaching hooks, chains, or clasps to your resin jewelry. Use small pliers to open and close jump rings. Choose findings that match the style and color of your piece for a neat look.
Sealing and protecting keeps your jewelry safe from scratches and dirt. A clear sealant spray or resin topcoat adds a strong, protective layer. Let it dry completely before wearing or handling to keep your creation looking new.
Troubleshooting
Common resin issues include bubbles, uneven curing, and cloudiness. Bubbles form when resin mixes too fast or traps air. Let resin sit for a few minutes before pouring to reduce bubbles. Uneven curing happens if resin layers are too thick or mixing is poor. Use thin layers and mix thoroughly for best results.
Fixing imperfections involves sanding and polishing. After resin cures, gently sand rough spots with fine sandpaper. Then polish the surface with a soft cloth for a smooth finish. For small holes or cracks, apply a thin resin layer and cure again.
Prevent sticking problems by using silicone molds or wax paper. Resin does not stick to silicone, Teflon, or certain plastics. Avoid oily or dusty surfaces as resin will not bond well. Clean molds before each use to keep resin from sticking.
Tips For Beginners
Choosing the right resin is key for good jewelry. Epoxy resin is clear and easy to use. UV resin cures fast with sunlight or lamp. Avoid resins that yellow quickly or have strong smells.
Workspace setup needs good lighting and fresh air. Use a flat, clean surface covered with plastic or paper. Keep gloves, mixing sticks, and molds nearby. Protect your clothes and skin from resin spills.
Time management helps finish projects well. Mix small batches to avoid waste. Let resin cure fully before removing pieces. Plan breaks during long curing times to stay patient and careful.
Frequently Asked Questions
How To Make Your Own Resin Jewellery?
To make resin jewellery, mix resin and hardener, add color or inclusions, pour into molds, and cure under UV light or air.
What Will Resin Not Stick To?
Resin will not stick to silicone, Teflon (PTFE), polyethylene, polypropylene, oily or waxy surfaces, contaminated areas, and wet surfaces. These materials and conditions prevent proper bonding by creating barriers or having low surface energy.
What Materials Are Needed For Resin Jewelry?
Materials needed for resin jewelry include epoxy or UV resin, molds, mixing cups, stir sticks, gloves, pigments, and embellishments like dried flowers or glitter.
What Sells Well In Resin?
Resin sells well in jewelry, coasters, keychains, art pieces, and decorative items. Floral and glitter resin crafts also attract buyers.
Conclusion
Creating resin jewellery offers endless fun and creative possibilities. Start simple, then try new shapes and colors. Use safe materials and clean your workspace well. Enjoy crafting unique pieces that show your style. Practice often to improve your skills and designs.
Resin jewellery making is a rewarding hobby anyone can enjoy. Keep experimenting and have fun with each project!